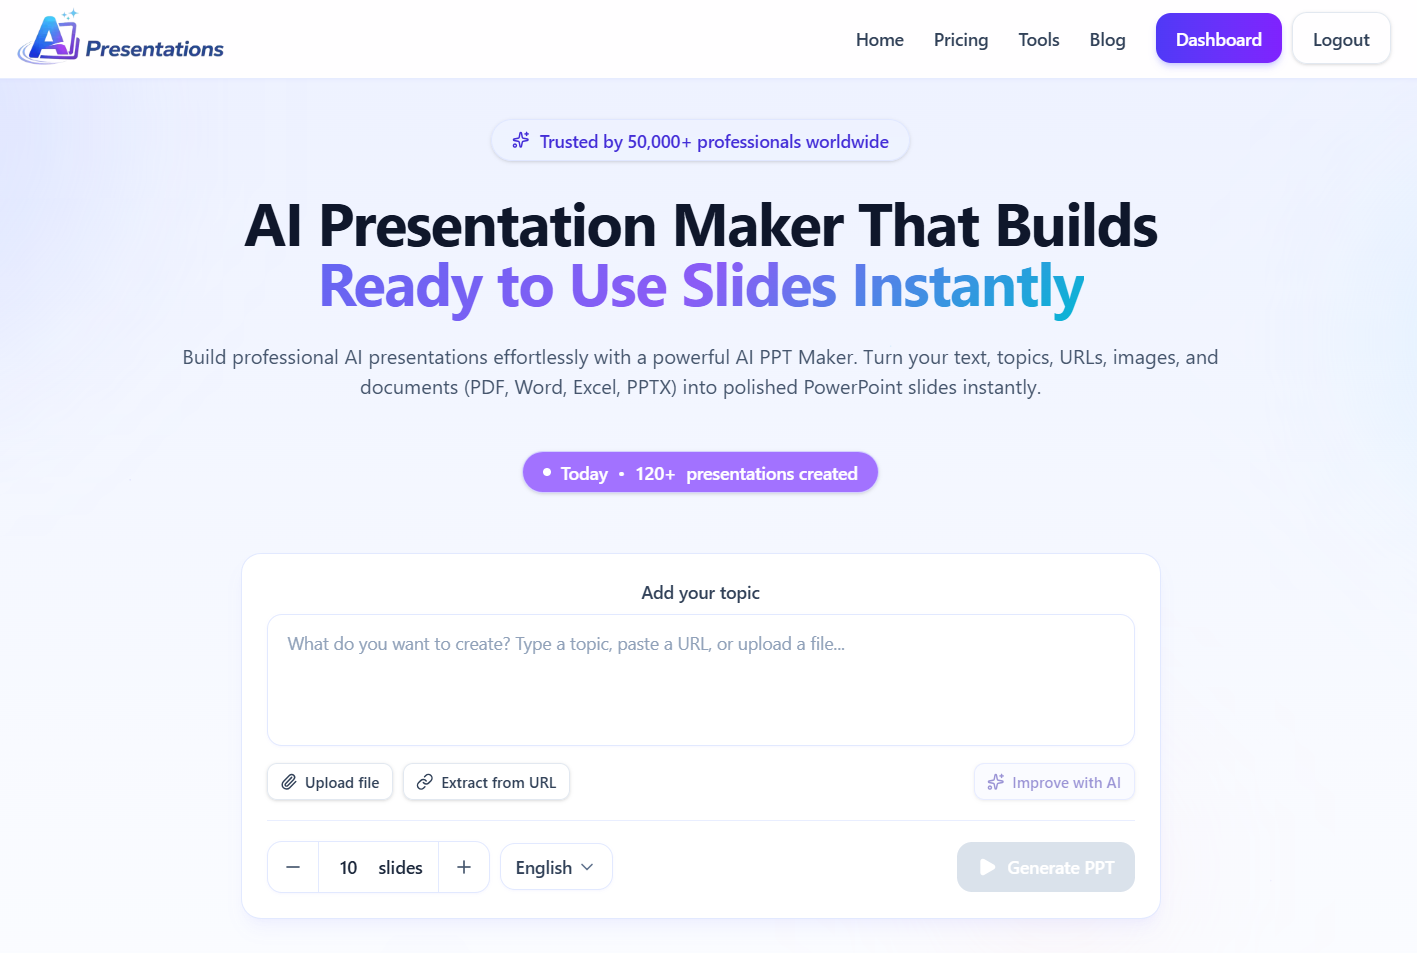
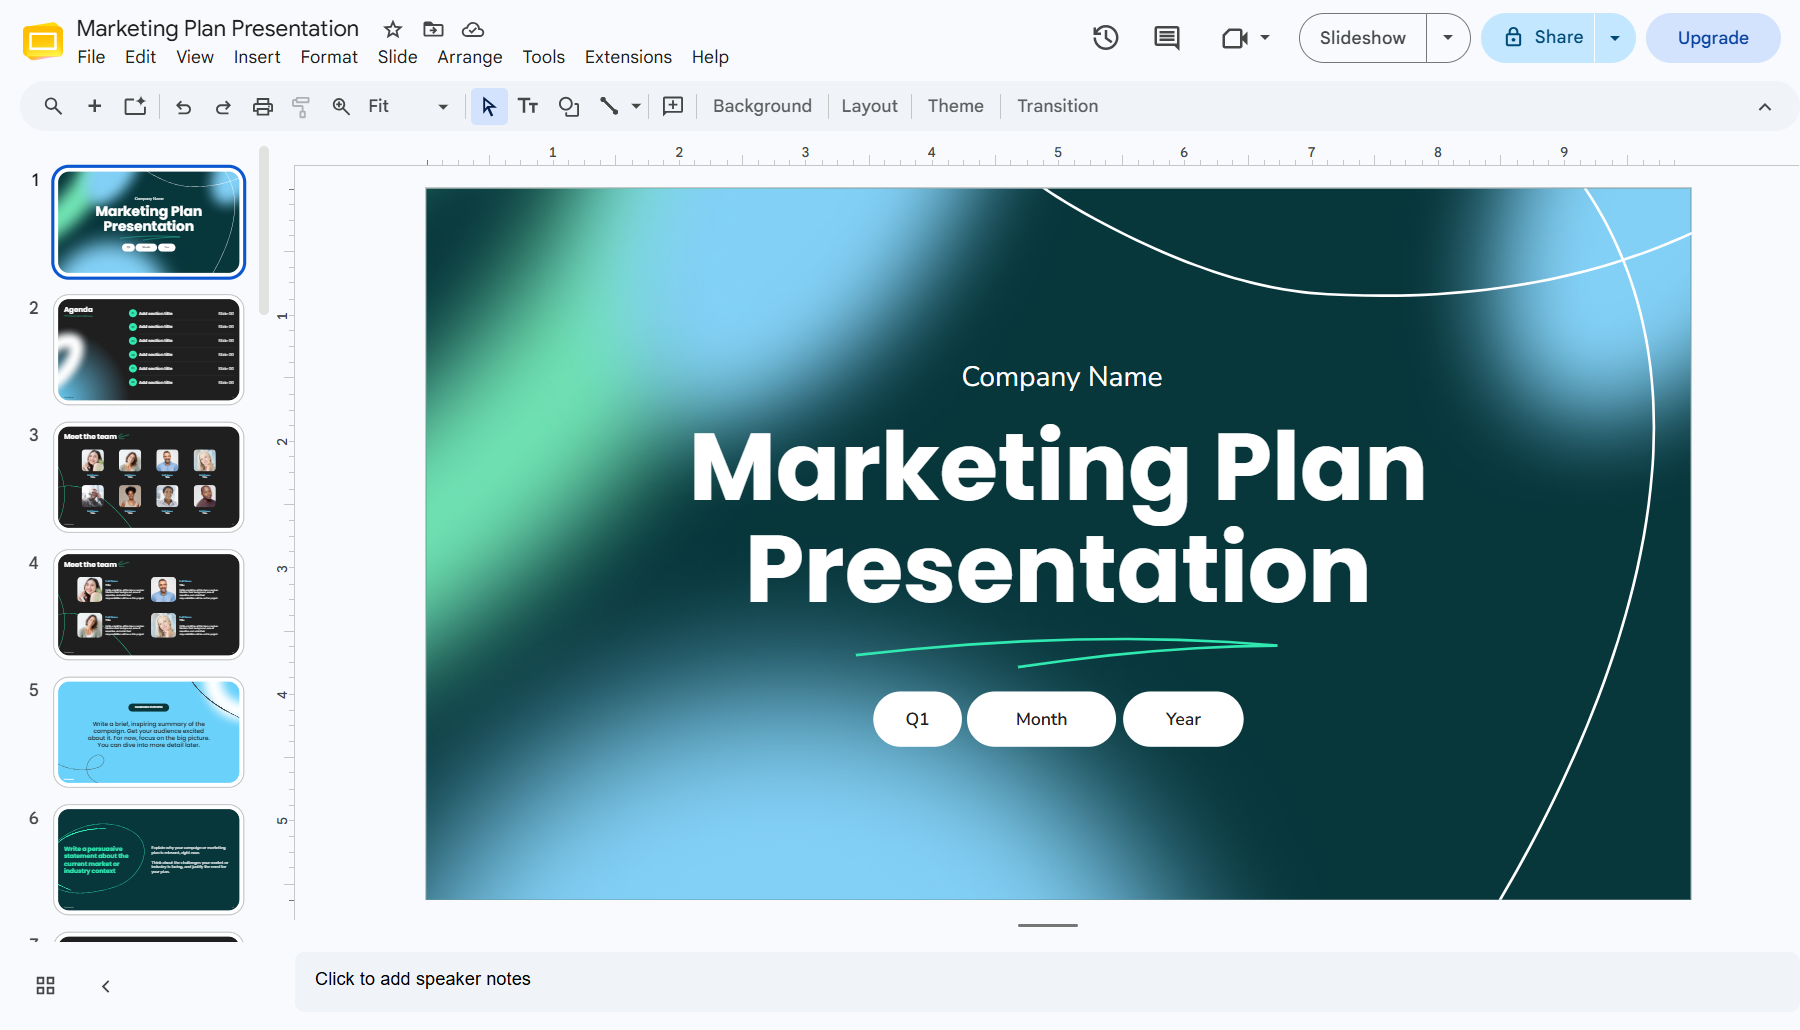
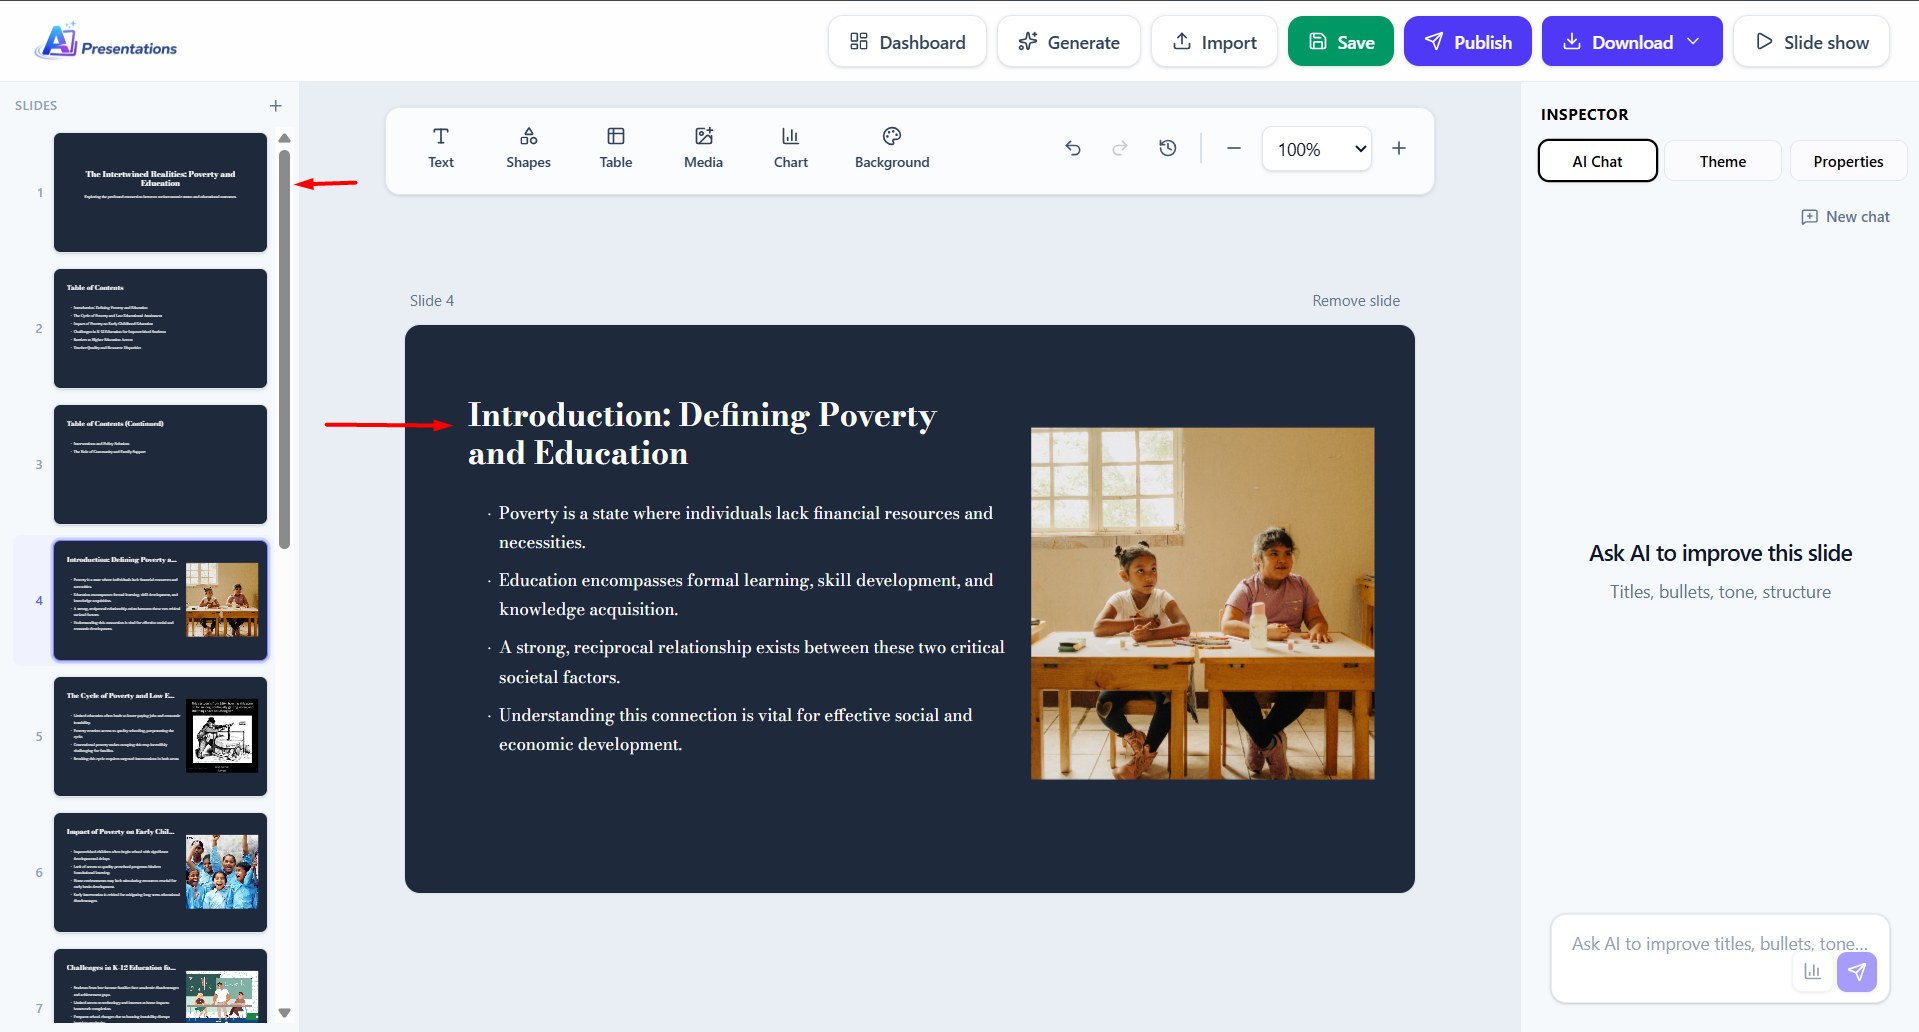
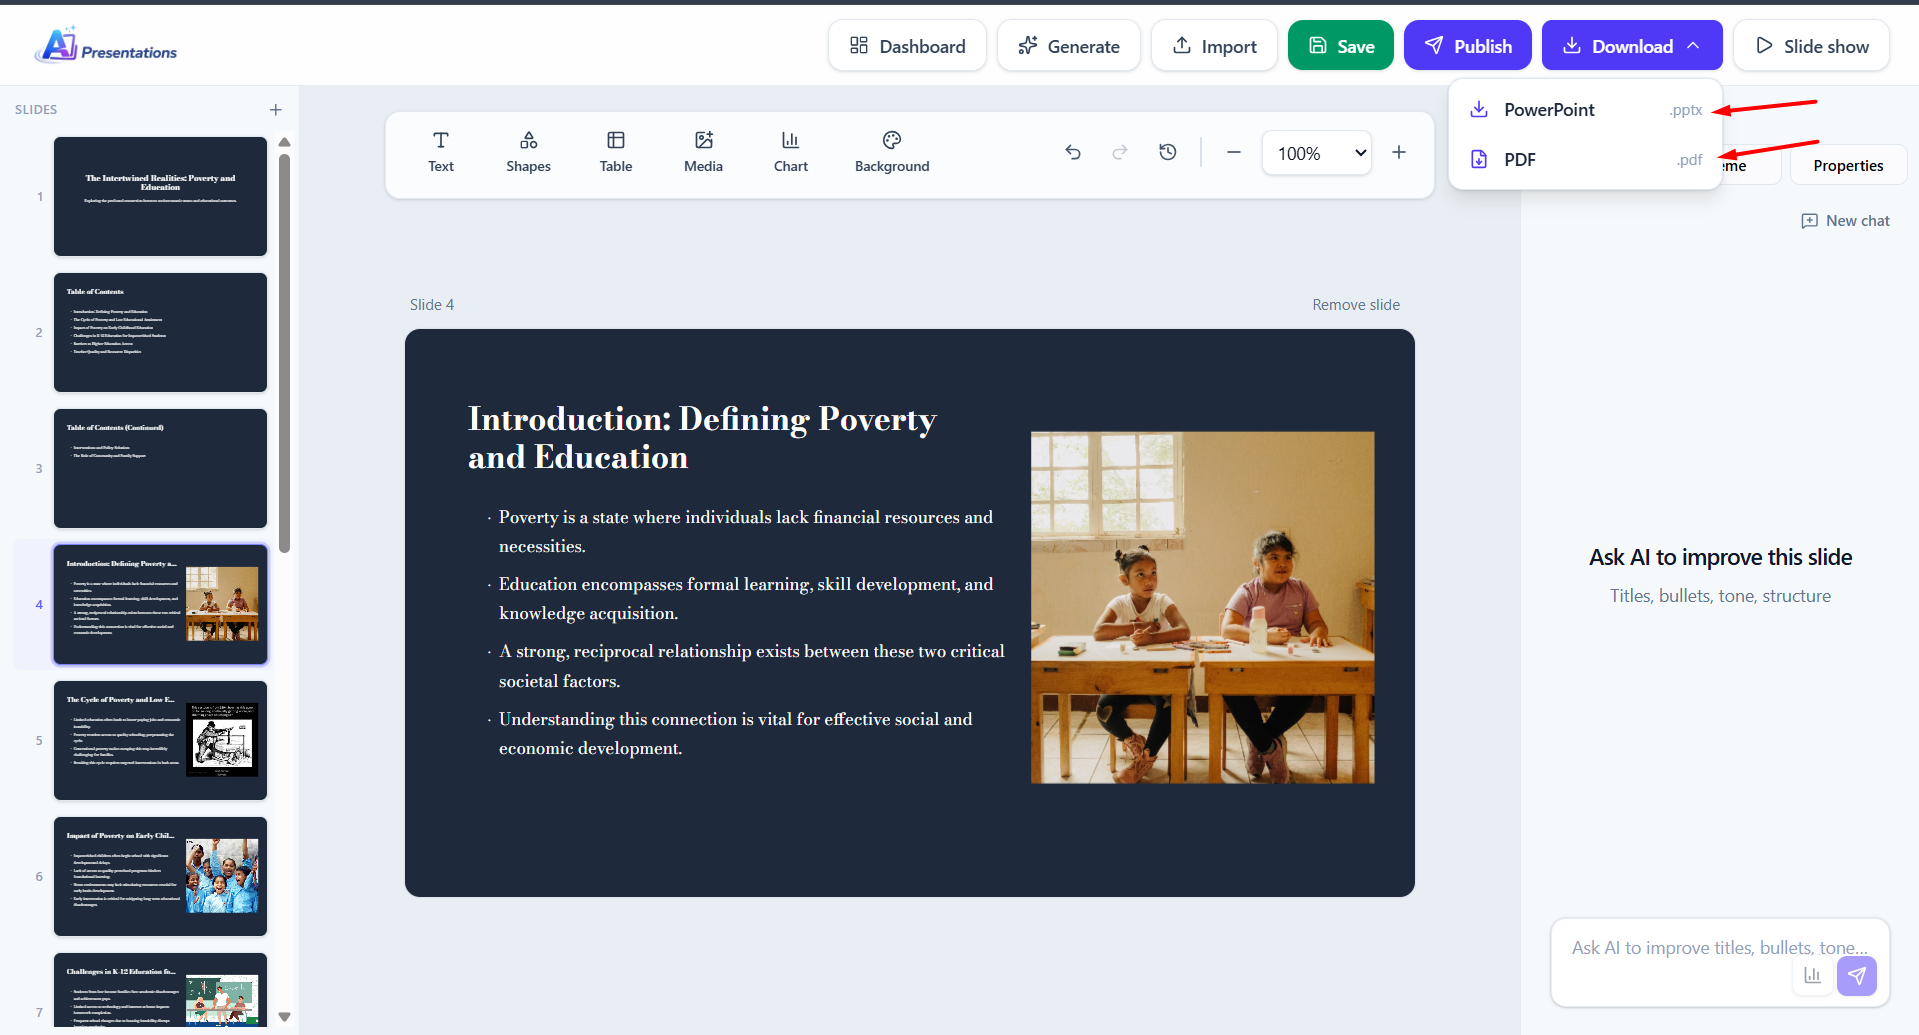
Webinars have become one of the most effective ways to educate customers, train employees, demonstrate products, and share expertise. However, once the live session ends, valuable insights often remain locked inside a lengthy webinar recording or transcript. Manually turning that information into a presentation can take hours of reviewing, summarising, designing, and formatting.
That’s where AI changes the workflow.
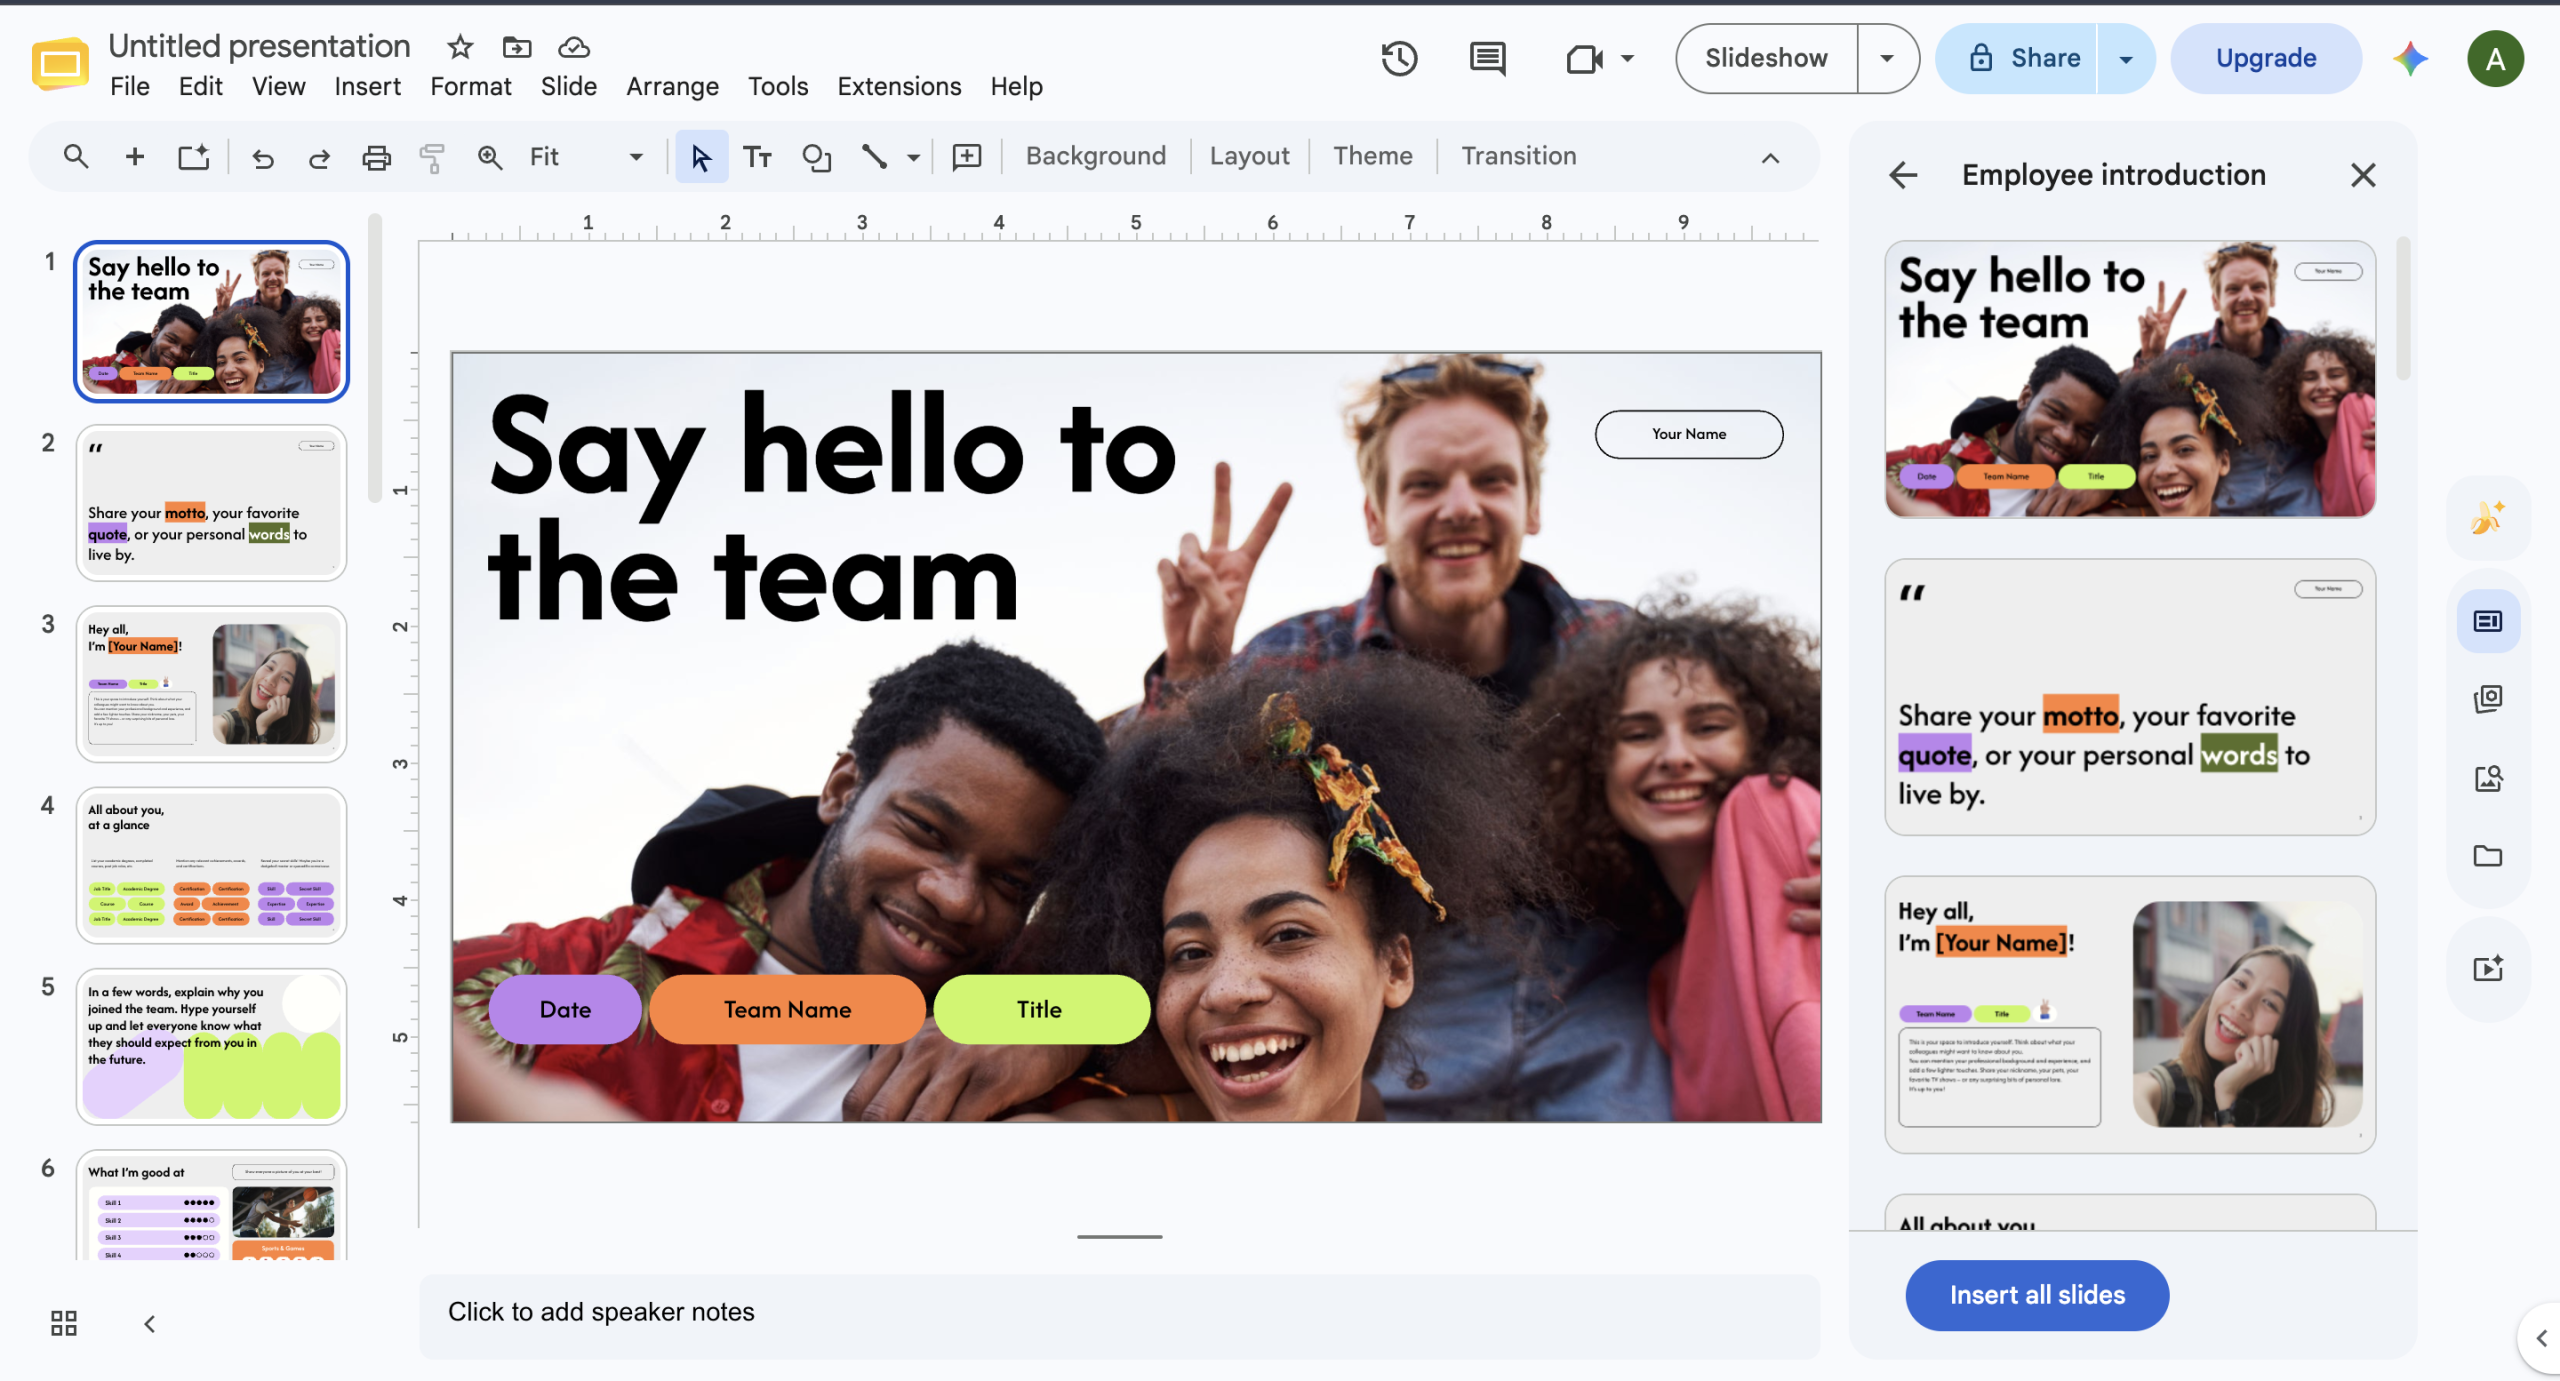
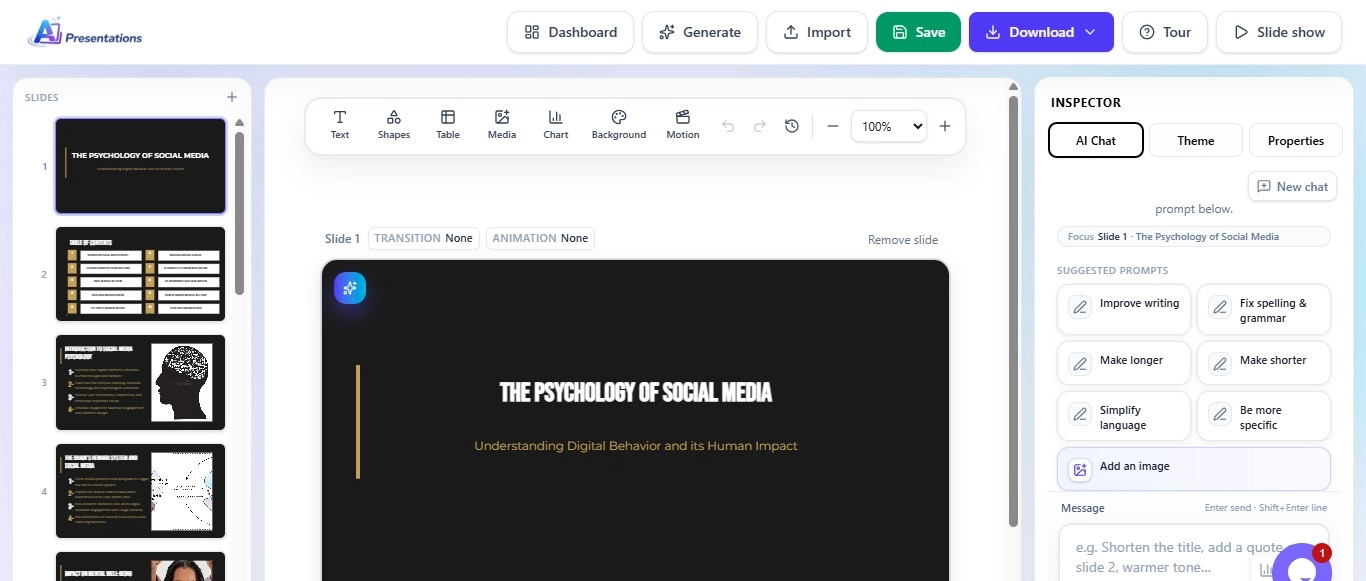
Instead of rebuilding your presentation from scratch, modern AI tools can analyse webinar content, identify the most important topics, organise ideas into logical sections, and generate presentation-ready slides in minutes. Whether you’re repurposing a customer webinar, an internal training session, or a product demonstration, AI helps transform your content into polished PowerPoint or Google Slides presentations with minimal effort.
In this guide, you’ll learn what a webinar-to-PPT workflow looks like, why businesses are adopting it, and how AI can dramatically reduce the time required to create professional presentation decks.
What Does Webinar to PPT Mean?
A Webinar to PPT workflow refers to converting the content of a webinar into a structured presentation that can be edited, shared, or presented later.
Rather than replaying an entire webinar whenever someone needs the information, organisations often convert key ideas into presentation slides that are easier to consume and distribute.
These presentations can be used for:
Employee onboarding
Customer education
Sales enablement
Product demonstrations
Partner training
Executive summaries
Knowledge sharing
Workshop materials
Instead of reviewing a one-hour webinar multiple times, you can present the same information in a concise 15-slide deck.
Why Businesses Convert Webinars into Presentations?
A webinar usually contains far more information than an audience can retain in a single session. Converting it into presentation slides makes that knowledge reusable across different teams and use cases.
Improve Knowledge Sharing: Presentation decks are easier to circulate across departments than long webinar recordings. Employees can quickly review key concepts without watching an hour-long session.
Support Sales Teams: Product webinars often contain valuable demonstrations and customer insights. Turning them into presentation slides helps sales representatives communicate the same value consistently.
Simplify Training: Training webinars can become reusable learning materials for future employees, reducing the need to repeat live sessions.
Create Executive Summaries: Leadership teams rarely have time to watch full webinars. A concise slide deck highlighting objectives, key findings, and recommendations communicates information much faster.
Repurpose Existing Content: One webinar can become multiple assets, including presentation decks, documentation, blog posts, and training materials, helping organisations maximise the value of their content.
Types of Webinars You Can Convert into PowerPoint
Not every webinar has the same objective, but almost any webinar can be transformed into a professional presentation with AI. Whether you’re educating customers or training employees, converting webinar content into slides makes it easier to share information, improve engagement, and reuse valuable content.
You can convert various types of webinars into PowerPoint presentations, including:
Product demonstration webinars
Customer onboarding webinars
Employee training sessions
Sales enablement webinars
Marketing webinars
Educational webinars
Partner enablement webinars
Industry thought leadership webinars
Product launch webinars
Internal company webinars
Each webinar type benefits from a slightly different presentation structure, but the goal remains the same present key insights in a clear, visual, and easy-to-understand format.
How AI Converts a Webinar into a Presentation?
Artificial Intelligence combines Natural Language Processing (NLP) and Large Language Models (LLMs) to analyse webinar content, identify the most important discussion points, summarise key ideas, and organise them into a logical presentation structure.
Instead of copying every sentence from a webinar, AI focuses on the information that belongs on presentation slides, helping you create concise, visually engaging presentations in a fraction of the time it would take manually.
A typical AI-powered workflow includes the following steps.
Step 1: Upload Your Webinar Content
Upload your webinar content to an AI presentation tool. The AI analyses the webinar, understands the discussion, and prepares the key information for presentation generation.
The AI analyses the content while preserving the overall structure and context.
Step 2: Identify Key Topics
Large Language Models (LLMs) and Natural Language Processing (NLP) identify:
Main discussion topics
Important insights
Action items
Key takeaways
Supporting examples
Instead of copying every sentence, AI focuses on the information that belongs on presentation slides.
Step 3: Organise Information into Sections
Good presentations follow a logical flow.
AI automatically groups related information into sections such as:
Introduction
Agenda
Challenges
Solutions
Results
Recommendations
Next Steps
This makes the final presentation easier to understand.
Step 4: Generate Presentation Slides
Each section becomes one or more slides with:
Clear headings
Concise bullet points
Logical content hierarchy
Professional layouts
Consistent formatting
Rather than overwhelming the audience with text, AI produces presentation-friendly content.
Step 5: Refine and Export
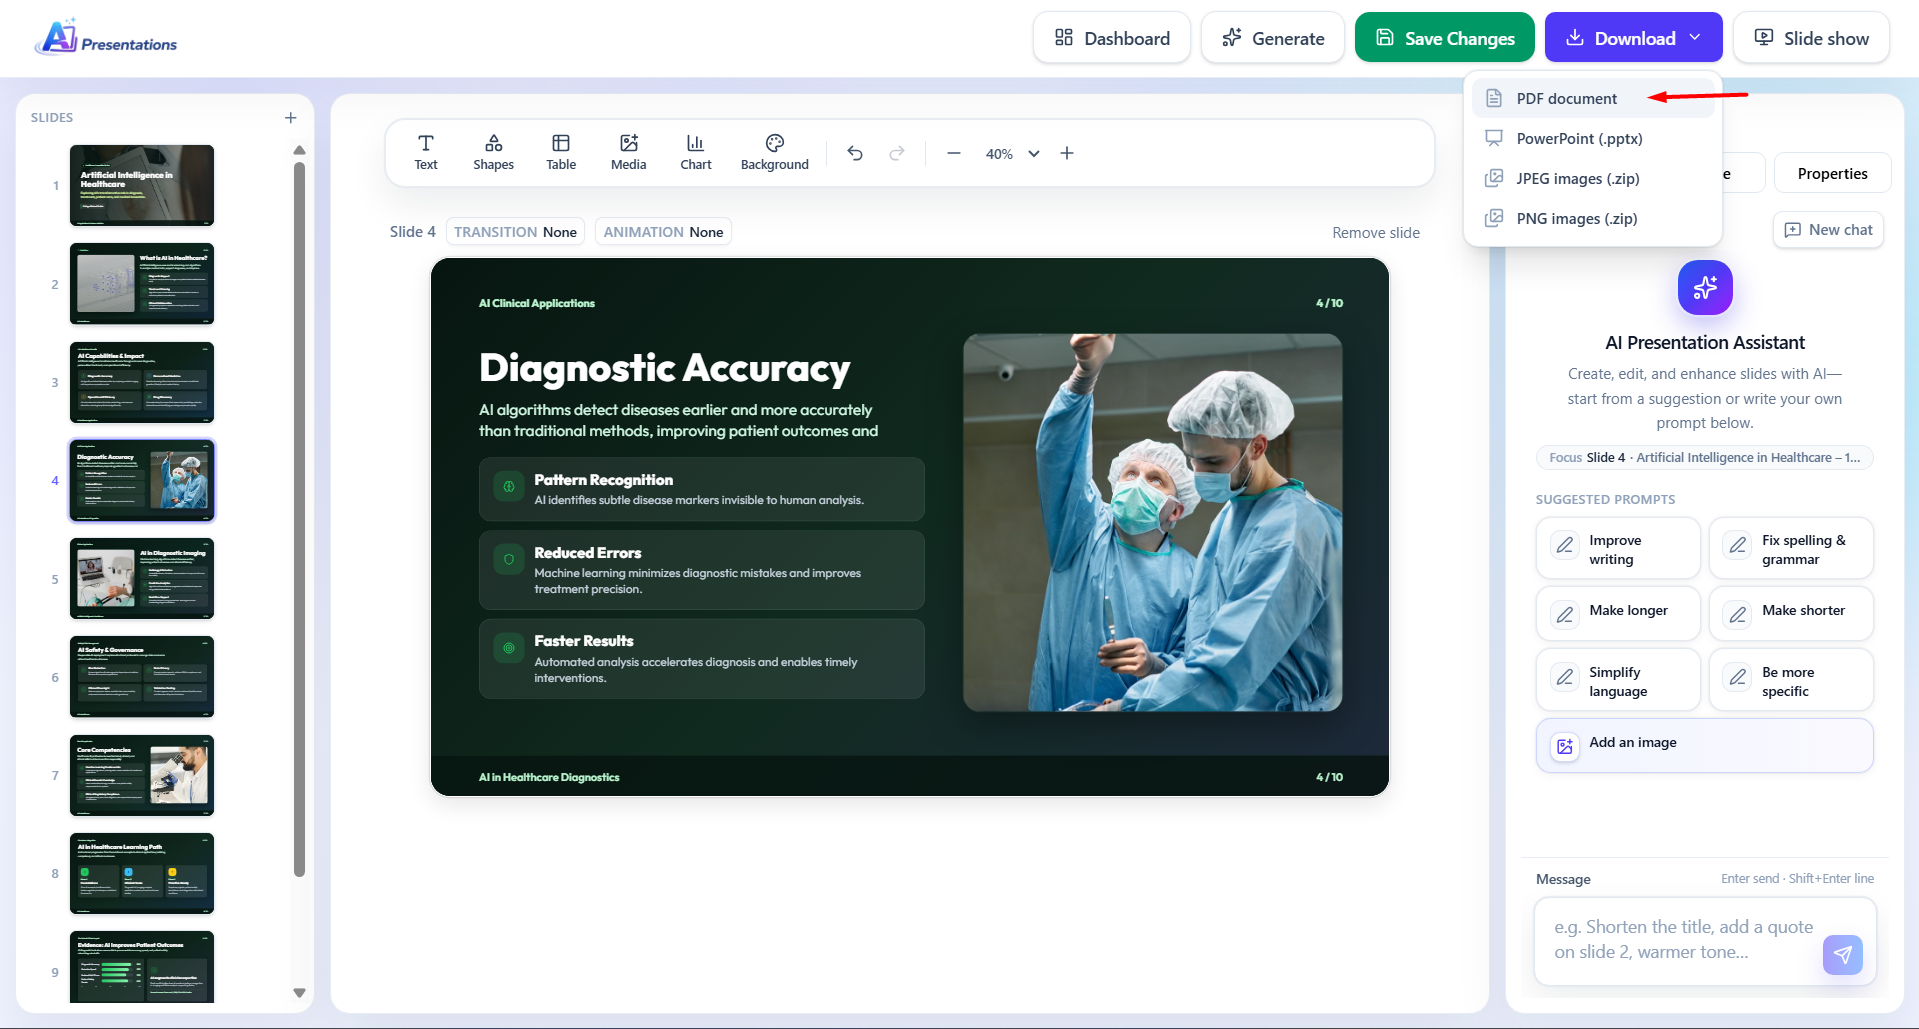
After reviewing the generated slides, you can make edits, adjust the design, and export the presentation to PowerPoint or Google Slides for collaboration and delivery.
Example: Converting a Webinar into a Presentation
Imagine you’ve just finished hosting a 45-minute product webinar introducing a new software feature. Instead of replaying the webinar and manually creating slides, AI analyses the discussion, identifies the agenda, product highlights, customer benefits, and next steps, then organises everything into a professional presentation. After a quick review, you can customise the design and export it as a PowerPoint or Google Slides presentation in just a few minutes.
While creating slides manually gives you complete control, it also requires significant time and effort. AI automates much of the repetitive work, allowing you to focus on refining your message rather than building every slide from scratch. Here’s how the two approaches compare:
Feature
AI Webinar-to-PPT
Manual Presentation Creation
Time Required
Minutes
Several hours
Summarises Key Insights
✅ Automatically
❌ Manual note-taking
Creates Slide Structure
✅ Yes
❌ Build from scratch
Generates Professional Layouts
✅ Automatically
❌ Manual design
Maintains Consistent Formatting
✅ Yes
Depends on the creator
Editable After Generation
✅ Fully editable
✅ Yes
Export to PowerPoint & Google Slides
✅ One-click export
Manual formatting required
Best For
Fast, scalable presentation creation
One-off presentations
Ready to turn your webinar into a professional presentation?
With AI Presentations, you can generate editable PowerPoint or Google Slides presentations from your webinar content in minutes. Instead of spending hours organising information and designing slides, let AI create a structured presentation that you can customise and share immediately.
Common Mistakes to Avoid
Copying the Webinar Word for Word: Presentation slides should summarise ideas rather than reproduce an entire webinar transcript.
Adding Too Much Text: Crowded slides reduce audience attention. Keep information concise and presentation-friendly.
Ignoring Structure: Randomly arranged slides make presentations difficult to follow. Maintain a logical progression throughout the deck.
Inconsistent Formatting: Different fonts, colours, and layouts can make presentations appear unprofessional. Use a consistent design throughout.
Skipping the Final Review: AI accelerates slide creation, but reviewing the presentation ensures accuracy and clarity before sharing it.
Why Choose AI Presentations to Convert a Webinar into PPT?
Creating a PowerPoint from a webinar manually takes time. AI Presentations makes it easy by turning your webinar content into a well-structured, editable presentation in minutes.
Whether you’re creating training materials, sales presentations, or customer education decks, AI Presentations helps you save time while delivering polished, professional presentations.
Turn your next webinar into an engaging PowerPoint in minutes with AI Presentations App.
Frequently Asked Questions
Q1. Can AI convert webinar content into PowerPoint?
Yes. AI can analyse webinar content, identify important topics, organise information into slides, and generate presentation-ready PowerPoint decks that can be edited further.
Q2. Can I create Google Slides from webinar content?
Yes. Many AI presentation tools allow you to generate presentations that can be exported to Google Slides for collaboration and sharing.
Q3. Is AI-generated presentation content editable?
Absolutely. You can modify slide text, layouts, images, colours, and themes after generation.
Q4. How long does it take to convert webinar content into slides?
Depending on the length and complexity of the webinar, AI can usually generate a presentation within minutes, significantly faster than manual creation.
Q5. Can AI summarise webinar content before creating slides?
Yes. Modern AI uses Natural Language Processing (NLP) to identify key themes, remove repetitive information, and organise ideas into a structured presentation.
Q6. What’s the difference between a webinar recording and a webinar presentation?
A webinar recording captures the complete session, while a webinar presentation highlights the essential points in a concise, visual format that is easier to present, review, and share.
Q7. Can I customise AI-generated webinar presentations?
Yes. You can edit slide content, rearrange sections, update themes, apply your own branding, and export the presentation as PowerPoint or Google Slides before sharing it with your audience.
Final Thoughts
Webinars contain valuable knowledge, but long sessions are rarely the most efficient way to share information. Converting webinar content into a well-structured presentation helps teams communicate ideas faster, improve knowledge retention, and reuse existing content across multiple business functions.
By combining AI with modern presentation workflows, you can transform webinar insights into polished PowerPoint or Google Slides presentations in a fraction of the time it would take manually. Whether you’re supporting employee training, customer education, sales enablement, or executive reporting, AI-powered presentation generation allows you to focus less on formatting and more on delivering impactful ideas.
Instead of letting valuable webinar insights remain inside a recording, repurpose them into engaging PowerPoint or Google Slides presentations that are easier to share, present, and reuse across your organisation. With AI Presentations, you can create professional webinar presentations in minutes while saving hours of manual work.
Whether I’m creating a business presentation, a classroom lesson, or a project proposal, adding videos is one of the easiest ways to make my slides more engaging. A well-placed video can explain complex ideas, capture attention, and make presentations far more memorable than text alone.
Fortunately, Google Slides makes it simple to embed videos directly into your presentation. You can insert videos from YouTube, use videos stored in Google Drive, and customize playback settings so they play exactly when you want.
In this guide, I’ll walk you through every method available to add videos to Google Slides. I’ll also share practical tips, common mistakes to avoid, and troubleshooting solutions if your videos don’t play correctly.
Why Add Videos to Google Slides?
Adding videos isn’t just about making slides look better it helps communicate information more effectively.
Here are some of the biggest benefits I’ve experienced when using videos in presentations.
Improve Audience Engagement
Videos naturally capture attention better than long paragraphs or static images. Instead of explaining every concept with text, you can let a short video demonstrate it in seconds.
This is especially useful during:
Business presentations
Product demonstrations
Marketing pitches
Educational lessons
Team training sessions
Explain Complex Topics Faster
Some ideas are easier to show than describe.
For example, if you’re explaining software, a screen recording is often much more effective than multiple screenshots. Similarly, product demonstrations, tutorials, or animated explainers can help your audience understand concepts much faster.
Create More Professional Presentations
Modern presentations rely on multimedia rather than text-heavy slides. Adding relevant videos helps create a polished presentation that feels more interactive and engaging.
Increase Information Retention
Research consistently shows that combining visuals, audio, and text helps people remember information better than text alone. Strategic use of videos can improve how well your audience understands and recalls your presentation.
Tip: Use short, relevant videos instead of lengthy clips. In most presentations, videos between 30 seconds and 2 minutes work best because they support your message without distracting from it.
Ways to Add Videos to Google Slides
Google Slides offers multiple ways to insert videos, and the best method depends on where your video is stored.
Method
Best For
Internet Required
YouTube Video
Public videos, tutorials, demos
Yes
Google Drive Video
Personal or company videos
Yes (for most presentations)
Uploaded MP4 (via Google Drive)
Recorded presentations, custom videos
Yes (through Drive access)
If you’re working with a video stored on your computer, you’ll first need to upload it to Google Drive before inserting it into your presentation.
How to Add a YouTube Video to Google Slides?
Adding a YouTube video is the quickest and most popular method because Google Slides integrates directly with YouTube.
I usually use this option when I want to include tutorials, promotional videos, interviews, webinars, or product demonstrations.
Method 1: Search for a YouTube Video
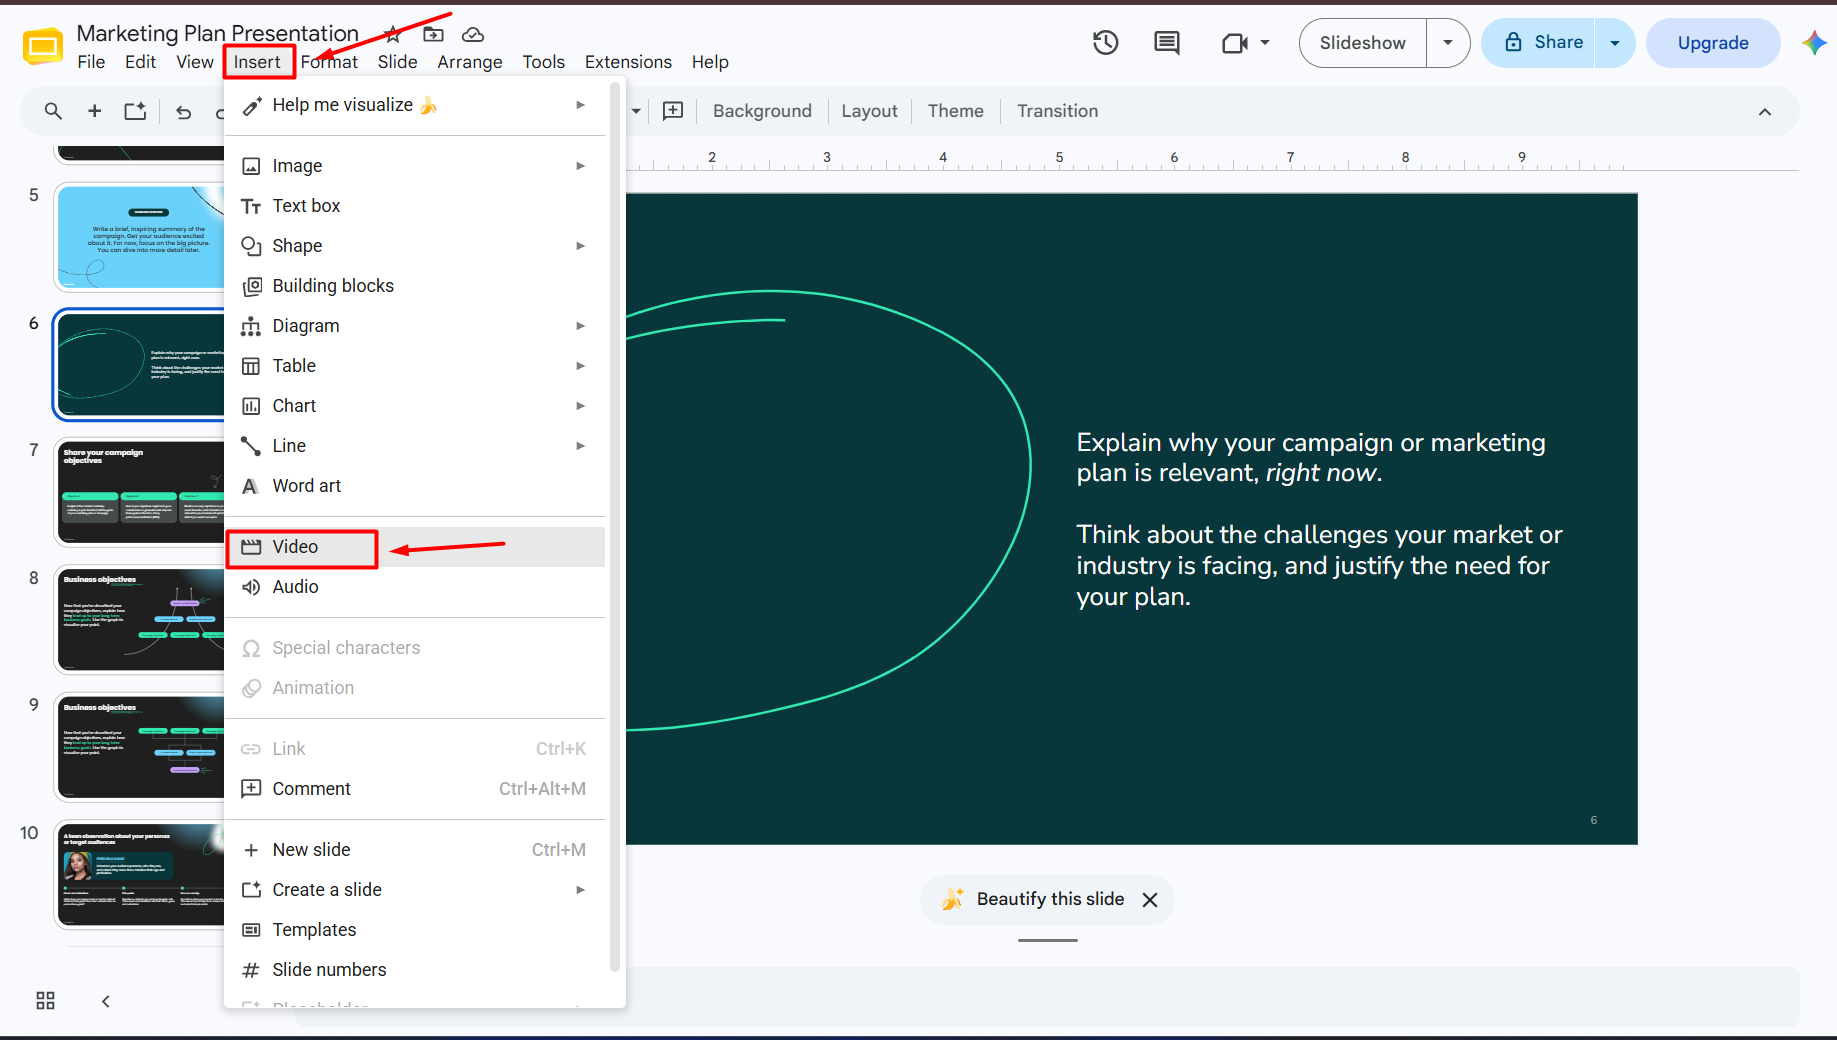
Step 1. Open your presentation in Google Slides.
Step 2. Select the slide where you want the video to appear.
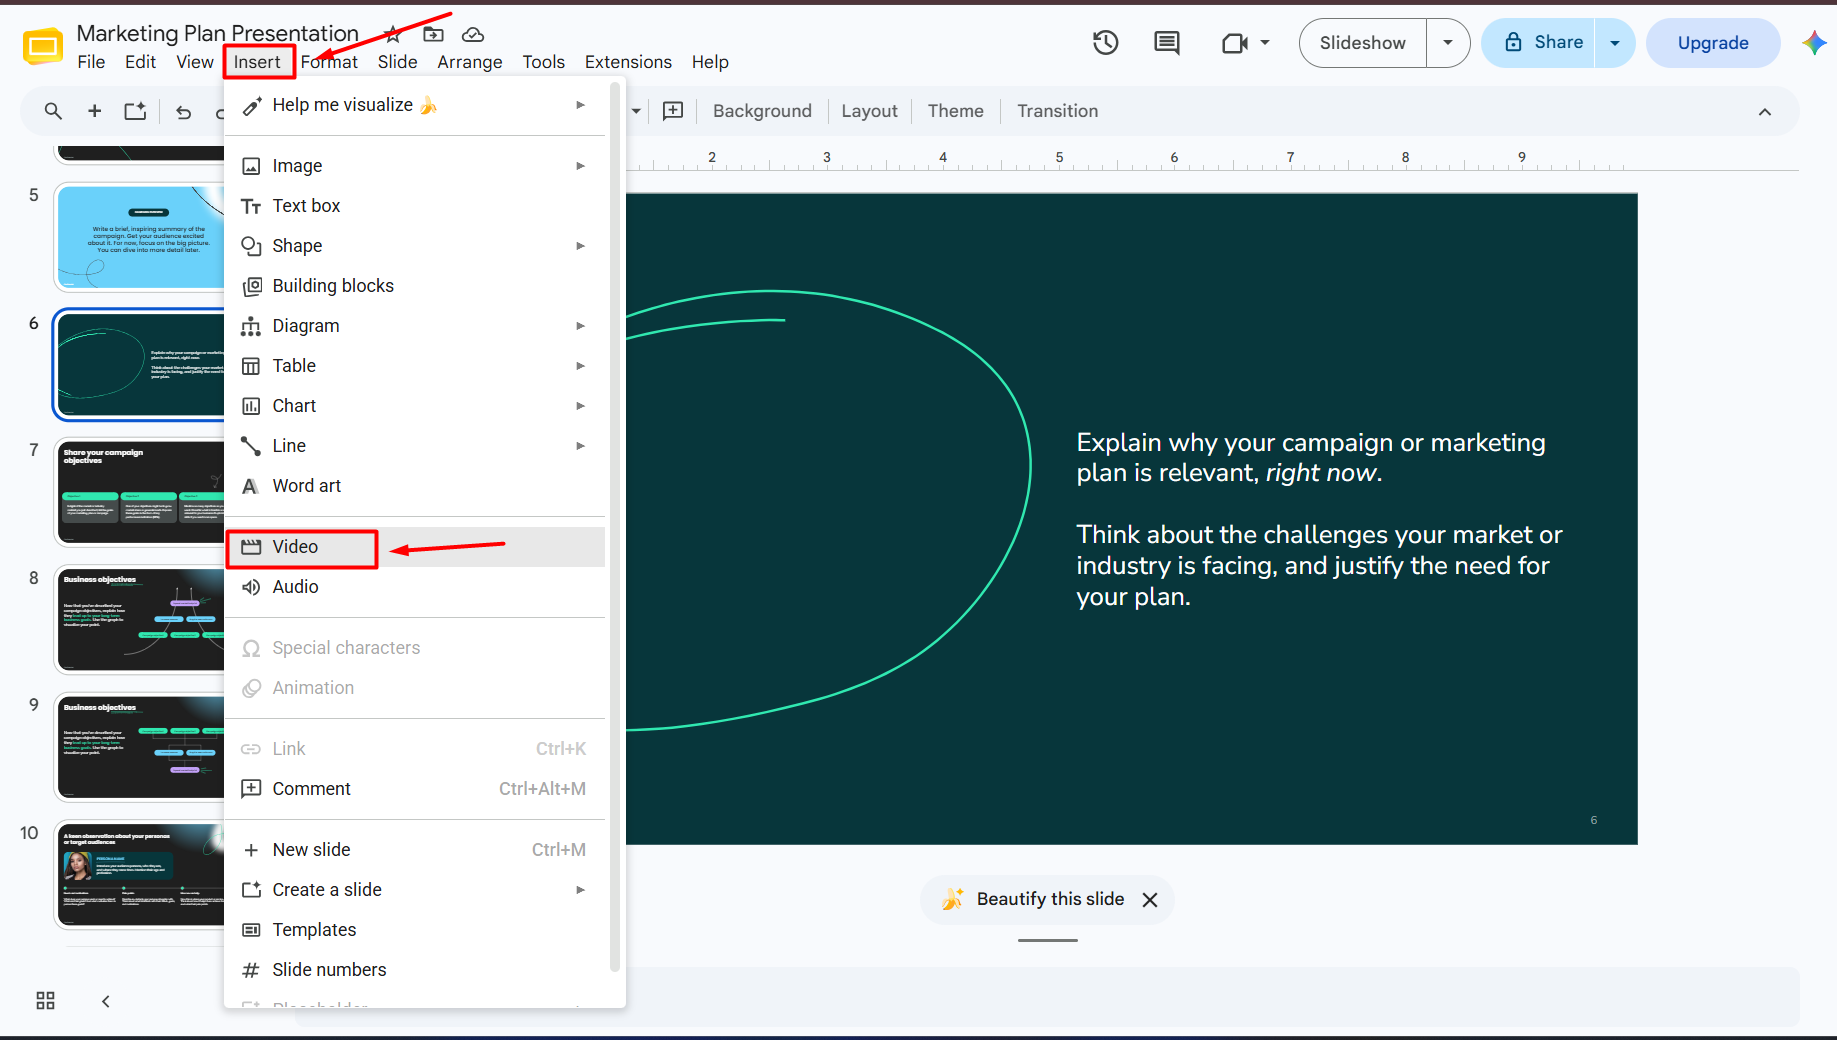
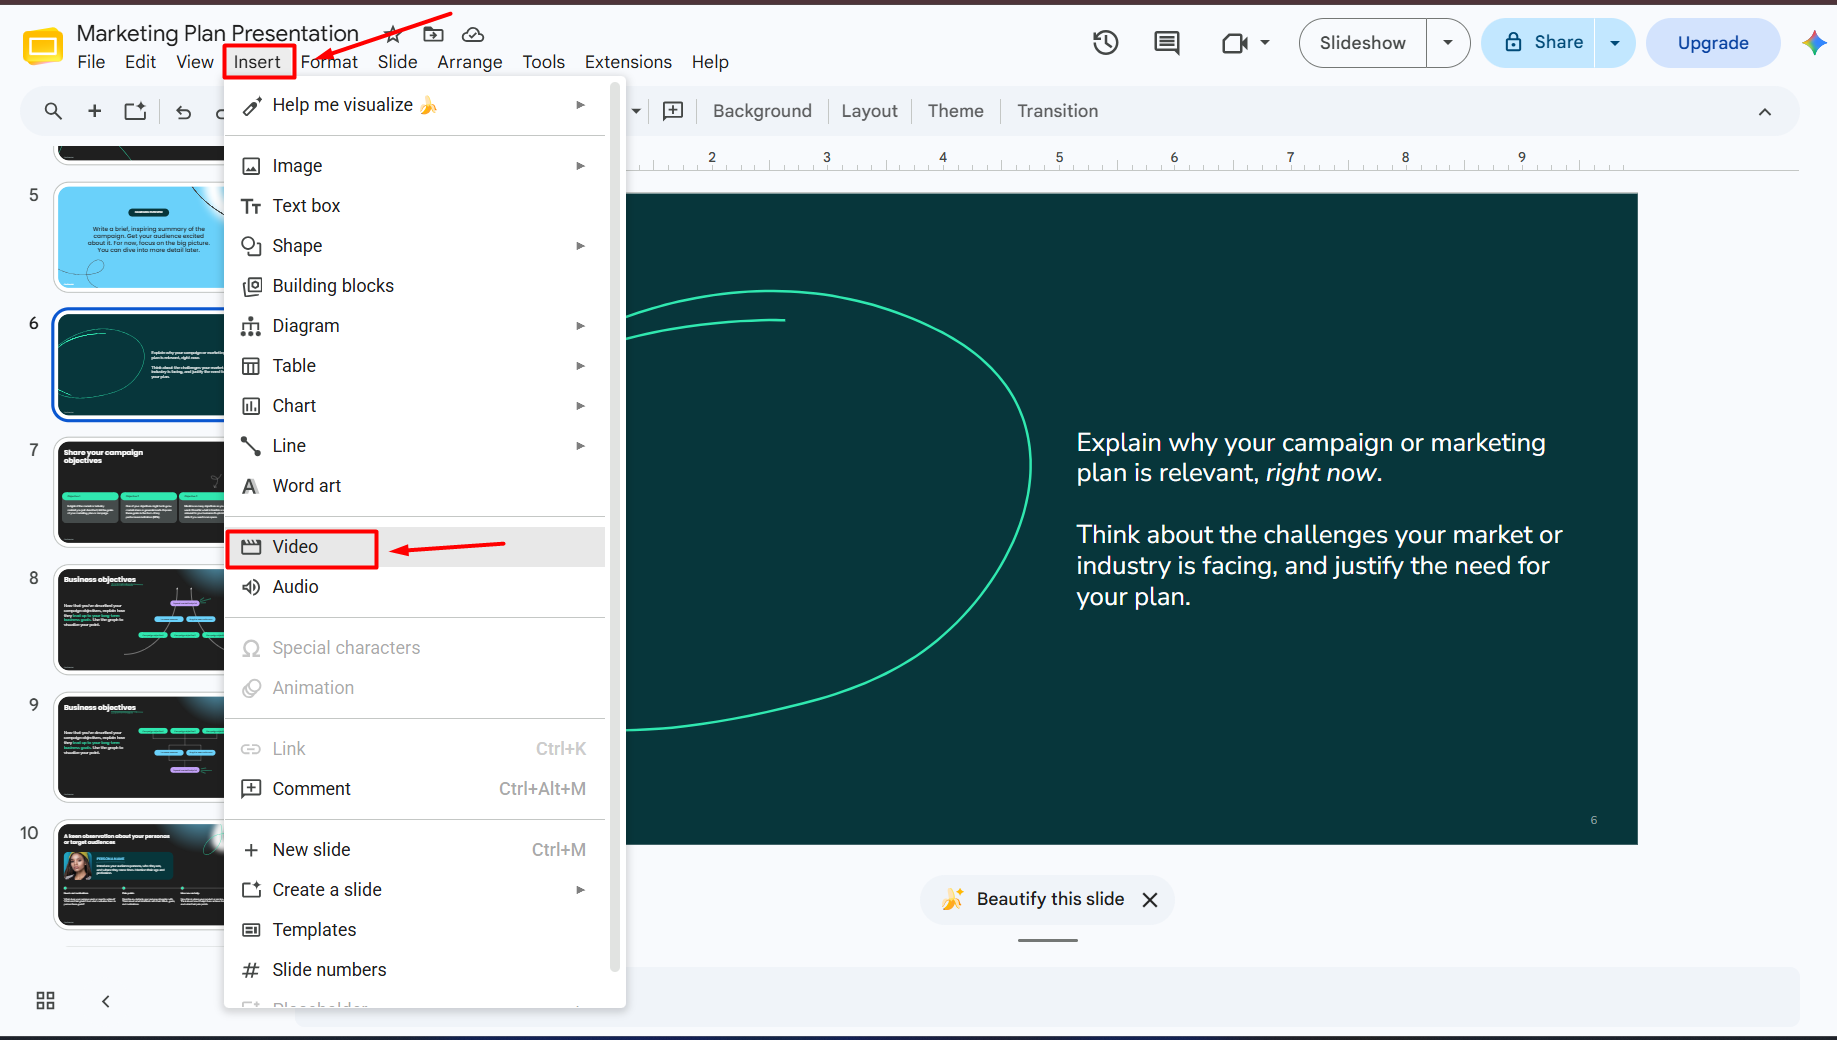
Step 3. Click Insert from the top menu.
Step 4. Select Video.
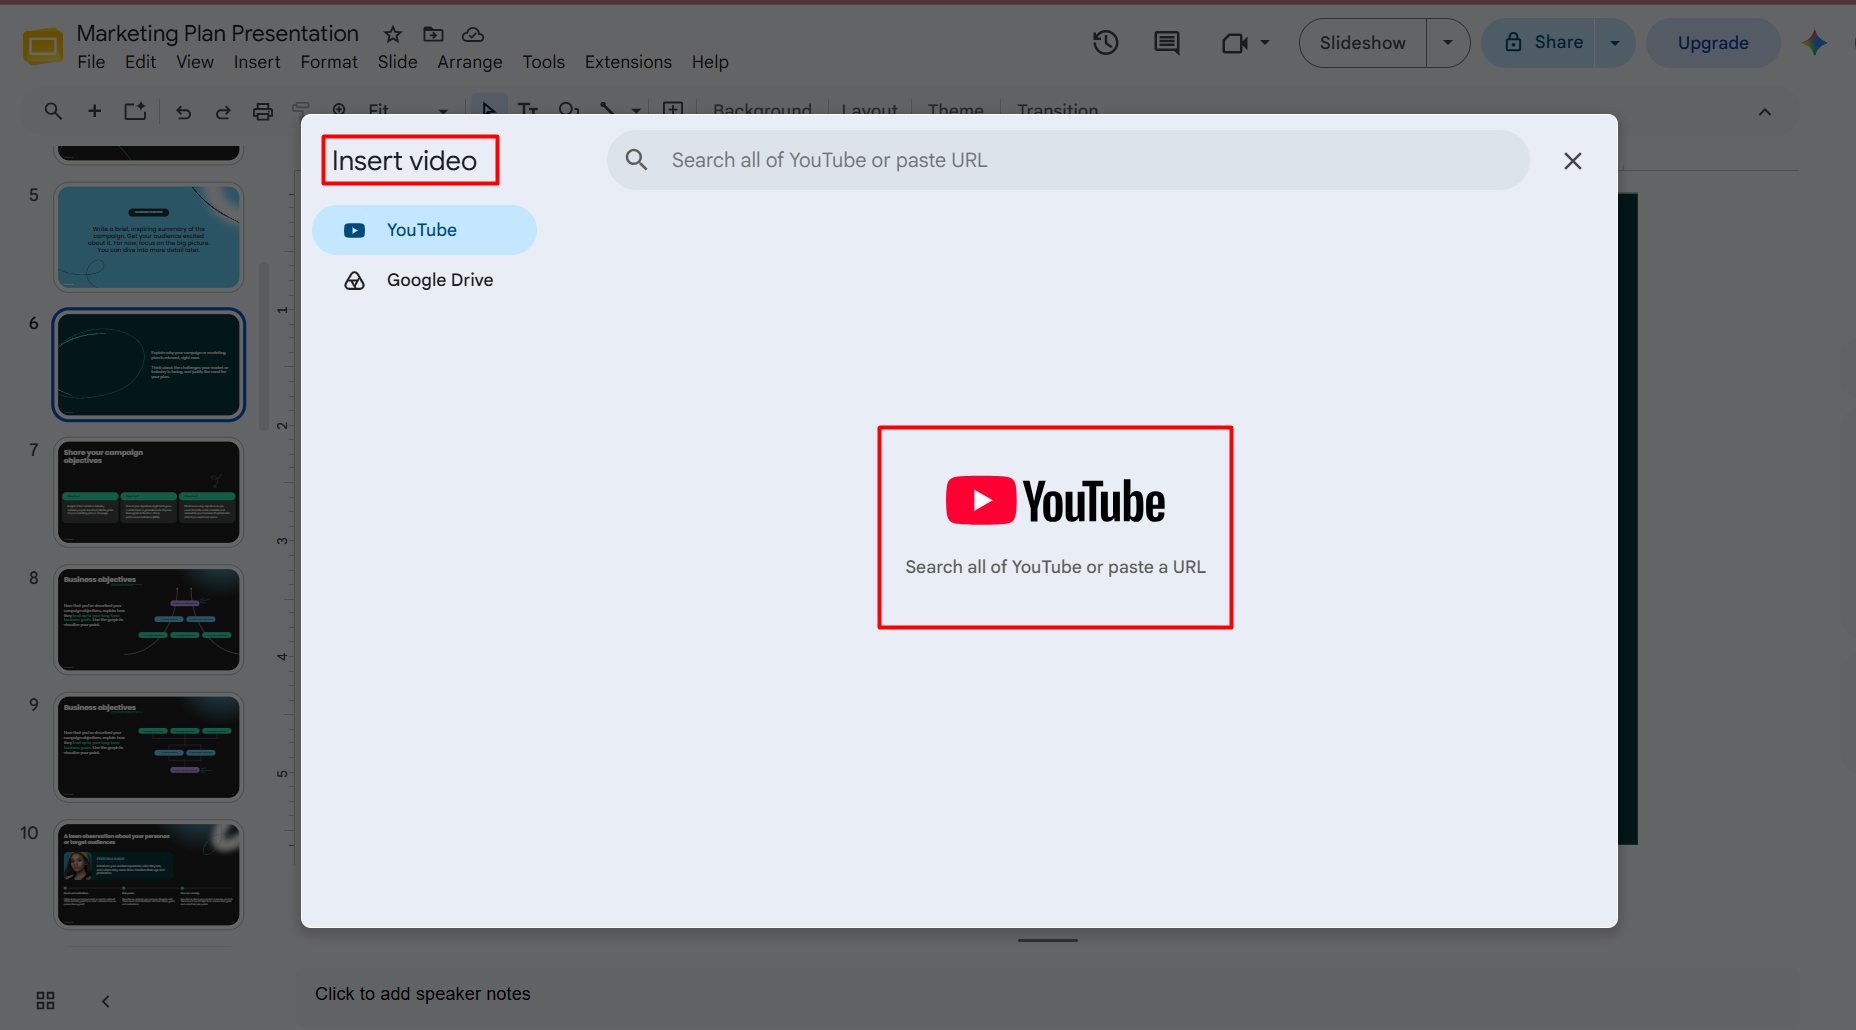
A new window will appear with multiple options.
Step 5. Choose the Search tab.
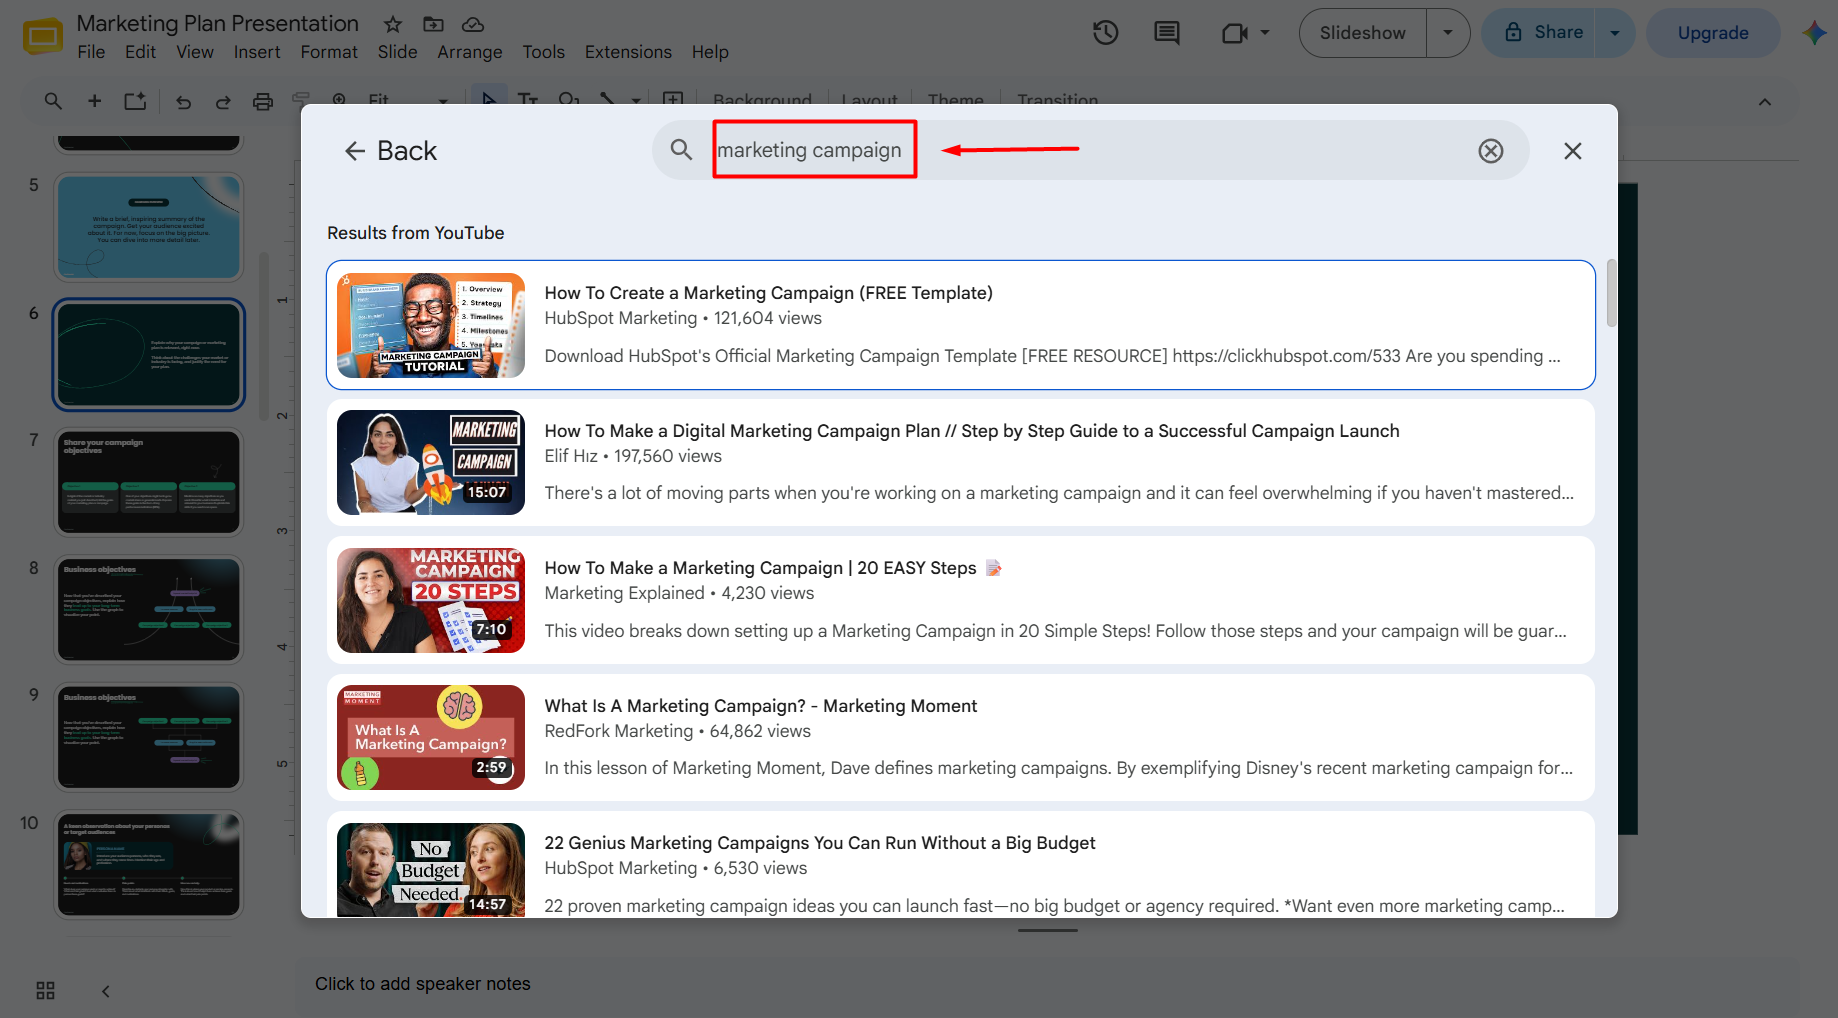
Step 6. Type the title or keywords for the YouTube video.
Google Slides will display matching YouTube results directly inside the editor.
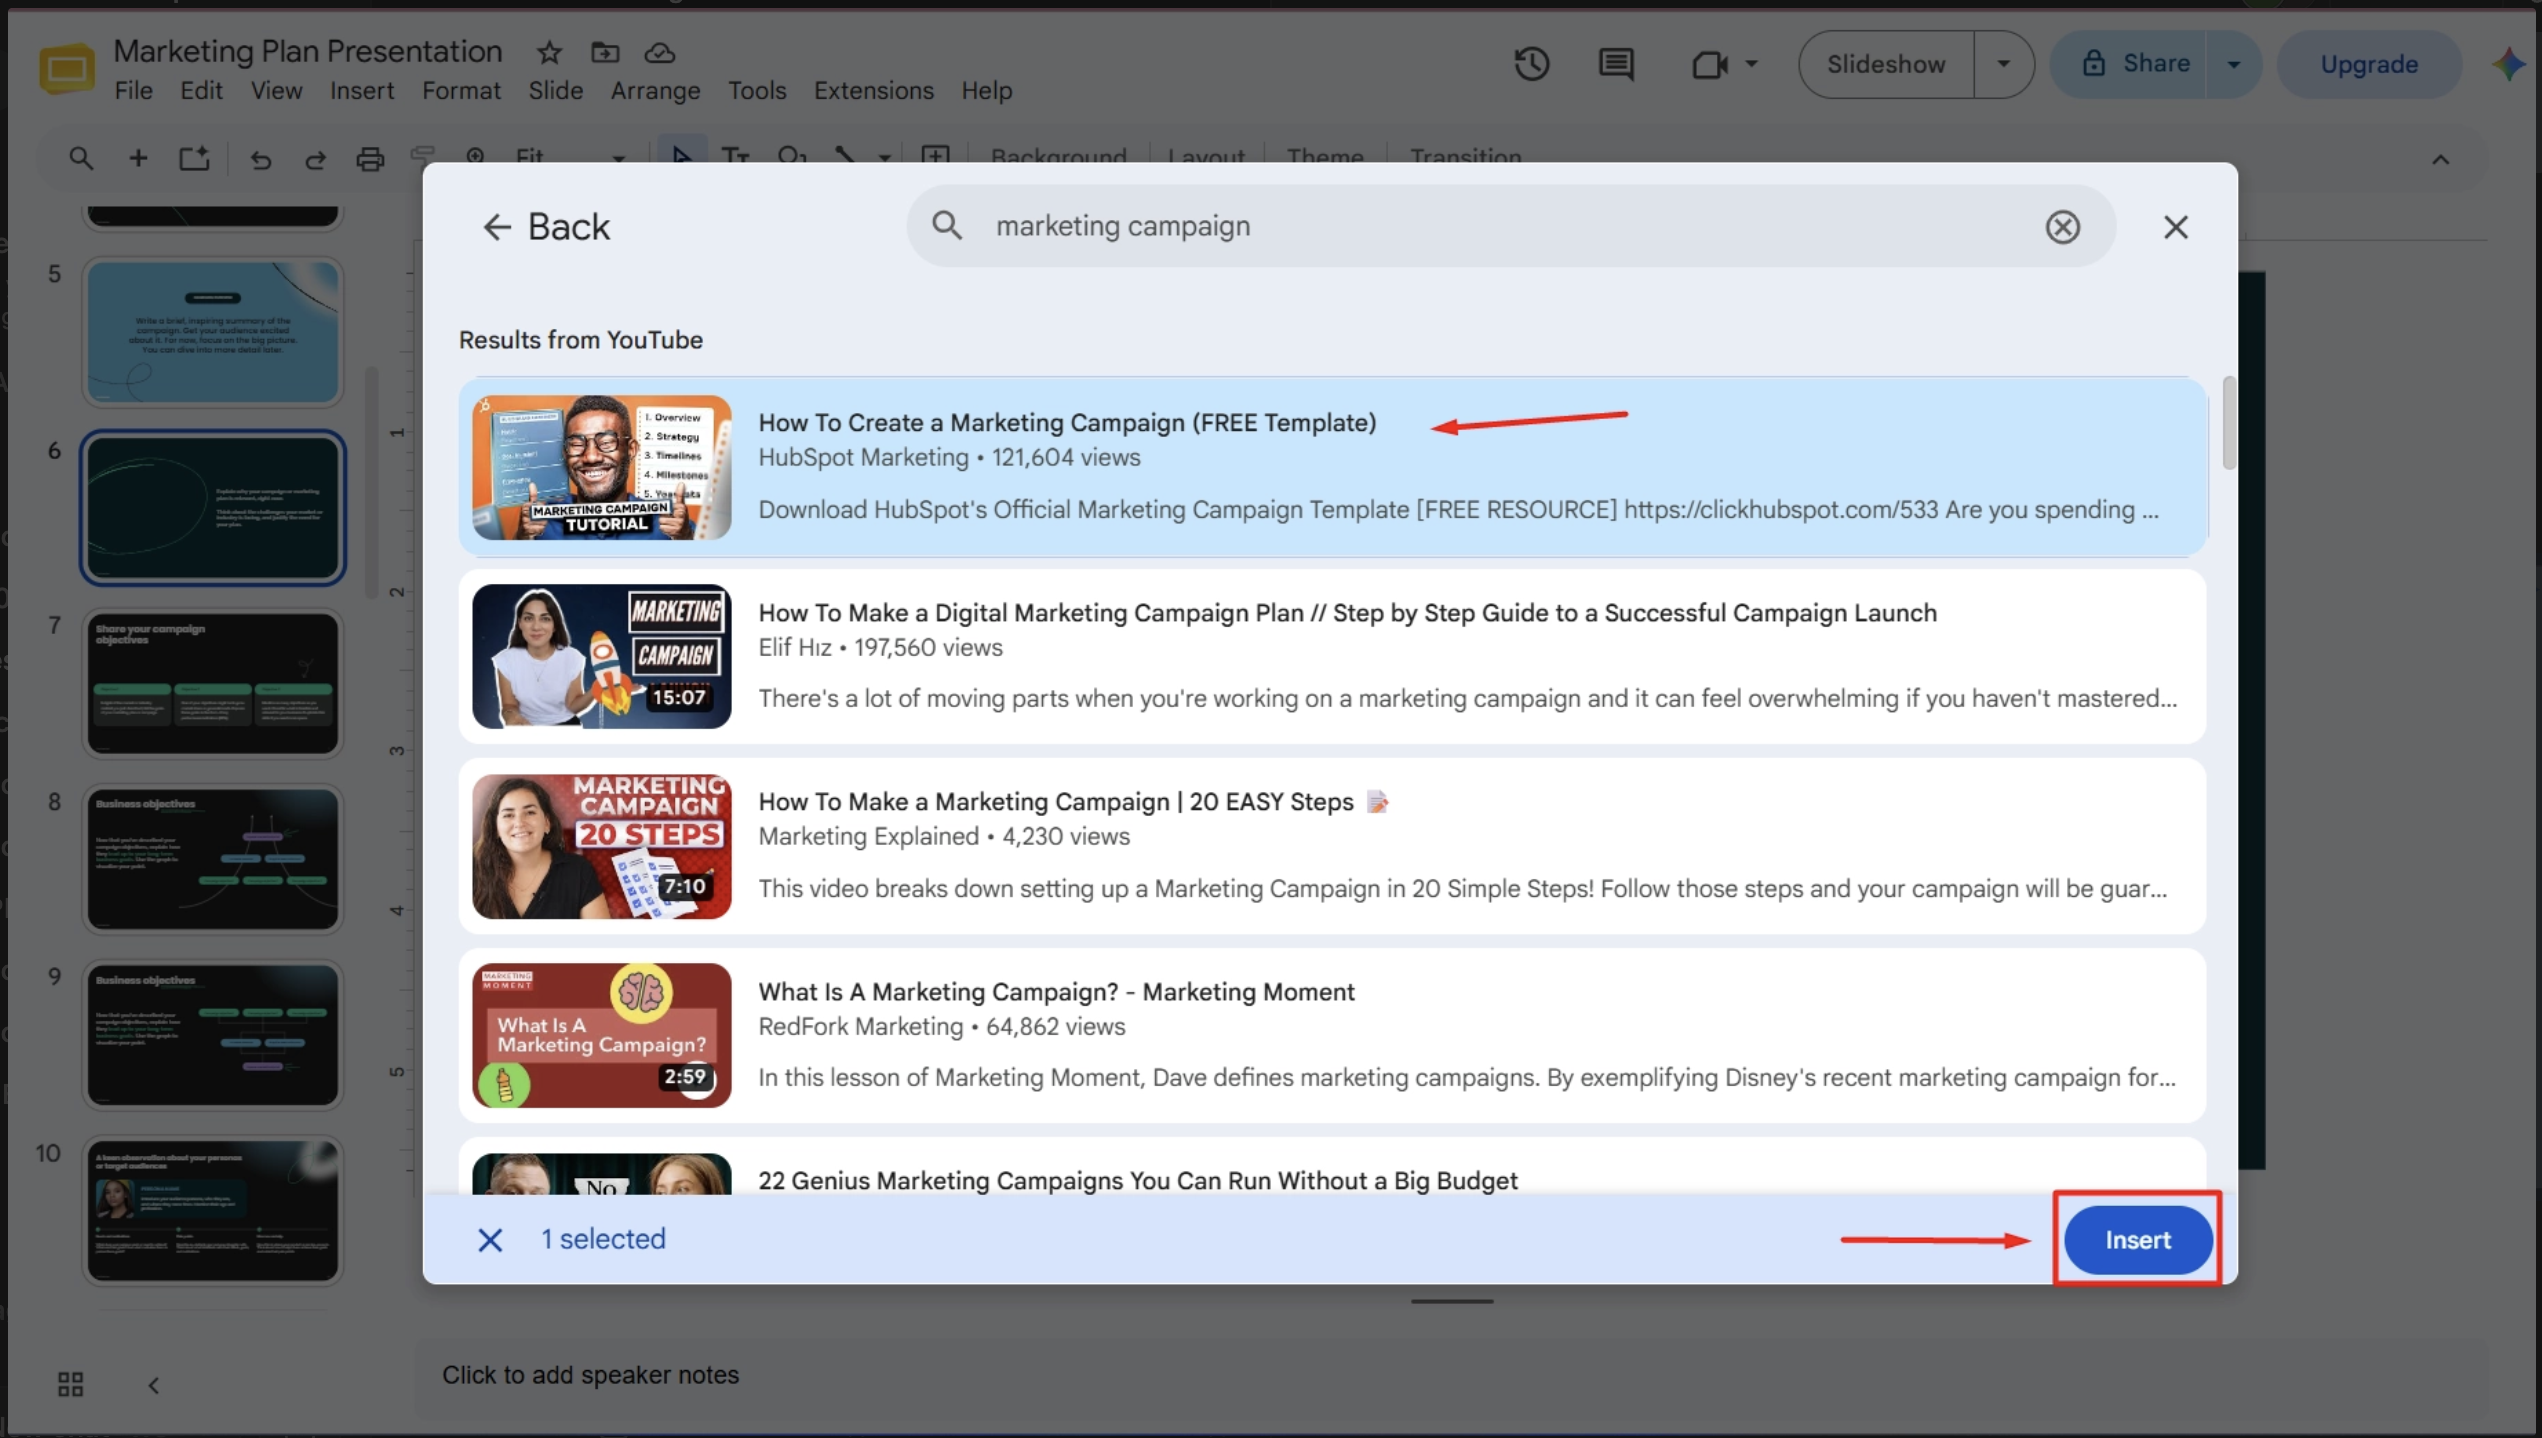
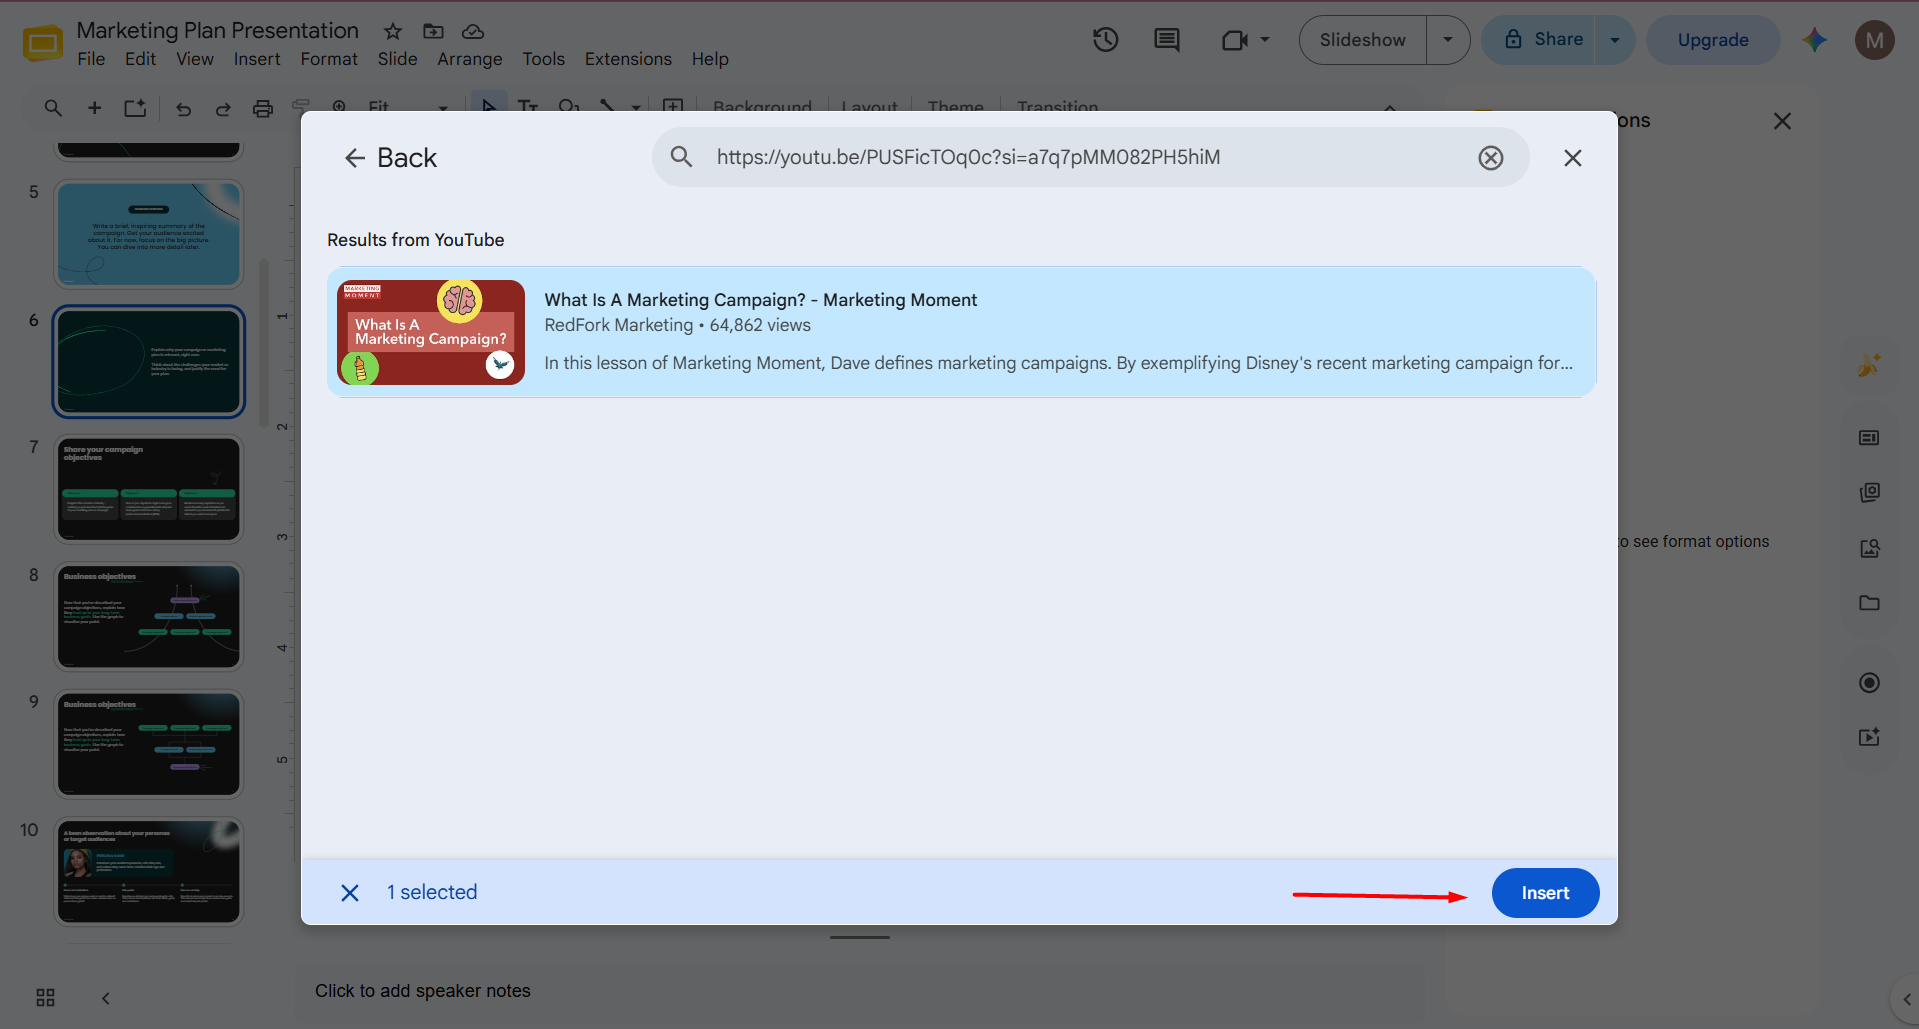
Step 7. Select the video you want.
Step 8. Click Insert.
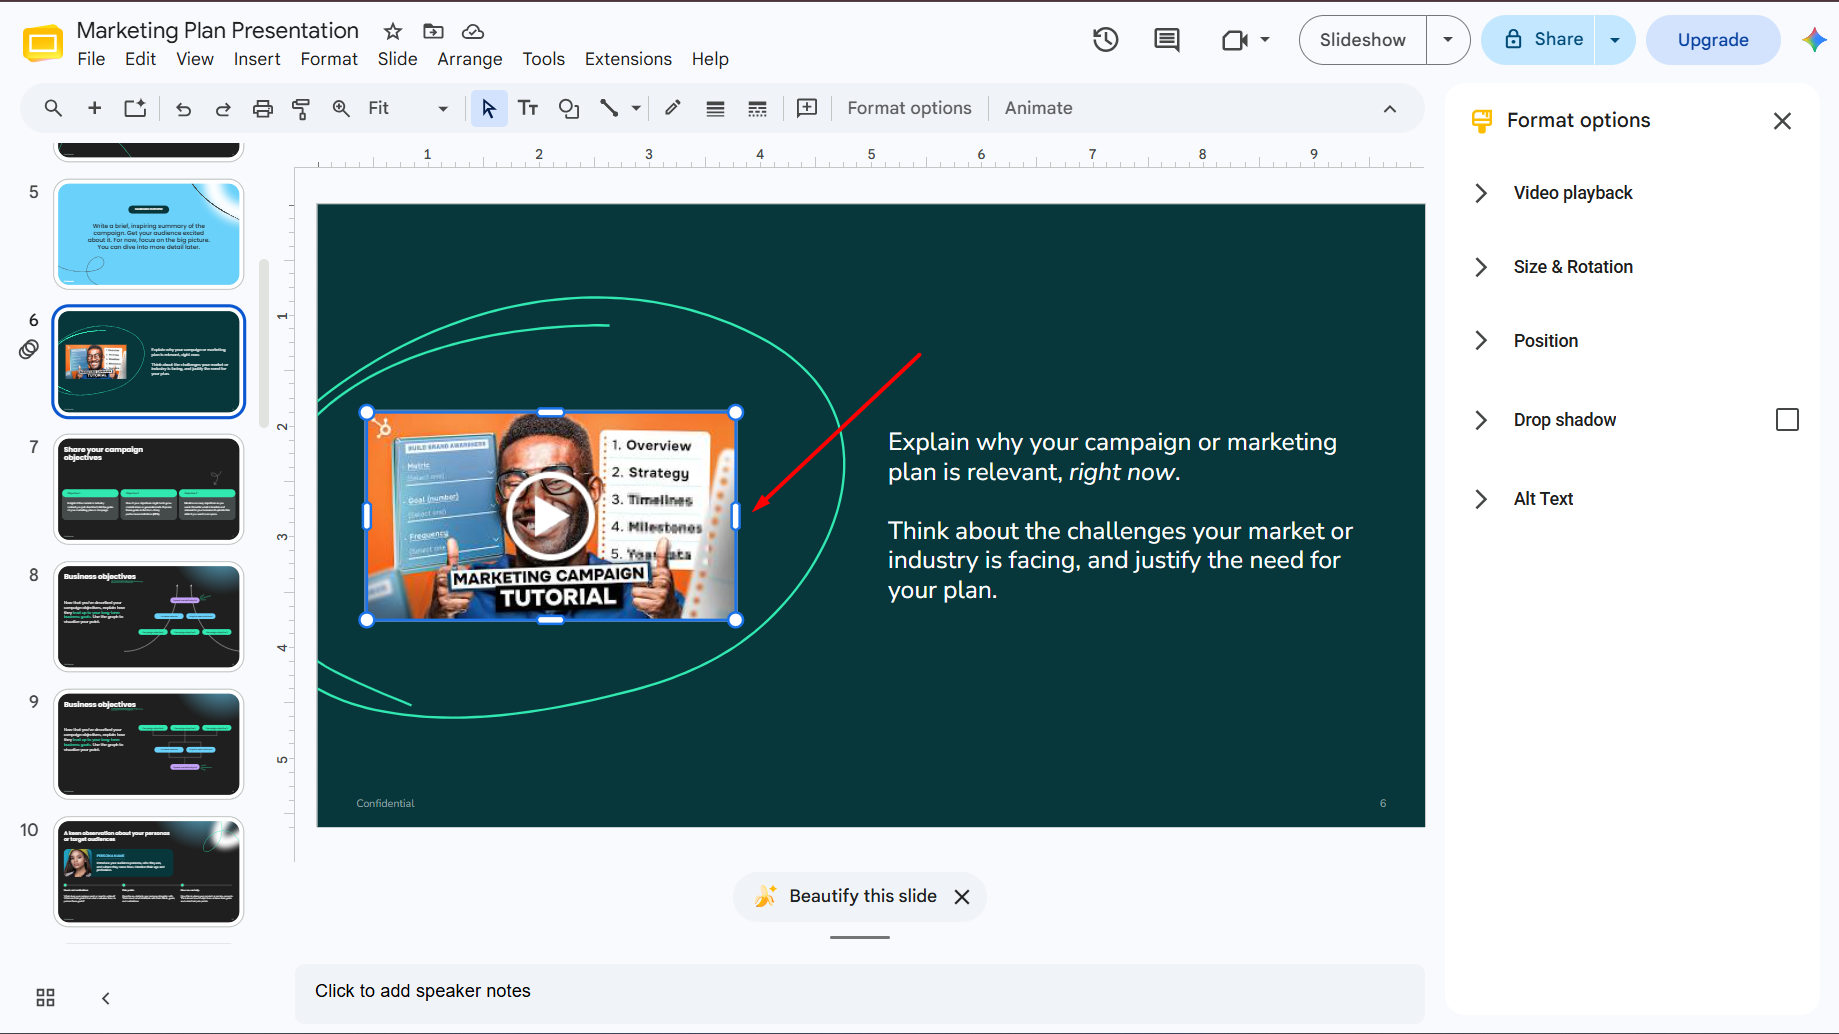
The video will now appear on your slide, and you can resize or reposition it just like an image.
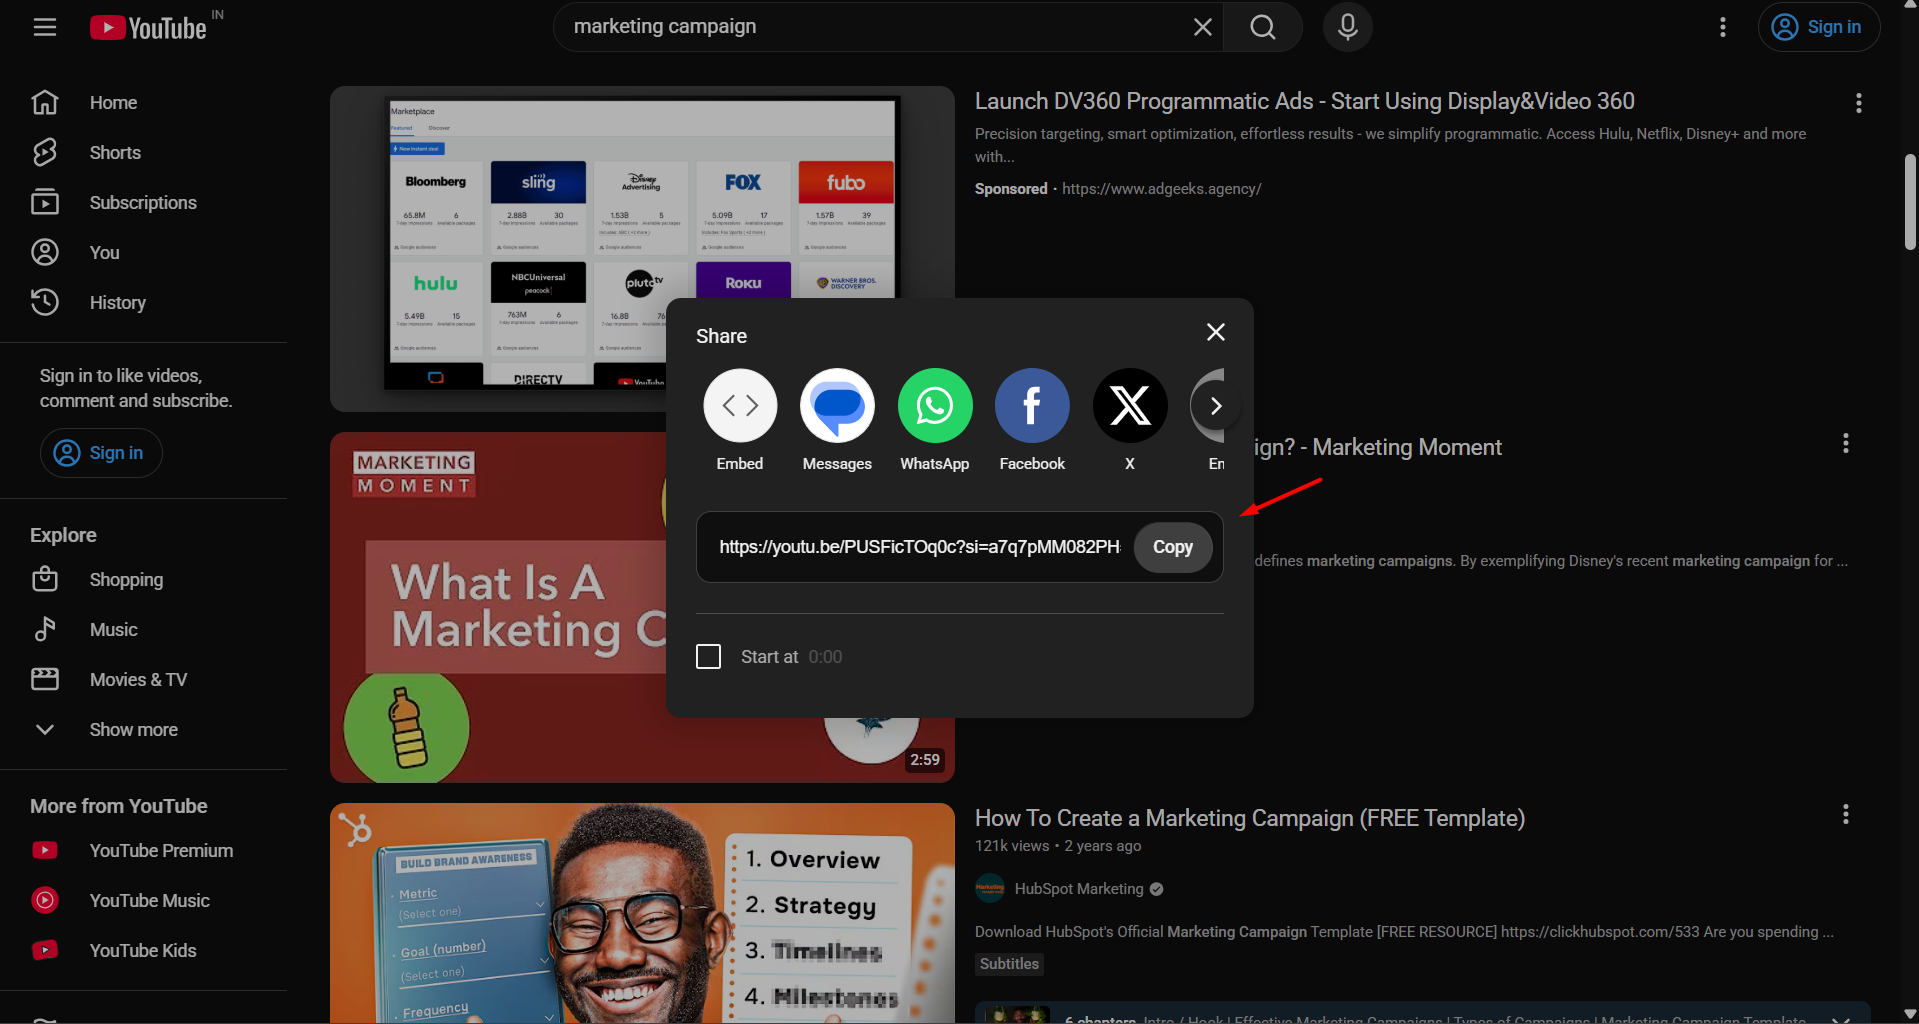
Method 2: Insert a YouTube Video Using Its URL
If you already have the video’s link, this method is even faster.
Step 1. Copy the YouTube video’s URL.
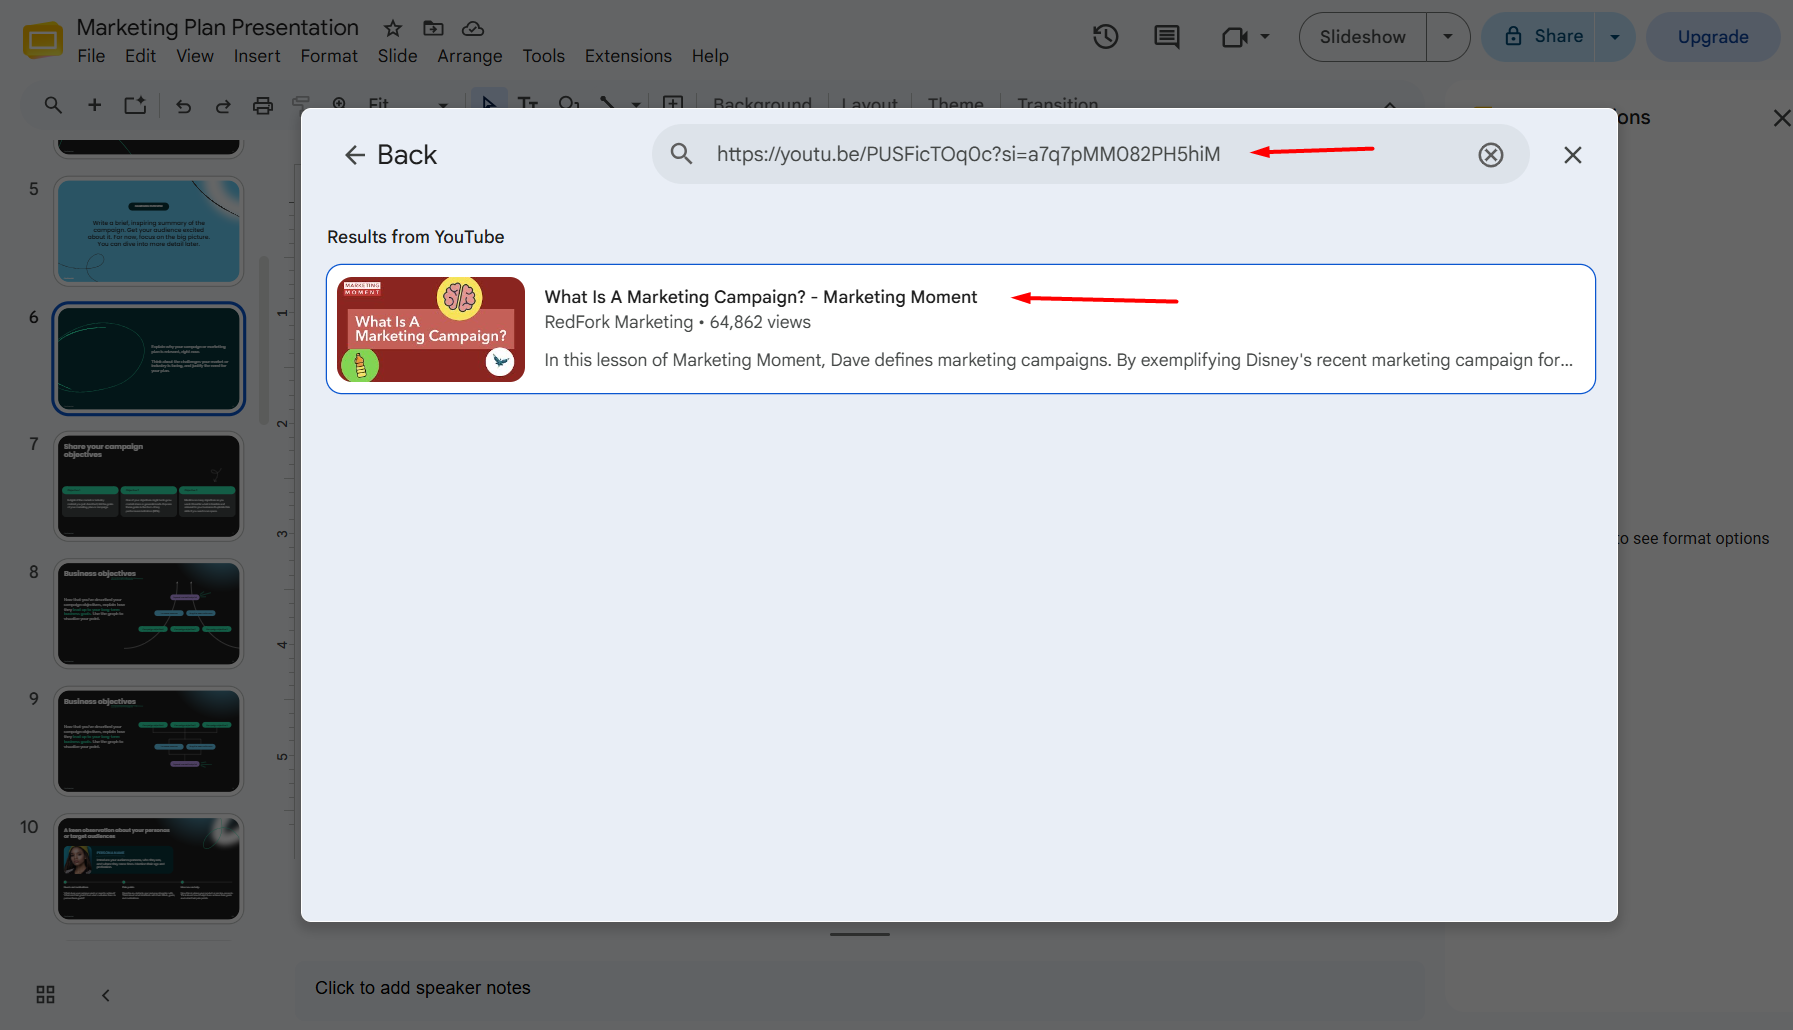
Step 2. In Google Slides, go to:
Insert → Video
Step 3. Select the By URL option.
Step 4. Paste the YouTube link.
Step 5. Click Insert.
Google Slides will automatically embed the video into your presentation.
Pro Tip
Before presenting, play the embedded video once to make sure it loads correctly. This helps avoid unexpected playback issues during your presentation, especially if you’re using a shared internet connection.
Common Mistakes
Avoid these common errors when inserting YouTube videos:
Using deleted or unavailable YouTube videos
Embedding age-restricted videos that require login
Assuming the video will work offline
Forgetting to test playback before presenting
How to Add a Video from Google Drive?
If you’ve created your own video or downloaded one from another source, Google Drive is usually the best option.
I often use Google Drive for company training videos, recorded meetings, product walkthroughs, and custom tutorials that aren’t available on YouTube.
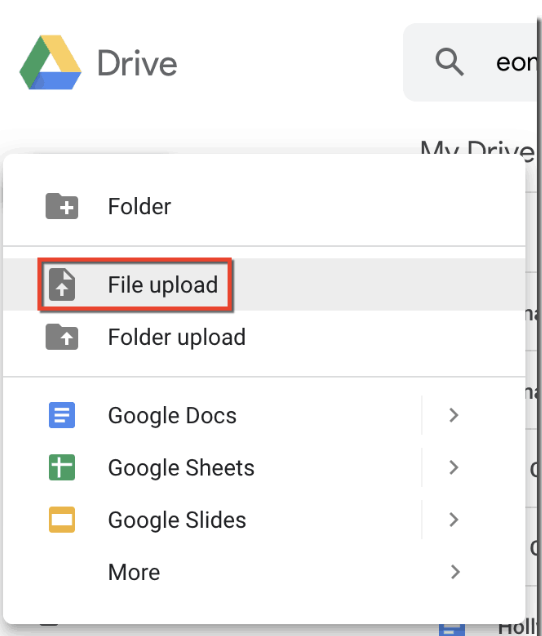
Step 1: Upload Your Video to Google Drive
If your video isn’t already stored in Google Drive:
Open Google Drive.
Click New.
Select File Upload.
Choose your video file.
Wait for the upload to finish.
Once uploaded, you’re ready to insert it into Google Slides.
Step 2: Insert the Video into Google Slides
Open your presentation.
Navigate to:
Insert → Video
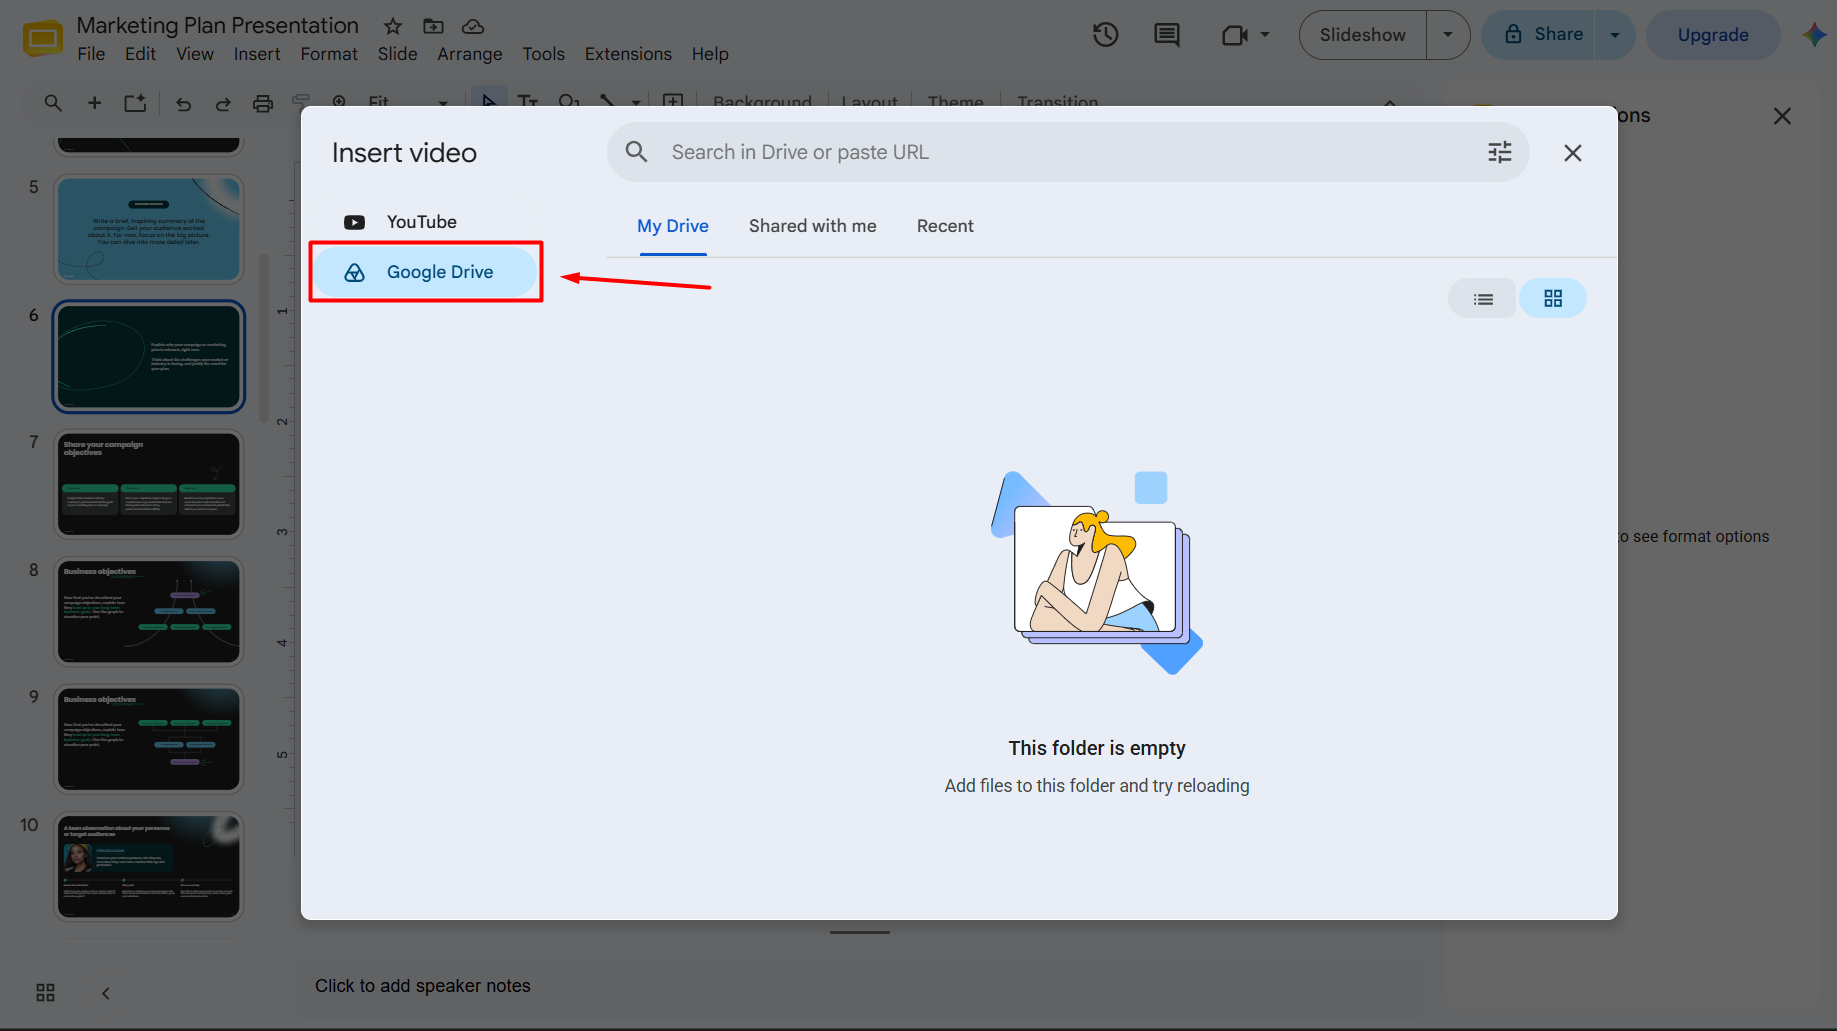
Instead of searching YouTube, switch to the Google Drive tab.
Google Slides will display the videos stored in your Drive.
Select your preferred video.
Click Insert.
The video will immediately appear on your slide.
Share Permissions Matter
One of the most common reasons Drive videos fail to play is incorrect sharing permissions.
If you’re sharing your presentation with classmates, coworkers, or clients, make sure they also have permission to access the video stored in Google Drive.
Otherwise, they may see an error instead of the video.
I always test my presentation using another account before an important meeting to confirm that every embedded video is accessible.
Best Practices for Google Drive Videos
Keep filenames descriptive so they’re easy to find.
Organize presentation videos in dedicated Drive folders.
Avoid moving or deleting videos after embedding them.
Use high-quality MP4 files for the best playback experience.
Verify sharing permissions before sending your presentation.
Can You Upload an MP4 Directly to Google Slides?
Many users search for ways to upload an MP4 directly into Google Slides.
The important thing to understand is that Google Slides doesn’t store local video files inside the presentation itself. Instead, videos from your computer are typically uploaded to Google Drive first and then inserted into your slides from there.
Here’s the typical workflow I follow:
Save the MP4 file on your computer.
Upload it to Google Drive.
Wait for the upload to complete.
Open Google Slides.
Select Insert → Video.
Choose the Google Drive tab.
Select the uploaded video.
Click Insert.
This approach keeps your presentation lightweight while allowing Google Slides to stream the video from Drive when it’s played.
Which Video Formats Work Best?
For the best compatibility, use widely supported formats such as MP4 encoded with standard video and audio codecs. If you have videos in other formats, converting them to MP4 before uploading can help avoid playback issues.
Practical Tip: Before uploading, compress large video files if possible. Smaller files upload faster, are easier to manage in Google Drive, and can reduce buffering during presentations without a noticeable loss in quality.
How to Resize, Move, and Format Videos in Google Slides?
Once you’ve added a video to your slide, taking a few minutes to position and format it properly can make your presentation look much more polished. A poorly placed or stretched video can distract your audience, while a well-formatted one blends naturally with your slide design.
Here’s how I usually adjust videos before presenting.
Resize a Video
Click on the video.
Drag any of the corner handles to resize it.
Hold Shift (if needed) to maintain the aspect ratio while resizing.
Tip: Resize using the corner handles instead of the side handles to avoid stretching the video.
Move the Video
Simply click and drag the video anywhere on the slide.
For better alignment, Google Slides displays smart guides that help you position the video evenly with other elements.
Align Your Video
For professional-looking slides:
Center videos on the slide whenever they’re the main focus.
Leave enough white space around the video.
Keep consistent margins across all slides.
Align videos with text boxes and images.
A clean layout makes your presentation easier to follow.
Use Format Options
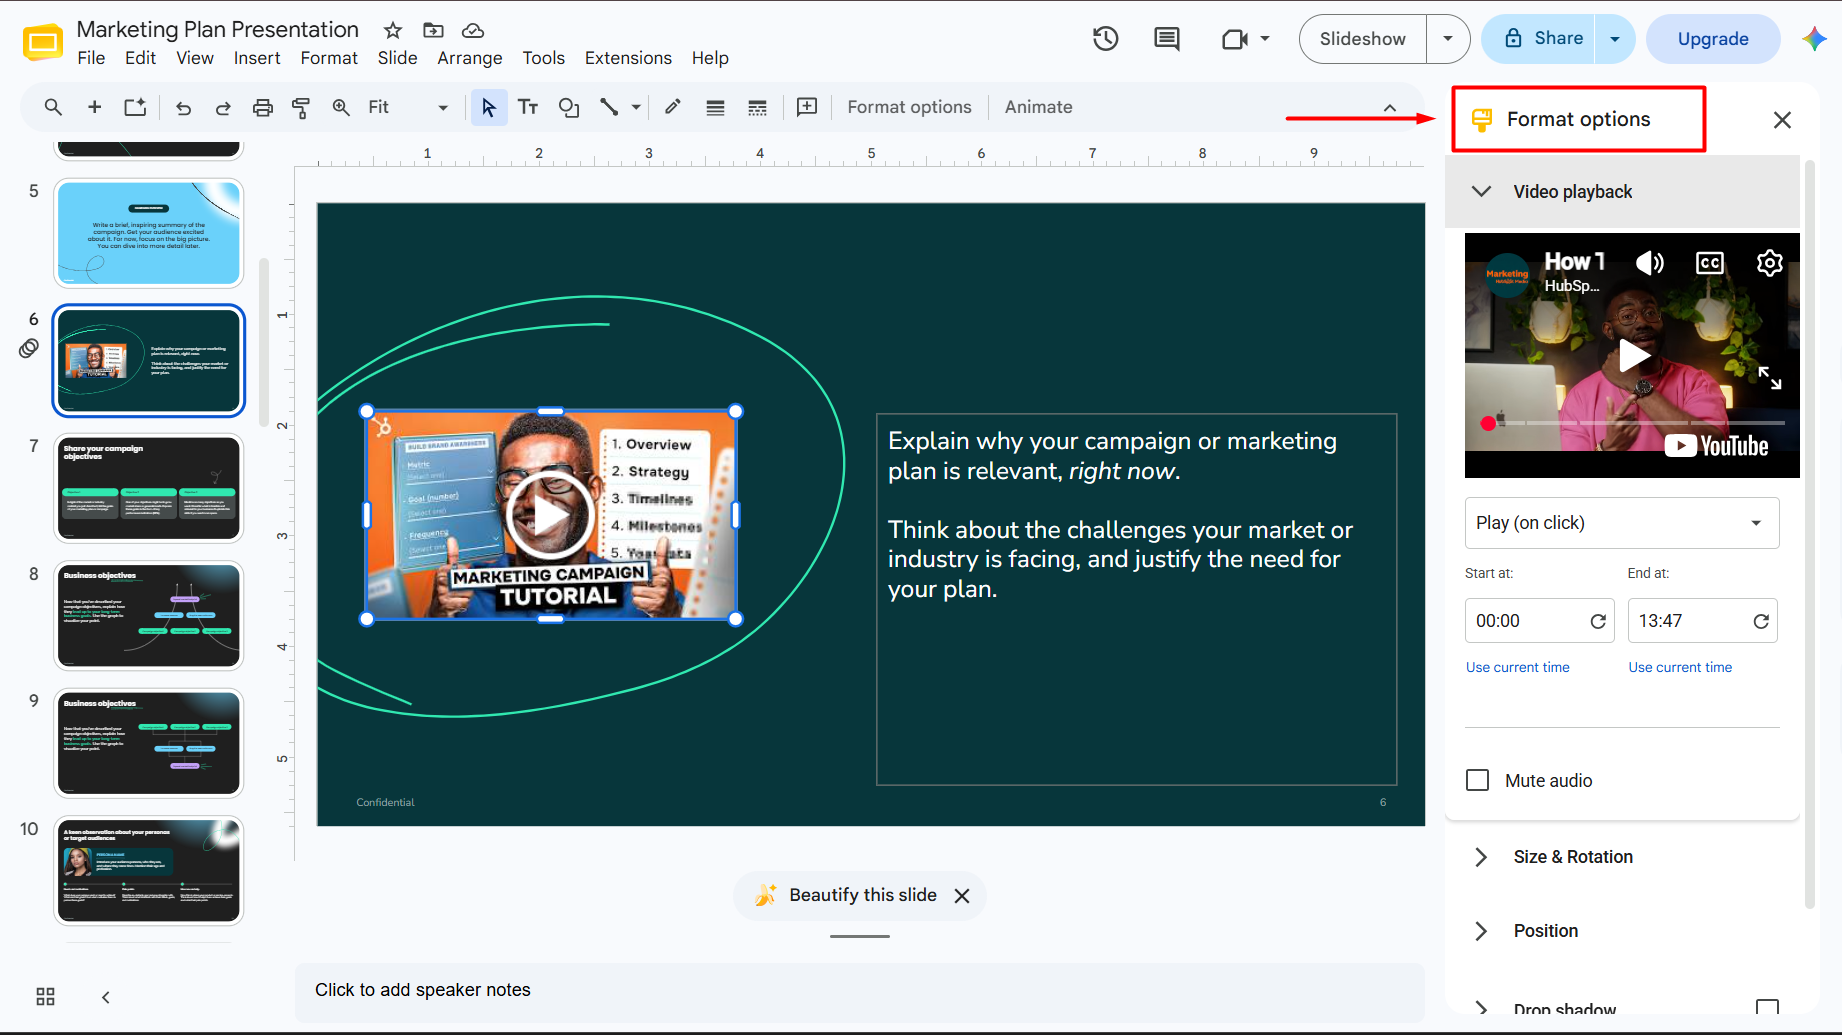
Google Slides also lets you customize the appearance of videos using Format options.
Depending on your version of Google Slides, you may be able to adjust:
Position
Size
Rotation
Drop shadow
Reflection (when available)
These small adjustments can improve the overall look of your presentation without overwhelming the slide.
Best Practice: Let the video be the focal point. Avoid placing large blocks of text directly over or next to the video unless they’re essential.
How to Change Video Playback Settings?
Google Slides provides several playback options that let you control how a video behaves during your presentation.
To access these settings:
Select the video.
Open Format options (or the playback settings panel, depending on the interface).
Adjust the available playback settings.
Let’s look at the most useful options.
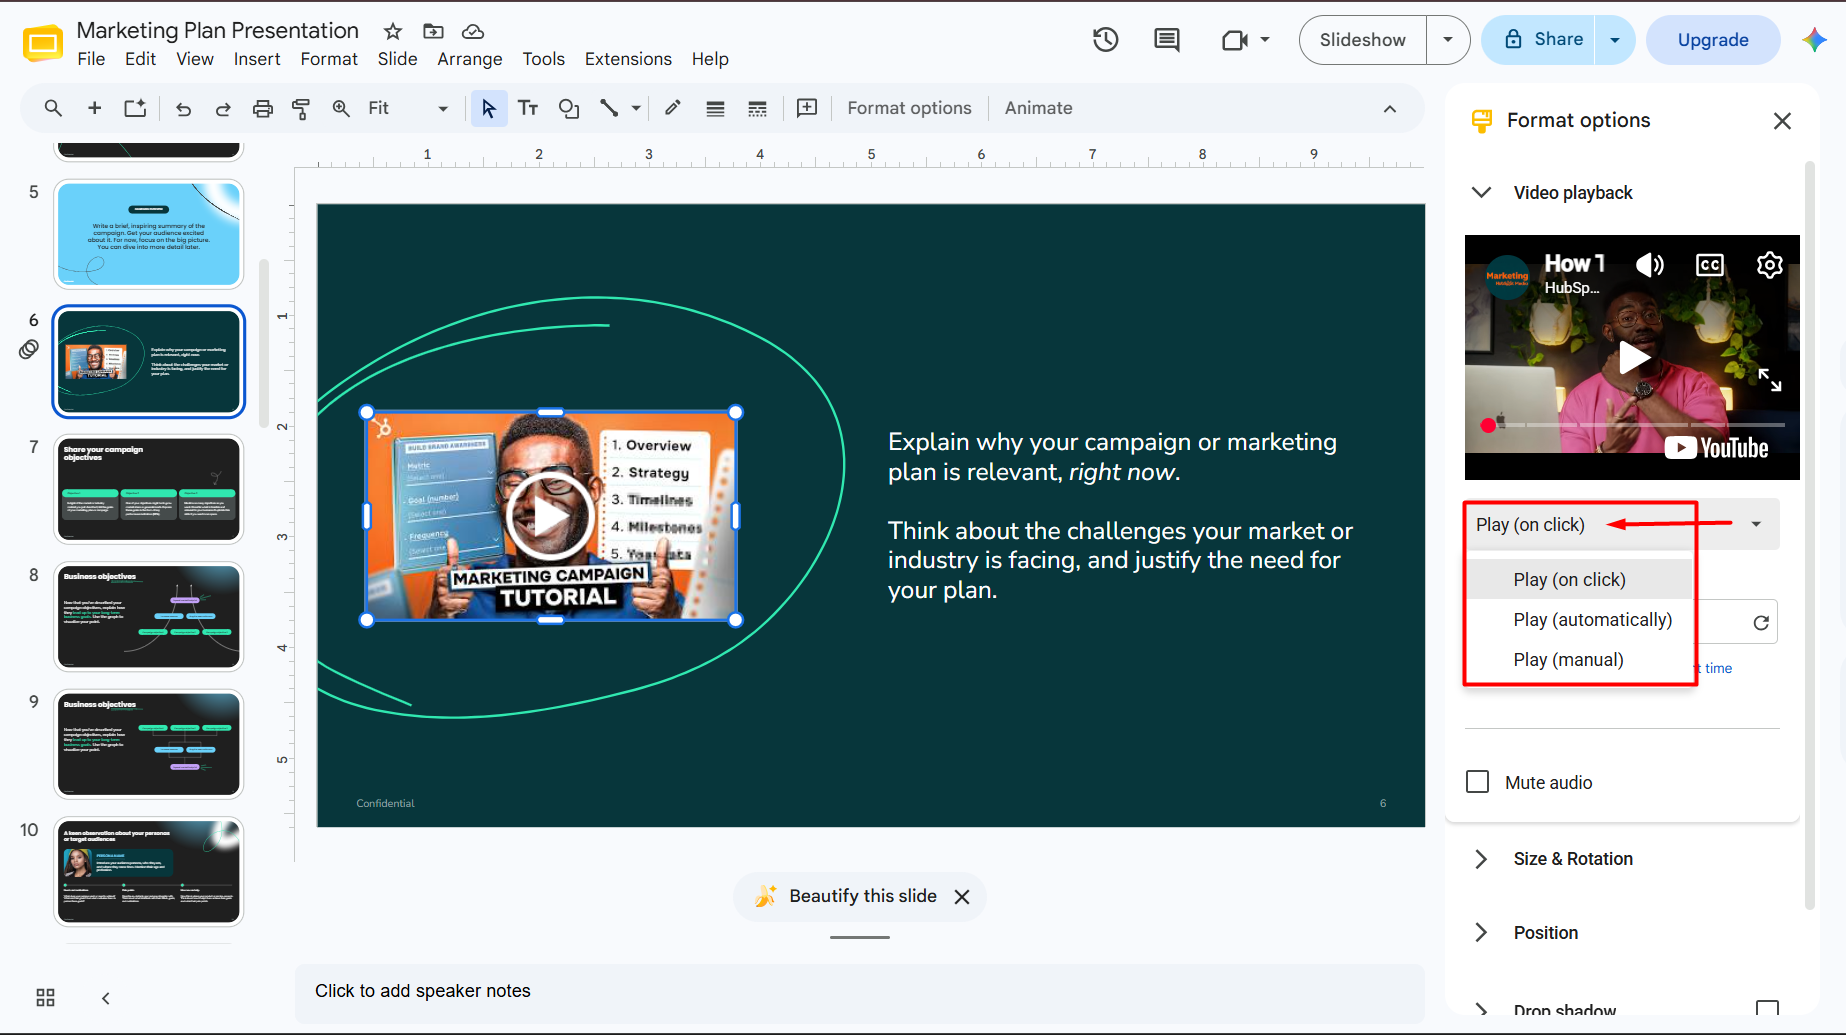
Play on Click
This is the default behavior.
The video only starts when you click it during your presentation.
I recommend this option for:
Business presentations
Sales pitches
Client meetings
Educational lessons
It gives you full control over when the video begins.
Autoplay During Presentation
If you want the video to start automatically when you reach a slide, enable the autoplay option if it’s available in your Google Slides version.
Autoplay works well for:
Welcome slides
Event presentations
Digital signage
Kiosk displays
Self-running presentations
However, I avoid autoplay for every slide because unexpected audio can distract the audience.
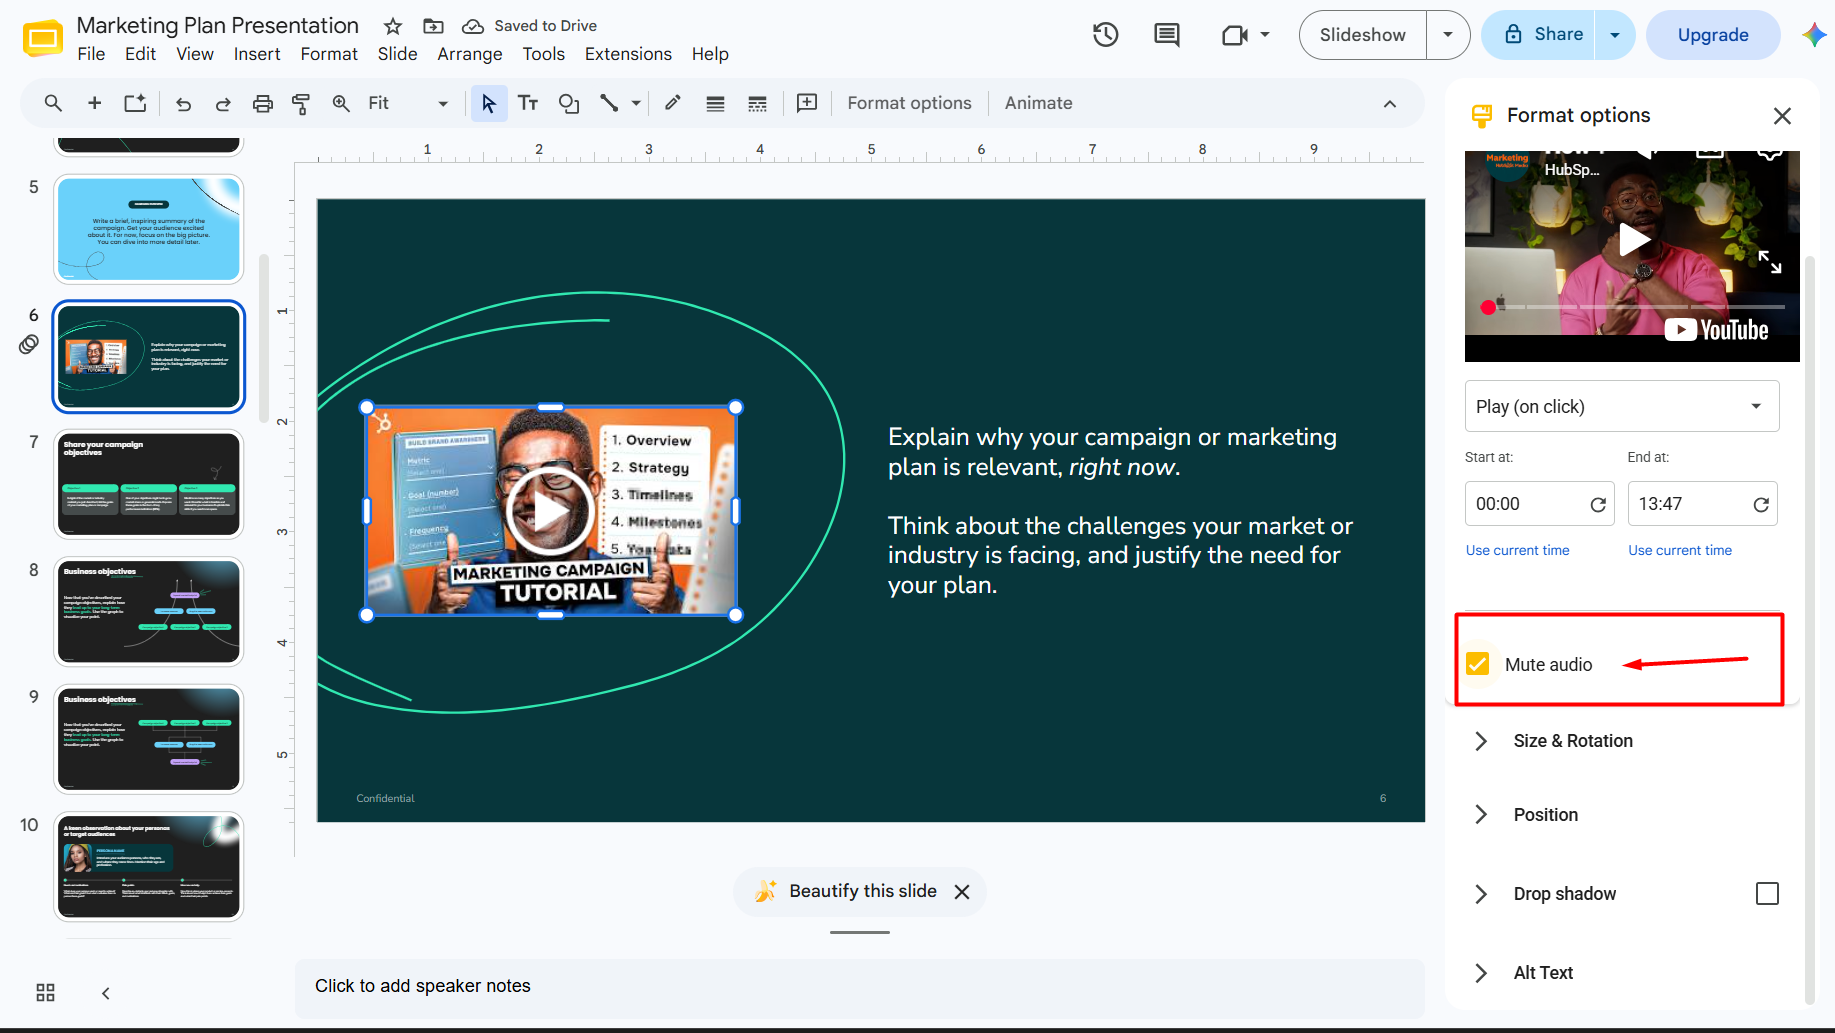
Mute Audio
Sometimes you only want viewers to watch the visuals.
Muting the video’s audio is useful when:
You’re narrating live.
Background music isn’t needed.
The video’s audio quality is poor.
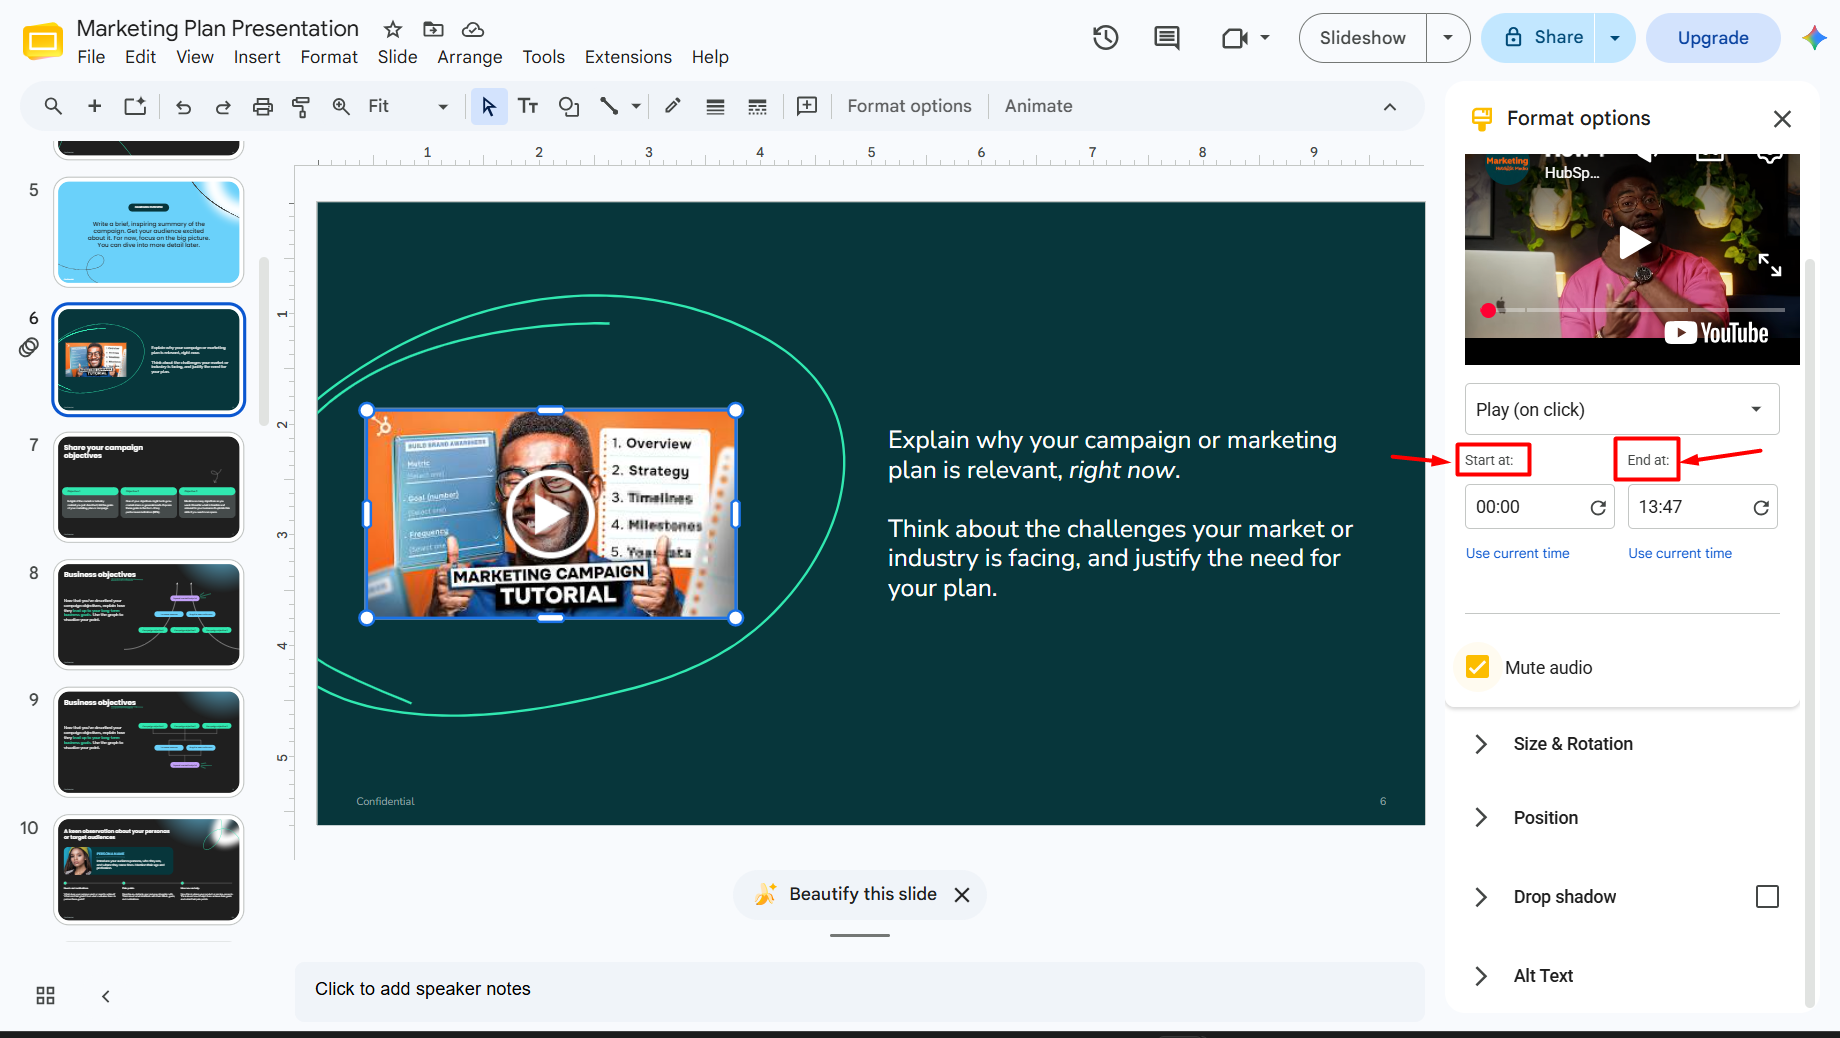
Set Start and End Times
One of my favorite features is trimming playback without editing the original video file.
Instead of playing the entire video, you can specify:
Start time
End time
For example:
Start at 00:45
End at 01:30
This allows you to show only the most relevant section of a longer video.
Skip Long Introductions
Many YouTube videos begin with branding, intros, or advertisements for the creator’s channel.
Rather than making your audience wait, start playback from the section that delivers the information they need.
It creates a smoother presentation and keeps people engaged.
How to Trim a Video in Google Slides?
Google Slides doesn’t permanently edit your video. Instead, it lets you control which portion plays during the presentation.
To trim playback:
Select the embedded video.
Open the playback settings.
Enter a Start Time.
Enter an End Time.
Only that section will play during your presentation.
This is perfect for:
Tutorials
Product demos
Webinar highlights
Interviews
Recorded presentations
Limitation
If you need to:
Remove scenes
Cut unwanted footage
Add transitions
Add captions
Edit audio
You’ll need to edit the video first using a dedicated video editor before uploading it to Google Drive or YouTube.
Video Not Playing? Here’s How to Fix It
One of the most common frustrations is clicking a video during a presentation only to find that it doesn’t play.
Fortunately, most playback problems are easy to fix.
Check Your Internet Connection
YouTube videos and most Google Drive videos require an internet connection.
If your connection is slow or unavailable:
Videos may buffer.
Playback may fail.
Embedded YouTube videos may not load.
If you’re presenting in a venue with unreliable Wi-Fi, test the connection beforehand or consider alternative presentation methods if appropriate.
Verify Google Drive Permissions
If viewers receive a permission error, the video’s sharing settings are likely incorrect.
Open Google Drive.
Check the video’s sharing permissions.
Ensure the people viewing your presentation can access the file.
This is one of the most common issues I encounter when collaborating with teams.
Make Sure the Video Still Exists
If someone deletes the original YouTube video or removes the Google Drive file, Google Slides won’t be able to play it.
Before an important presentation, verify that:
The YouTube video is still available.
The Google Drive file hasn’t been deleted or moved.
The video link hasn’t changed.
Use a Supported Video Format
If you’re uploading your own video, MP4 is generally the safest and most compatible format.
Unsupported or corrupted files may fail to play correctly.
Clear Browser Cache
Occasionally, browser cache can interfere with video playback.
If videos aren’t loading:
Refresh the page.
Clear your browser cache.
Restart your browser.
Try opening the presentation in another supported browser.
Test Before Presenting
This is the simplest yet most important tip.
I always play every embedded video before presenting.
Testing helps identify:
Permission issues
Broken links
Buffering problems
Incorrect playback settings
Spending five minutes testing can prevent awkward interruptions during a live presentation.
Best Practices for Adding Videos to Google Slides
After creating dozens of presentations, I’ve found that a few simple habits make a big difference.
Keep Videos Short
Short videos maintain audience attention better than long clips.
Aim for 30 seconds to 2 minutes whenever possible.
Use Videos Purposefully
Every video should support your message.
Avoid adding videos simply because they look impressive.
Ask yourself:
“Does this video help explain my point better than text or images?”
If the answer is no, it’s probably unnecessary.
Match Your Presentation Style
Choose videos that align with your presentation’s design, tone, and audience.
For example:
Corporate presentations should use professional-looking videos.
Educational presentations can include tutorials and explainers.
Marketing presentations benefit from product demos and customer stories.
Test on the Presentation Device
A presentation that works perfectly on your laptop may behave differently on another computer or projector.
Whenever possible, open your presentation on the device you’ll actually use.
Avoid Overusing Videos
Too many videos can overwhelm your audience and interrupt the flow of your presentation.
Instead of embedding videos on every slide, use them strategically to emphasize important moments.
Common Mistakes to Avoid
Even experienced presenters make these mistakes.
Avoid them to ensure a smoother presentation:
Embedding videos without testing playback.
Forgetting to update Google Drive sharing permissions.
Stretching videos and distorting their aspect ratio.
Using videos that are much longer than necessary.
Relying entirely on autoplay.
Using low-quality or blurry videos.
Deleting or moving the original video after embedding it.
Ignoring internet requirements before presenting.
Create Your Presentation Faster Before Adding Videos
Adding videos is one of the final steps in creating a compelling presentation. Before you start enhancing your slides with multimedia, it’s worth making sure the presentation itself has a strong structure and professional design.
If you’re starting from a blank slide, AI Presentations can help you generate a complete presentation in minutes. Instead of building every slide manually, you can create a polished draft, customize the content in Google Slides, and then use the techniques in this guide to embed videos where they add the most value.
This workflow saves time while still giving you full control over your final presentation.
Yes. Google Slides allows you to embed videos from YouTube and Google Drive at no additional cost.
Q2. Can Google Slides play MP4 videos?
Yes. Upload the MP4 file to Google Drive first, then insert it into your presentation through the Google Drive option.
Q3. Can I upload a video directly from my computer?
The typical workflow is to upload the video to Google Drive and then insert it into Google Slides from there.
Q4. Can I make a video autoplay in Google Slides?
Yes, depending on the available playback settings in your version of Google Slides, you can configure videos to play automatically during a presentation.
Q5. Why isn’t my video playing?
Common causes include:
No internet connection
Incorrect Google Drive permissions
Unsupported or corrupted video files
Removed YouTube videos
Browser-related issues
Checking these areas usually resolves the problem.
Q6. Can I use Vimeo videos?
Google Slides doesn’t provide native Vimeo embedding like it does for YouTube. If you want to use Vimeo content, you’ll typically need to link to it or use a compatible workflow outside of direct embedding.
Q7. Can videos play offline?
YouTube videos generally require an internet connection. Google Drive videos may also depend on connectivity and access permissions, so test your presentation in the environment where you’ll present.
Conclusion
Adding a video to Google Slides is a simple way to make your presentations more engaging, memorable, and informative. Whether you’re embedding a YouTube tutorial, a product demonstration from Google Drive, or your own MP4 recording, Google Slides gives you the flexibility to integrate multimedia with just a few clicks.
The key is to choose the right insertion method, adjust playback settings to fit your presentation, and test everything before you present. Paying attention to permissions, video quality, and slide layout will help ensure a smooth experience for both you and your audience.
If you’re creating a presentation from scratch, consider using AI Presentations to generate a professional slide deck in minutes. Once your content is ready, you can enhance it with videos using the techniques covered in this guide to deliver a more engaging and impactful presentation.
Creating a professional PowerPoint presentation used to take hours. You had to research your topic, organize ideas, design slides, choose colors, add visuals, and make sure everything looked polished. Today, AI has changed that workflow completely.
Over the past few years, AI-powered presentation tools have evolved from simple design assistants into intelligent productivity platforms. Many of them can now generate presentation outlines, write slide content, suggest layouts, create visuals, improve formatting, and even help you present ideas more effectively. Whether you’re preparing a business proposal, classroom presentation, sales pitch, project report, or investor deck, these tools can significantly reduce the time and effort required.
However, not every AI tool delivers the same experience.
Some focus on speed, helping you create a complete presentation within minutes. Others prioritize design quality, collaboration, branding, or advanced customization. After testing multiple platforms, I noticed that each tool has its own strengths and limitations depending on your specific needs.
Instead of recommending a single solution for everyone, I evaluated each tool using practical criteria, including:
Ease of use
Output quality
Design flexibility
Template library
AI-generated content quality
Collaboration features
Export options
Pricing
Overall value
In this guide, you’ll find a detailed comparison of the top AI tools for PPT presentation available in 2026. I’ll walk you through their features, advantages, drawbacks, pricing, and the scenarios where each tool performs best, helping you choose the one that fits your workflow.
Quick Comparison of Top 10 AI Tools for PPT Presentation
Choosing the right AI tool isn’t just about how quickly it creates slides. A good platform should also produce accurate content, offer flexible customization, support collaboration, and export presentations without breaking layouts.
To make this comparison as useful as possible, I tested every tool using the same evaluation criteria.
Ease of Use
The first thing I looked at was how quickly a new user could create a presentation. The best tools have intuitive interfaces, require minimal learning, and guide users through the creation process without unnecessary complexity.
AI Content Quality
Generating slides is one thing; generating useful content is another. I evaluated how well each tool created presentation outlines, headlines, bullet points, summaries, and supporting information.
Design Quality
Presentation quality depends heavily on design. I compared template variety, layout suggestions, typography, color consistency, image integration, and overall visual appeal.
Editing Flexibility
No AI-generated presentation is perfect. That’s why editing capabilities matter. I checked how easily users could modify text, rearrange slides, customize themes, and personalize designs.
Export Options
Many users eventually need to present in Microsoft PowerPoint or share files as PDFs. I assessed how well each tool exported presentations while preserving formatting and compatibility.
Pricing & Value
Finally, I compared pricing plans, free features, and whether the premium offerings justified their cost.
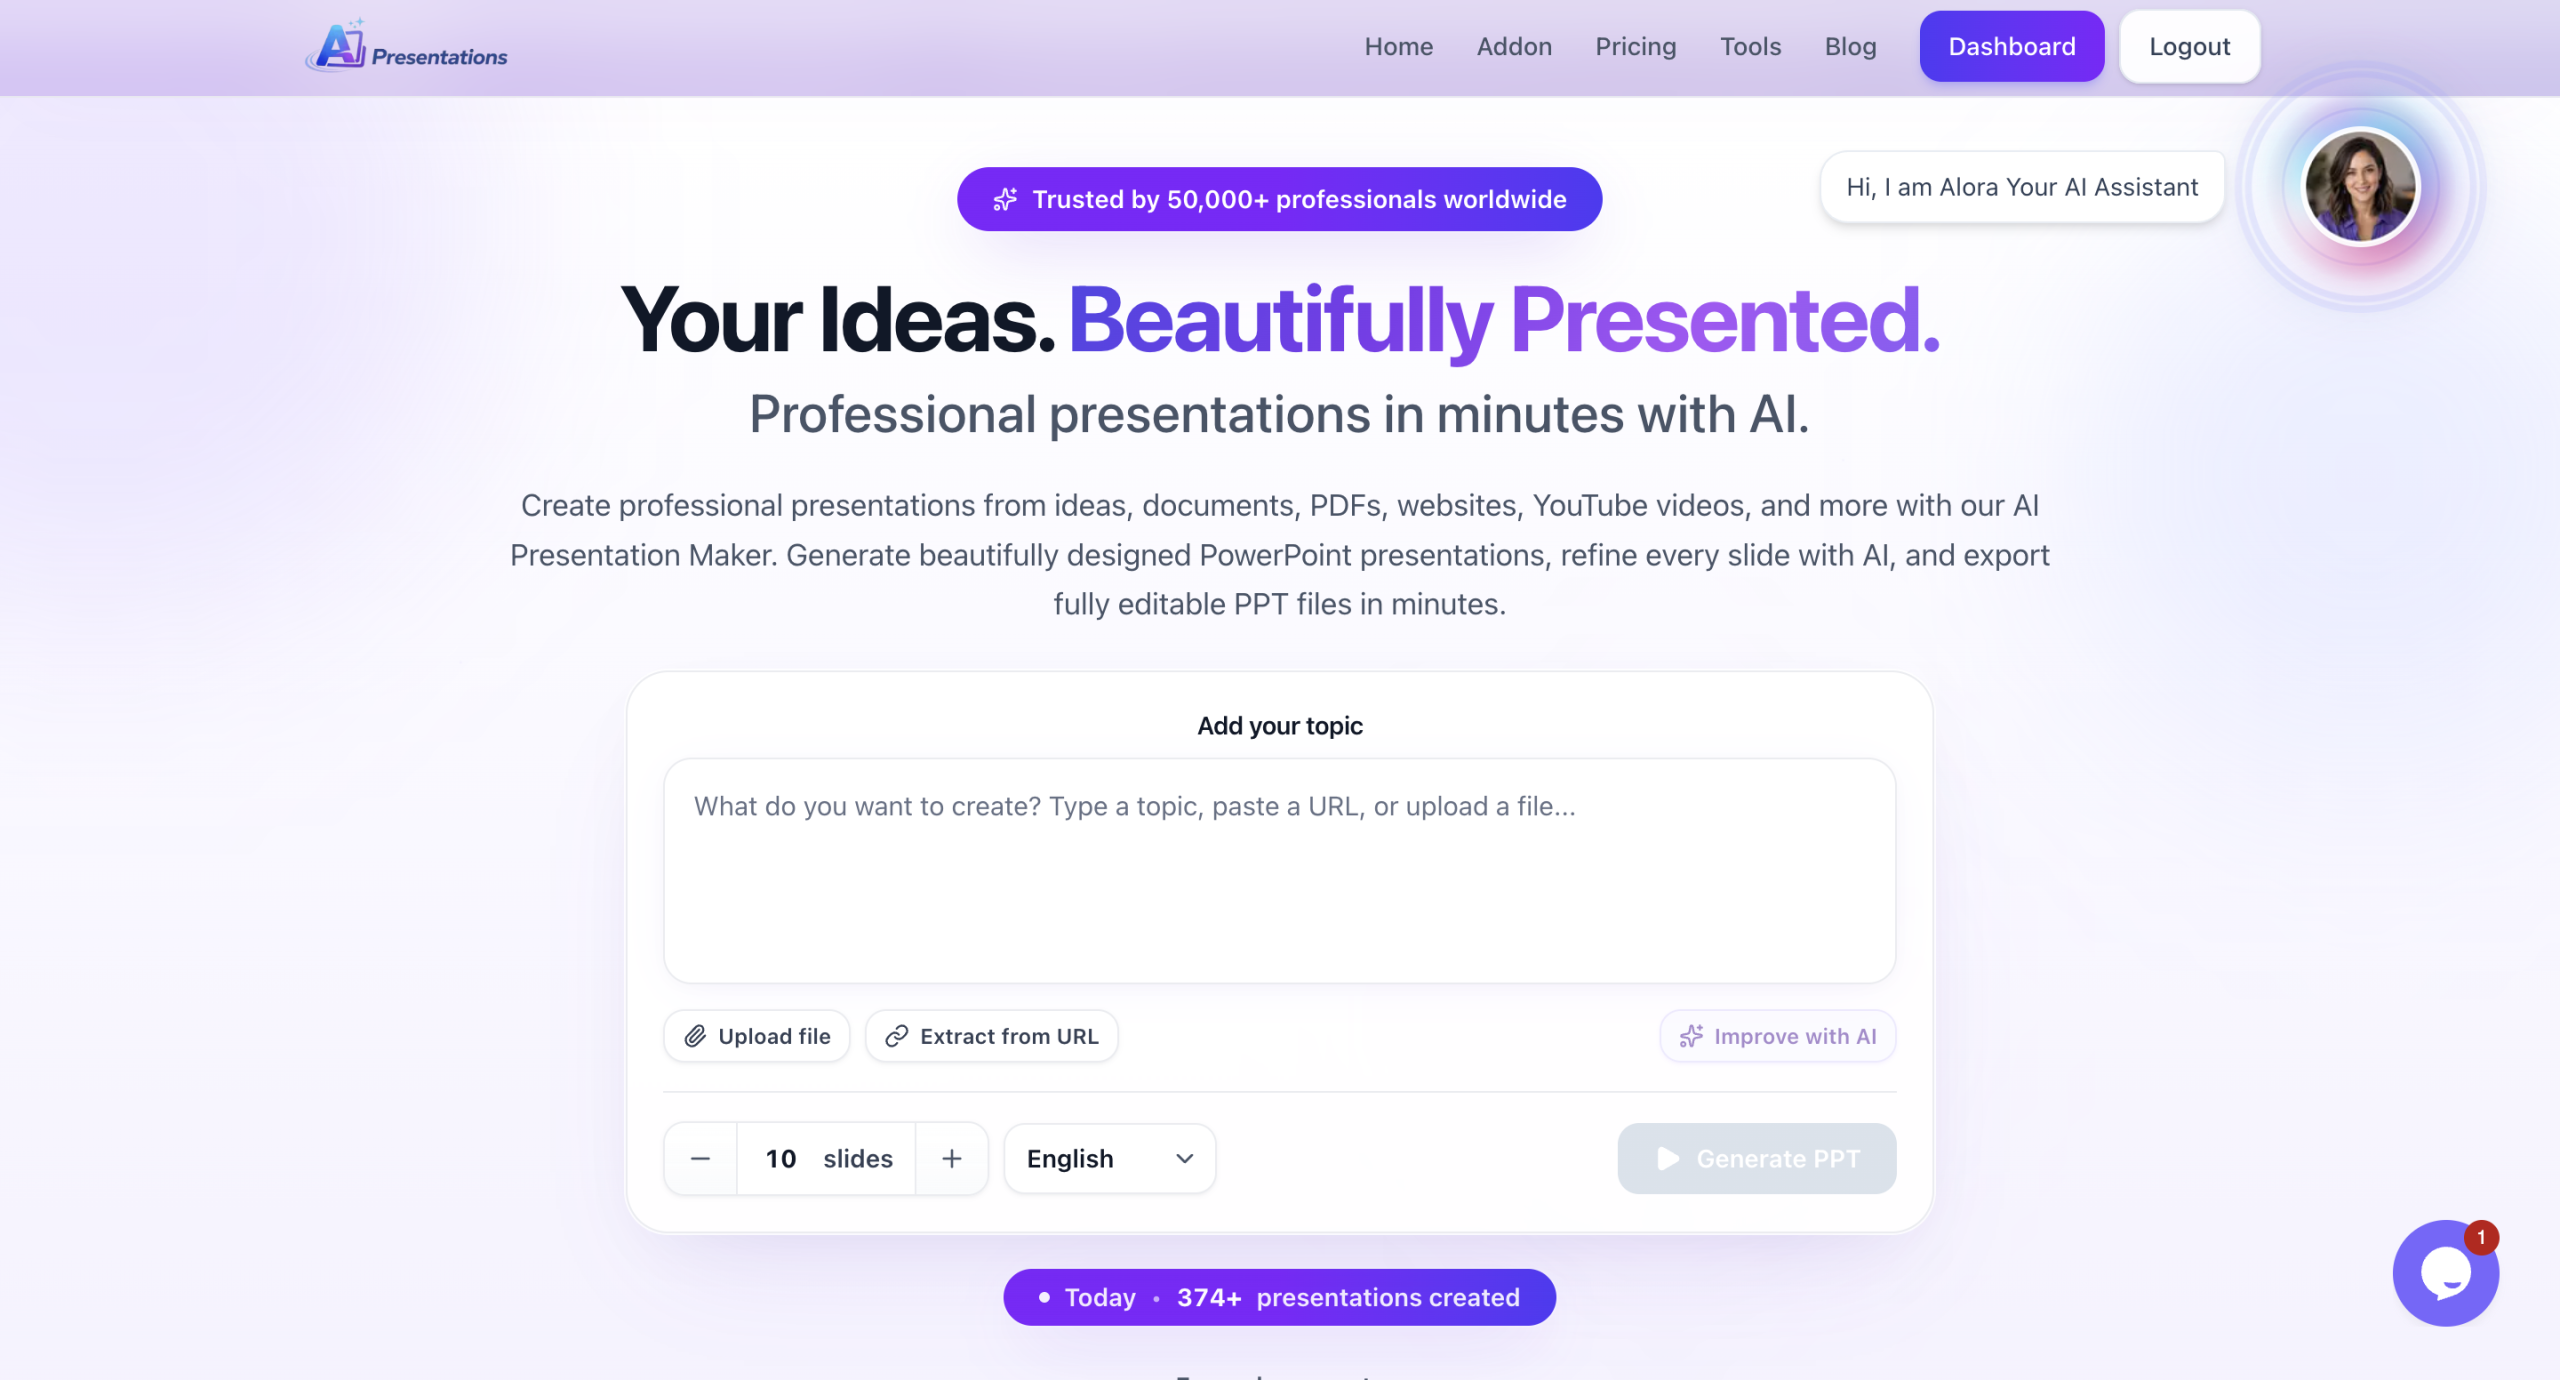
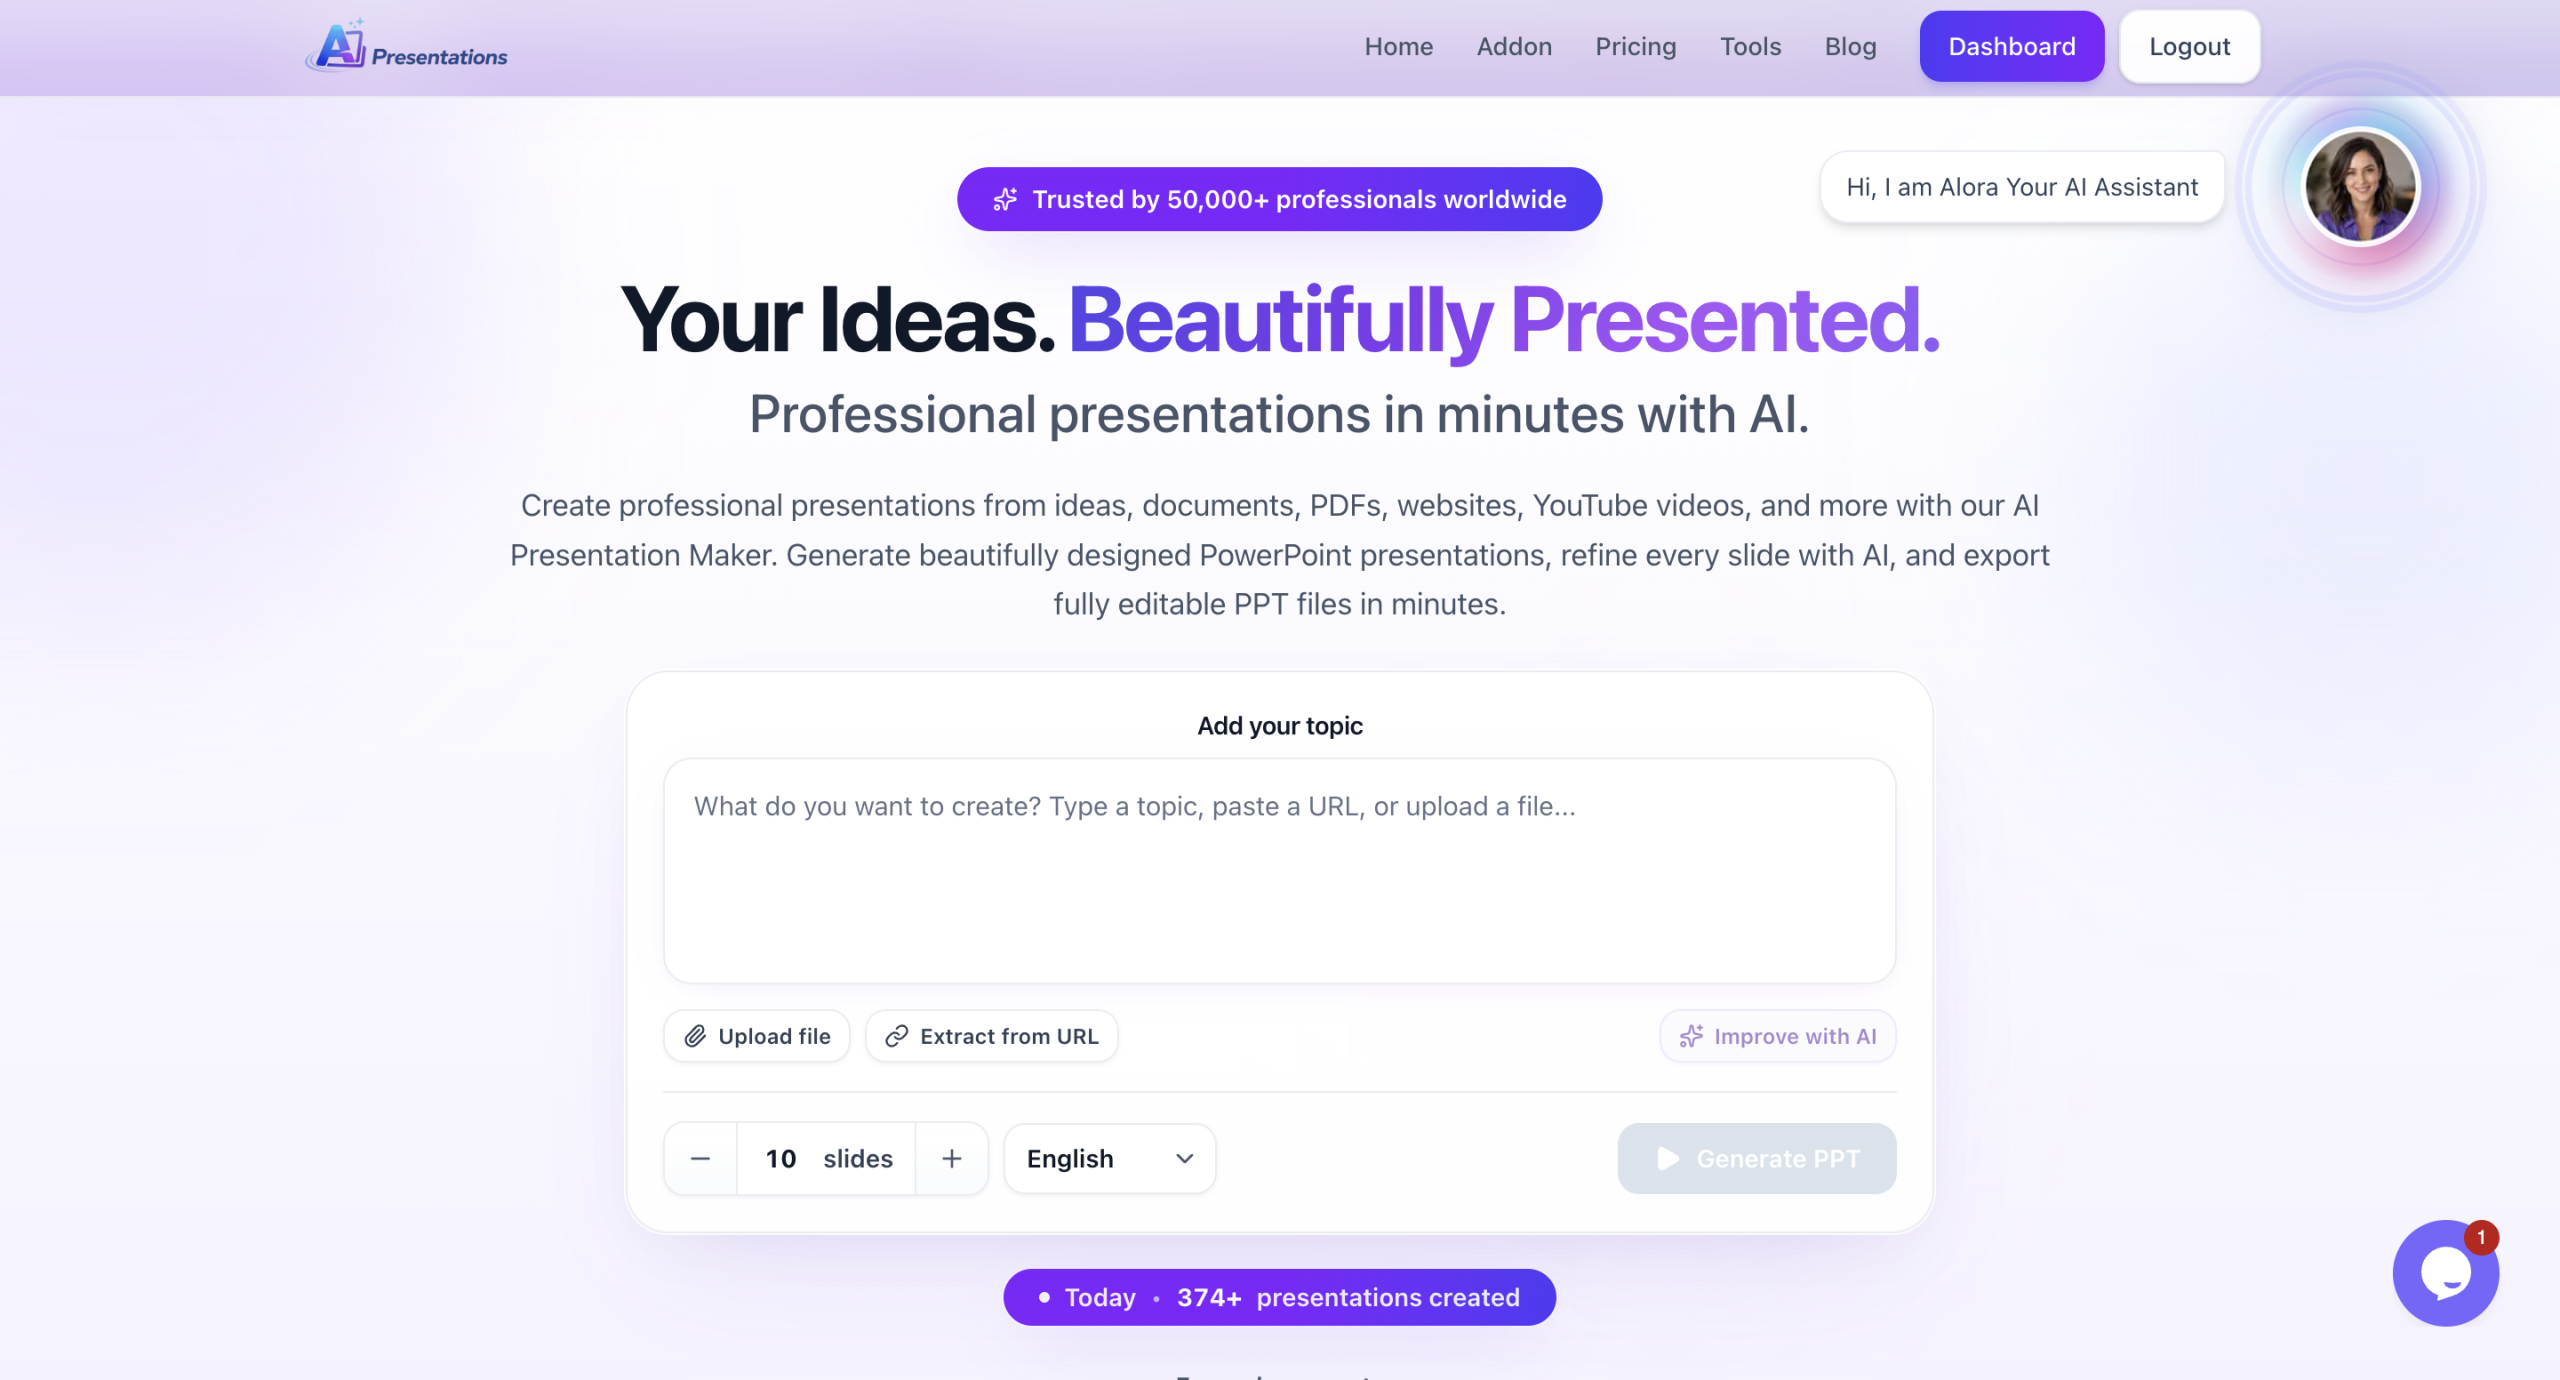
Best for: Creating professional PowerPoint presentations quickly with AI
If your goal is to create presentation slides without spending hours researching content or designing layouts, AIPresentations.app is one of the strongest options available today.
After testing it across business presentations, marketing proposals, educational content, and project reports, I found that its biggest advantage is how quickly it transforms a simple prompt into a well-structured PowerPoint presentation. Instead of giving users a blank canvas, it generates an organized outline, professionally designed slides, relevant visuals, and editable content within minutes.
Unlike many tools that focus primarily on design, AIPresentations.app balances content generation and presentation quality, making it useful for professionals, students, educators, startups, consultants, and corporate teams.
Another feature I appreciated is the flexibility after generation. AI-generated presentations are rarely perfect on the first attempt, so being able to edit text, replace visuals, reorganize slides, and refine layouts without starting over saves a significant amount of time.
Whether you’re preparing for a client meeting, classroom lecture, sales presentation, business proposal, or internal company update, the workflow feels efficient from start to finish.
Key Features
Generate complete presentations from a simple prompt
Professional slide layouts
AI-generated presentation outlines
Smart content suggestions
Large template library
PowerPoint export
Google Slides compatibility
Brand customization
Charts, icons, and images
Fast generation speed
Pros
✅ Very fast presentation generation
✅ Excellent balance between AI-generated content and design
✅ Beginner-friendly interface
✅ Good variety of templates
✅ Clean PowerPoint exports
✅ Works well for business and education
Cons
❌ Some presentations still require manual editing for niche or highly technical topics
❌ Advanced branding features require premium plans
Pricing
Free plan available
Premium plans with additional features and higher generation limits
My Experience
After testing multiple presentation topics, I consistently found AIPresentations.app among the fastest tools in this comparison. It produced structured presentations that required fewer edits than many competitors, especially for business and educational use cases.
Rather than spending time arranging slides manually, I could focus on improving the content and tailoring the presentation to my audience.
Overall Rating
⭐⭐⭐⭐⭐ 4.9/5
2. Gamma AI
Best for: Interactive presentations and modern storytelling
Gamma takes a different approach from traditional PowerPoint tools. Instead of focusing on slide-by-slide editing, it creates interactive presentations that resemble modern web pages.
If you’re building presentations for startups, product demos, workshops, or internal documentation, Gamma offers a refreshing workflow. It emphasizes visual storytelling, responsive layouts, and collaborative editing.
During testing, I liked how quickly Gamma organized information into visually appealing sections. Its AI also generated decent content from prompts and suggested layouts that looked modern without requiring much manual adjustment.
However, Gamma feels less suited for users who specifically need traditional PowerPoint files with extensive formatting control. While export options exist, some formatting adjustments may still be necessary depending on the presentation.
Key Features
AI-generated presentation structure
Interactive layouts
Built-in collaboration
AI writing assistance
Image generation support
Responsive presentation design
Team workspaces
Pros
✅ Excellent visual storytelling
✅ Modern interface
✅ Strong collaboration features
✅ Good AI writing capabilities
✅ Easy content organization
Cons
❌ Limited customization compared to PowerPoint
❌ Export formatting may require adjustments
❌ Learning curve for users accustomed to traditional slide editors
Pricing
Free plan available
Paid plans for advanced collaboration and AI usage
My Experience
Gamma impressed me with its design quality and speed. It’s particularly effective when presenting online or sharing interactive presentations with teams.
For users who frequently deliver presentations in Microsoft PowerPoint, however, other tools may provide a smoother workflow.
Best for: Beautiful presentation design and visual creativity
Canva has evolved far beyond a graphic design platform. Today, it offers AI-powered features that simplify presentation creation while maintaining one of the largest template libraries available.
Its biggest advantage is flexibility. Rather than relying entirely on AI, Canva combines intelligent design assistance with manual editing, giving users greater creative control.
During testing, I found Canva particularly useful for marketing presentations, educational slides, portfolios, event presentations, and social-media-inspired designs. The sheer number of templates makes it easy to start with a polished foundation.
The AI tools can generate content, suggest layouts, remove image backgrounds, create graphics, and improve designs. While its AI-generated presentation content wasn’t always as structured as dedicated presentation-focused tools, the design capabilities more than make up for it.
Key Features
Thousands of presentation templates
AI writing assistance
Magic Design
Image editing
Background removal
Stock photos and graphics
Animation effects
PowerPoint export
Team collaboration
Pros
✅ Outstanding template library
✅ Excellent visual design tools
✅ Beginner-friendly interface
✅ Strong collaboration
✅ Rich media library
Cons
❌ AI-generated content is less detailed than specialized presentation tools
❌ Large presentations may require more manual editing
❌ Some premium assets require a paid subscription
Pricing
Free plan available
Canva Pro for premium templates, AI features, and brand tools
My Experience
If presentation design matters more than rapid AI-generated content, Canva remains one of the strongest choices. I particularly liked how easy it was to customize colors, fonts, icons, and images without sacrificing visual consistency.
For users who enjoy having creative control over every slide, Canva continues to be one of the most versatile platforms available.
Overall Rating
⭐⭐⭐⭐☆ 4.7/5
Quick Comparison After Testing
Tool
Best For
AI Content
Templates
Editing
Export
Rating
AIPresentations.app
Fast PowerPoint creation
⭐⭐⭐⭐⭐
⭐⭐⭐⭐⭐
⭐⭐⭐⭐⭐
⭐⭐⭐⭐⭐
4.9/5
Gamma
Interactive presentations
⭐⭐⭐⭐☆
⭐⭐⭐⭐☆
⭐⭐⭐⭐☆
⭐⭐⭐⭐☆
4.6/5
Canva
Creative design
⭐⭐⭐⭐☆
⭐⭐⭐⭐⭐
⭐⭐⭐⭐⭐
⭐⭐⭐⭐⭐
4.7/5
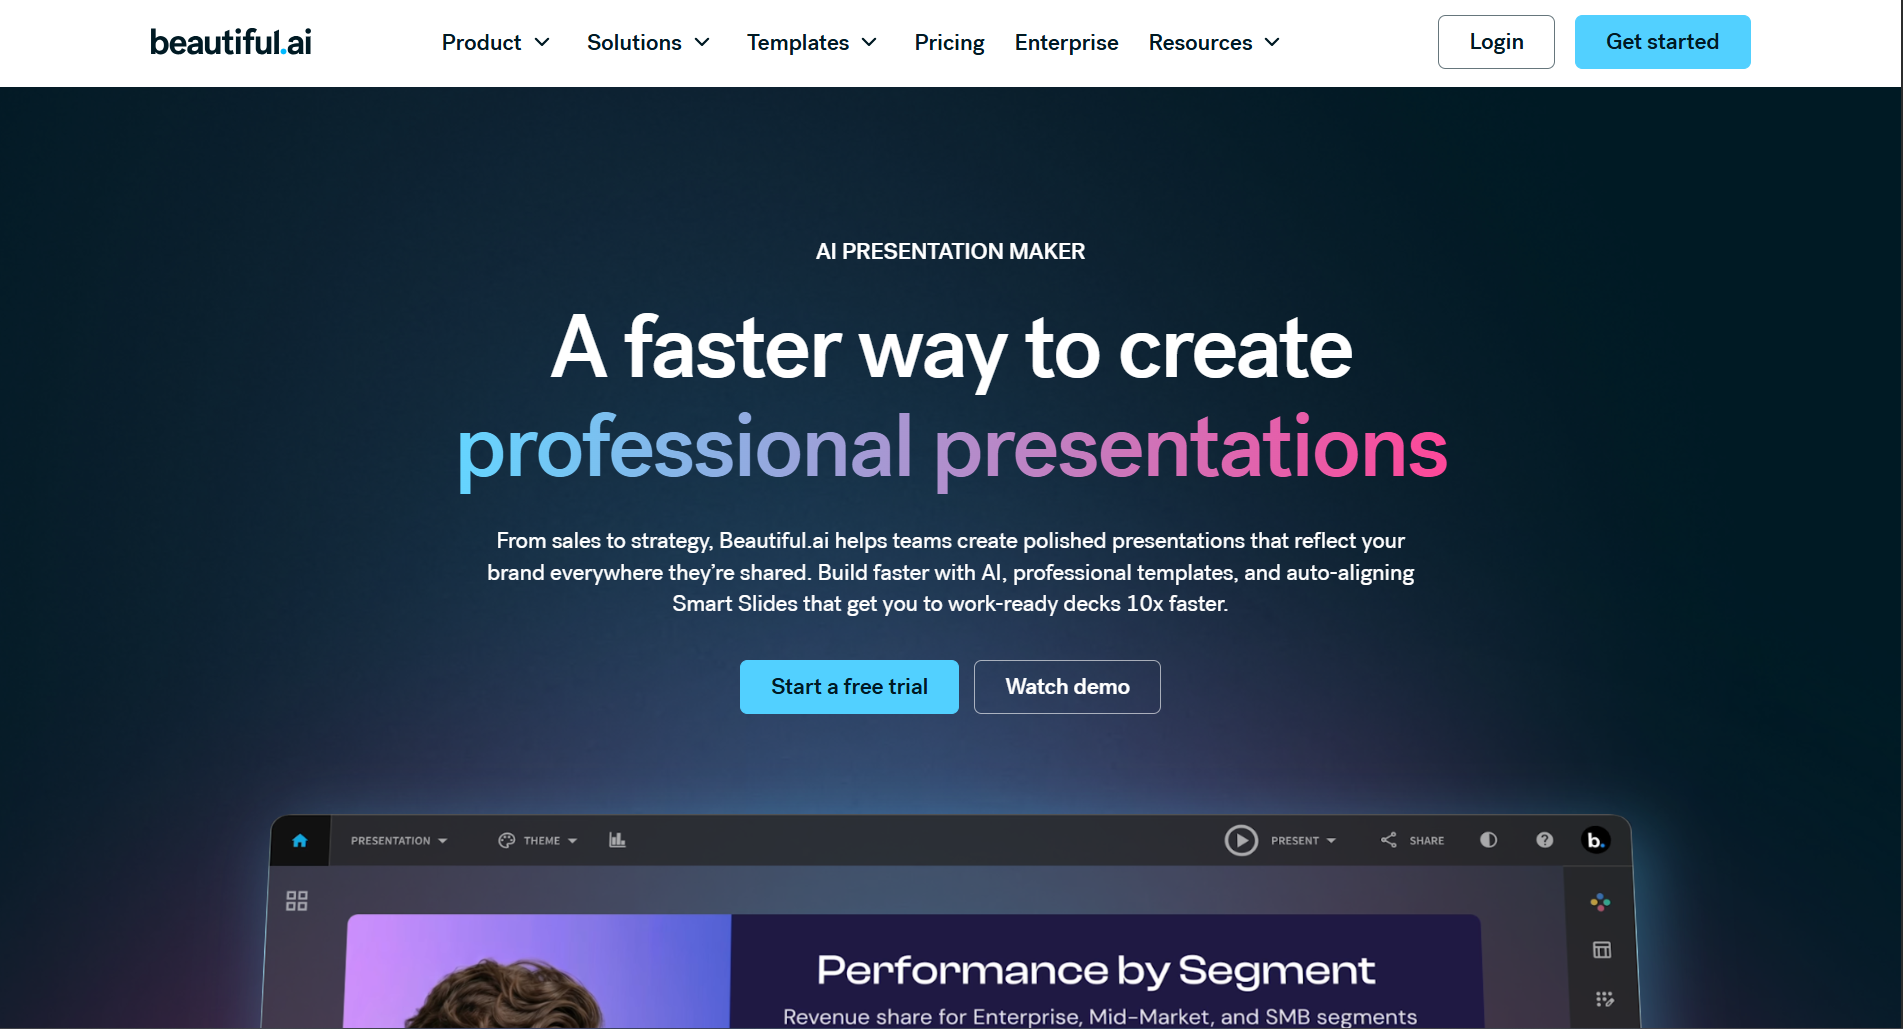
4. Beautiful.ai
Best for: Business presentations and corporate teams
If you frequently create business presentations, board meeting decks, investor updates, or executive reports, Beautiful.ai is one of the most polished tools available.
Unlike many presentation platforms that simply generate slides, Beautiful.ai focuses on presentation design automation. As you add content, it intelligently adjusts layouts, spacing, image placement, and typography to keep every slide looking professional.
During testing, I found this particularly useful because it eliminates one of the biggest frustrations in presentation design constantly moving elements around to make slides look balanced.
Instead of manually resizing charts or aligning text boxes, the platform handles much of the design work automatically.
Key Features
Smart slide layouts
Business-focused templates
AI-assisted content generation
Brand consistency tools
Team collaboration
PowerPoint export
Analytics for shared presentations
Pros
✅ Excellent business-focused templates
✅ Automatic layout optimization
✅ Professional-looking presentations
✅ Strong collaboration features
✅ Consistent slide design
Cons
❌ Less creative flexibility compared to Canva
❌ Smaller template library
❌ Premium features require a subscription
Pricing
Limited free access
Paid plans for advanced features
My Experience
Beautiful.ai consistently produced clean and polished business presentations with minimal effort. If your work involves executive meetings, client proposals, or corporate reports, it’s an excellent option.
Overall Rating
⭐⭐⭐⭐☆ 4.7/5
5. Tome
Best for: Storytelling and idea presentations
Tome approaches presentations differently than traditional slide-based tools.
Instead of focusing on individual slides, it emphasizes storytelling. The AI helps organize information into logical sections that flow naturally from one idea to the next.
When I tested Tome for startup pitches and product concepts, it generated well-structured narratives rather than isolated slides.
It also integrates AI-generated visuals and writing assistance, making it useful when you’re starting with only a rough idea.
However, users who require highly customized PowerPoint presentations may find Tome somewhat limiting because its workflow is optimized for interactive storytelling.
Key Features
AI-generated narratives
Smart page layouts
AI writing assistant
AI image generation
Collaboration tools
Presentation sharing
Interactive content
Pros
✅ Excellent storytelling capabilities
✅ Clean modern interface
✅ Fast content generation
✅ Strong AI writing
✅ Great for idea pitches
Cons
❌ Less suitable for traditional corporate presentations
❌ Limited PowerPoint editing flexibility
❌ Smaller template collection
Pricing
Free plan available
Premium plans for additional AI usage
My Experience
Tome stood out whenever I wanted to communicate an idea rather than simply display information. It’s ideal for founders, consultants, educators, and creators who rely on storytelling.
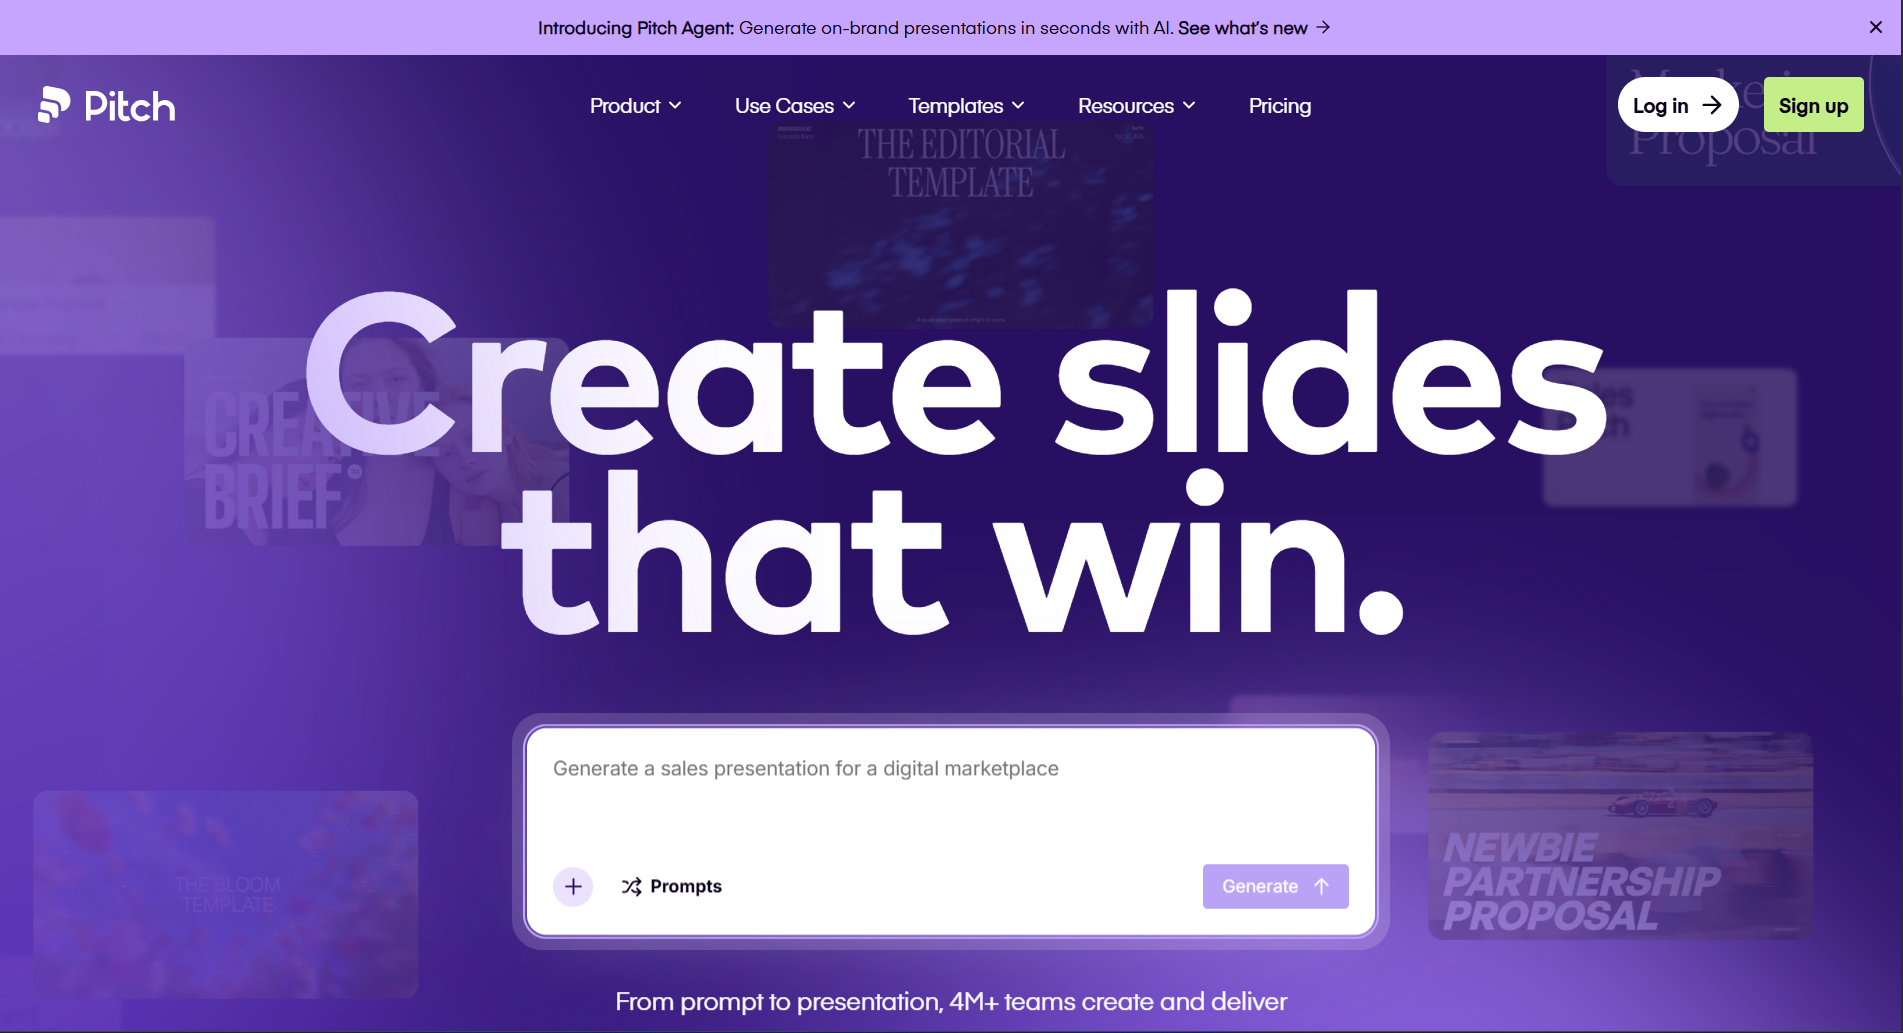
Pitch is designed for organizations where multiple people contribute to the same presentation.
Rather than focusing solely on AI, it combines collaboration, version history, comments, analytics, and presentation management into one platform.
During testing, I found Pitch especially useful for marketing teams, agencies, startups, and sales departments that frequently update presentations together.
Its collaboration experience feels closer to working in a shared document than editing traditional presentation files.
Key Features
Team collaboration
AI writing assistance
Shared workspaces
Comments and approvals
Presentation analytics
Brand management
PowerPoint export
Pros
✅ Excellent collaboration
✅ Clean interface
✅ Strong team workflow
✅ Easy sharing
✅ Business-ready templates
Cons
❌ AI generation isn’t as advanced as some competitors
❌ Better suited for teams than individuals
❌ Some enterprise features are paid
Pricing
Free plan available
Premium business plans
My Experience
Pitch is one of the strongest collaboration-focused presentation tools I tested. If your organization frequently works on presentations together, it offers a smoother workflow than many traditional presentation applications.
Overall Rating
⭐⭐⭐⭐☆ 4.6/5
7. Plus AI
Best for: Google Slides users
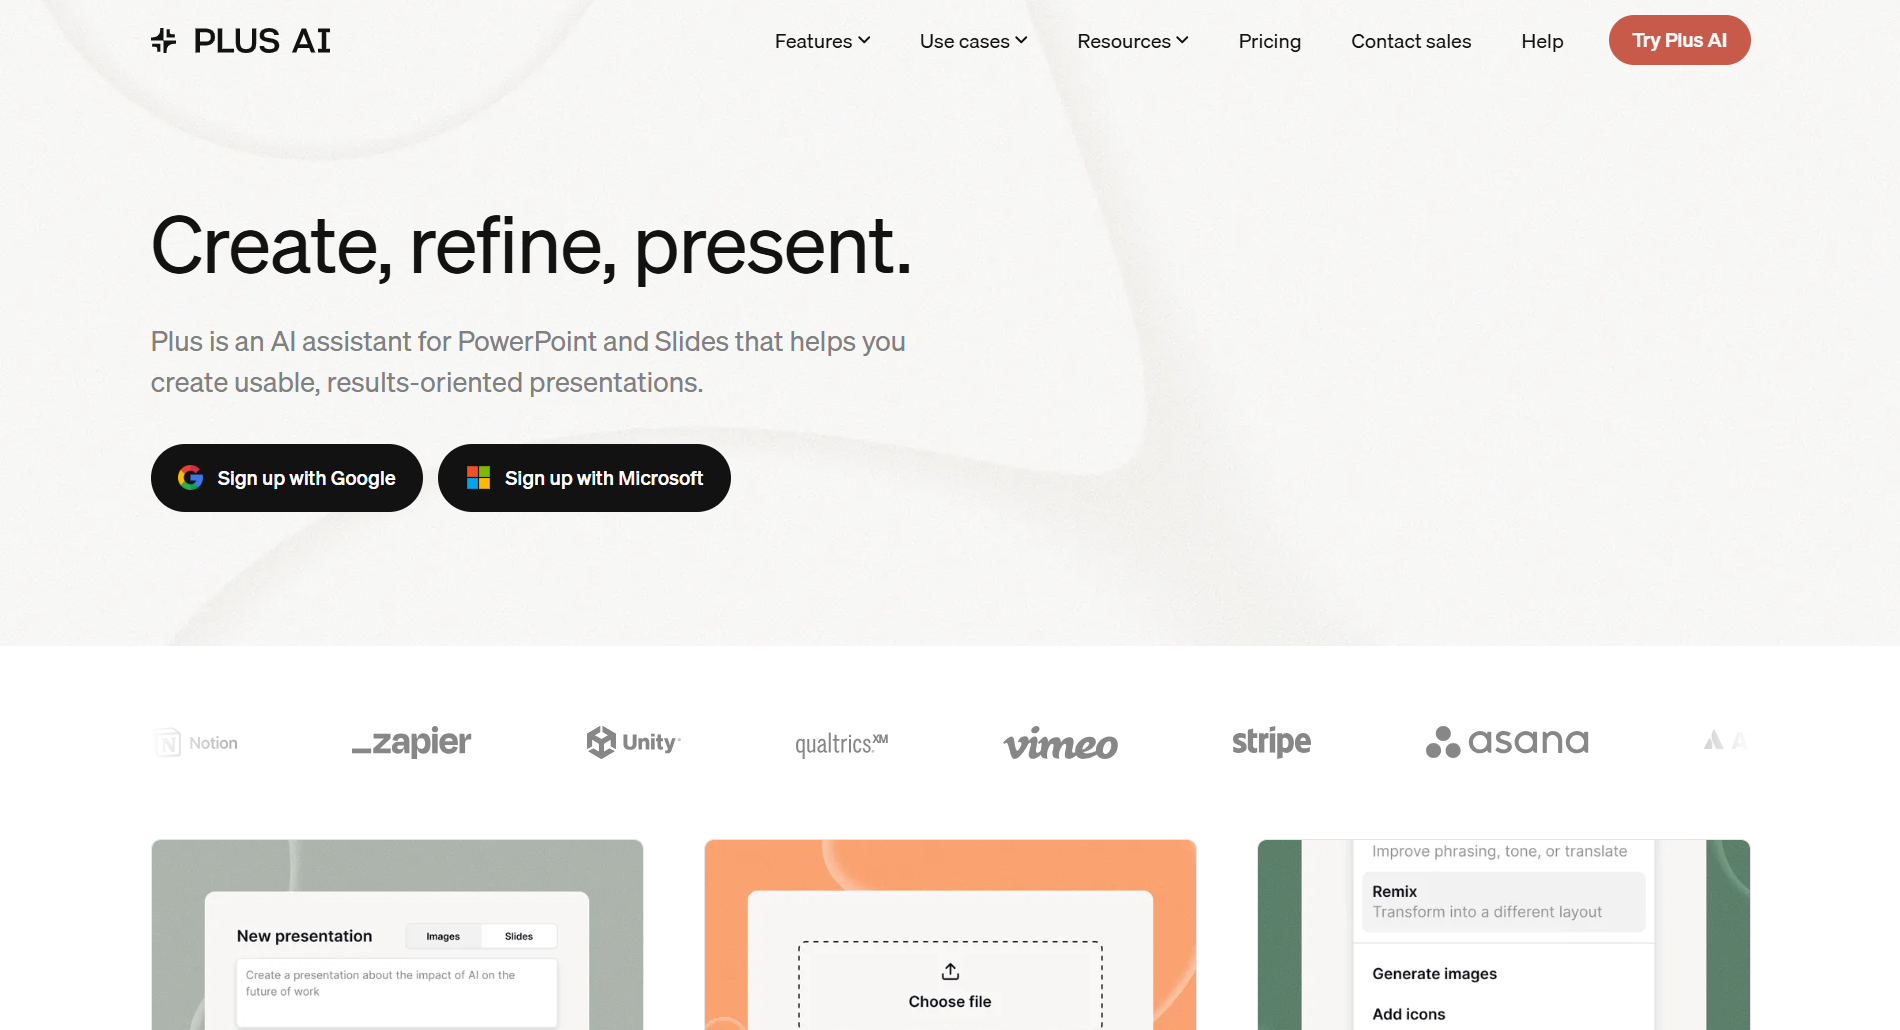
Plus AI is unique because it works directly inside Google Slides.
Instead of switching between different presentation platforms, users can generate outlines, rewrite slides, improve content, and create new presentations without leaving Google’s ecosystem.
For teams already invested in Google Workspace, this creates a much more seamless workflow.
During testing, I appreciated how quickly it generated presentation structures while preserving the familiar Google Slides editing experience.
Key Features
Google Slides integration
AI-generated outlines
Rewrite existing slides
Prompt-based generation
AI editing assistant
Team collaboration
PowerPoint compatibility
Pros
✅ Native Google Slides workflow
✅ Easy learning curve
✅ Helpful AI editing
✅ Fast presentation creation
✅ Good collaboration
Cons
❌ Requires Google Slides
❌ Smaller template ecosystem
❌ Limited standalone functionality
Pricing
Free trial
Paid subscription
My Experience
If you already spend most of your time working in Google Slides, Plus AI is one of the easiest tools to adopt because it integrates directly into your existing workflow instead of requiring you to learn an entirely new platform.
Overall Rating
⭐⭐⭐⭐☆ 4.6/5
Mid-Article Comparison
Tool
Ease of Use
AI Quality
Design
Collaboration
Best For
AIPresentations.app
⭐⭐⭐⭐⭐
⭐⭐⭐⭐⭐
⭐⭐⭐⭐⭐
⭐⭐⭐⭐☆
Fast presentation creation
Gamma
⭐⭐⭐⭐☆
⭐⭐⭐⭐☆
⭐⭐⭐⭐⭐
⭐⭐⭐⭐☆
Interactive presentations
Canva
⭐⭐⭐⭐⭐
⭐⭐⭐⭐☆
⭐⭐⭐⭐⭐
⭐⭐⭐⭐⭐
Creative presentations
Beautiful.ai
⭐⭐⭐⭐☆
⭐⭐⭐⭐☆
⭐⭐⭐⭐⭐
⭐⭐⭐⭐☆
Business presentations
Tome
⭐⭐⭐⭐☆
⭐⭐⭐⭐☆
⭐⭐⭐⭐☆
⭐⭐⭐⭐☆
Storytelling
Pitch
⭐⭐⭐⭐☆
⭐⭐⭐⭐☆
⭐⭐⭐⭐☆
⭐⭐⭐⭐⭐
Team collaboration
Plus AI
⭐⭐⭐⭐⭐
⭐⭐⭐⭐☆
⭐⭐⭐⭐☆
⭐⭐⭐⭐☆
Google Slides users
8. Visme
Best for: Marketing presentations, reports, and data visualization
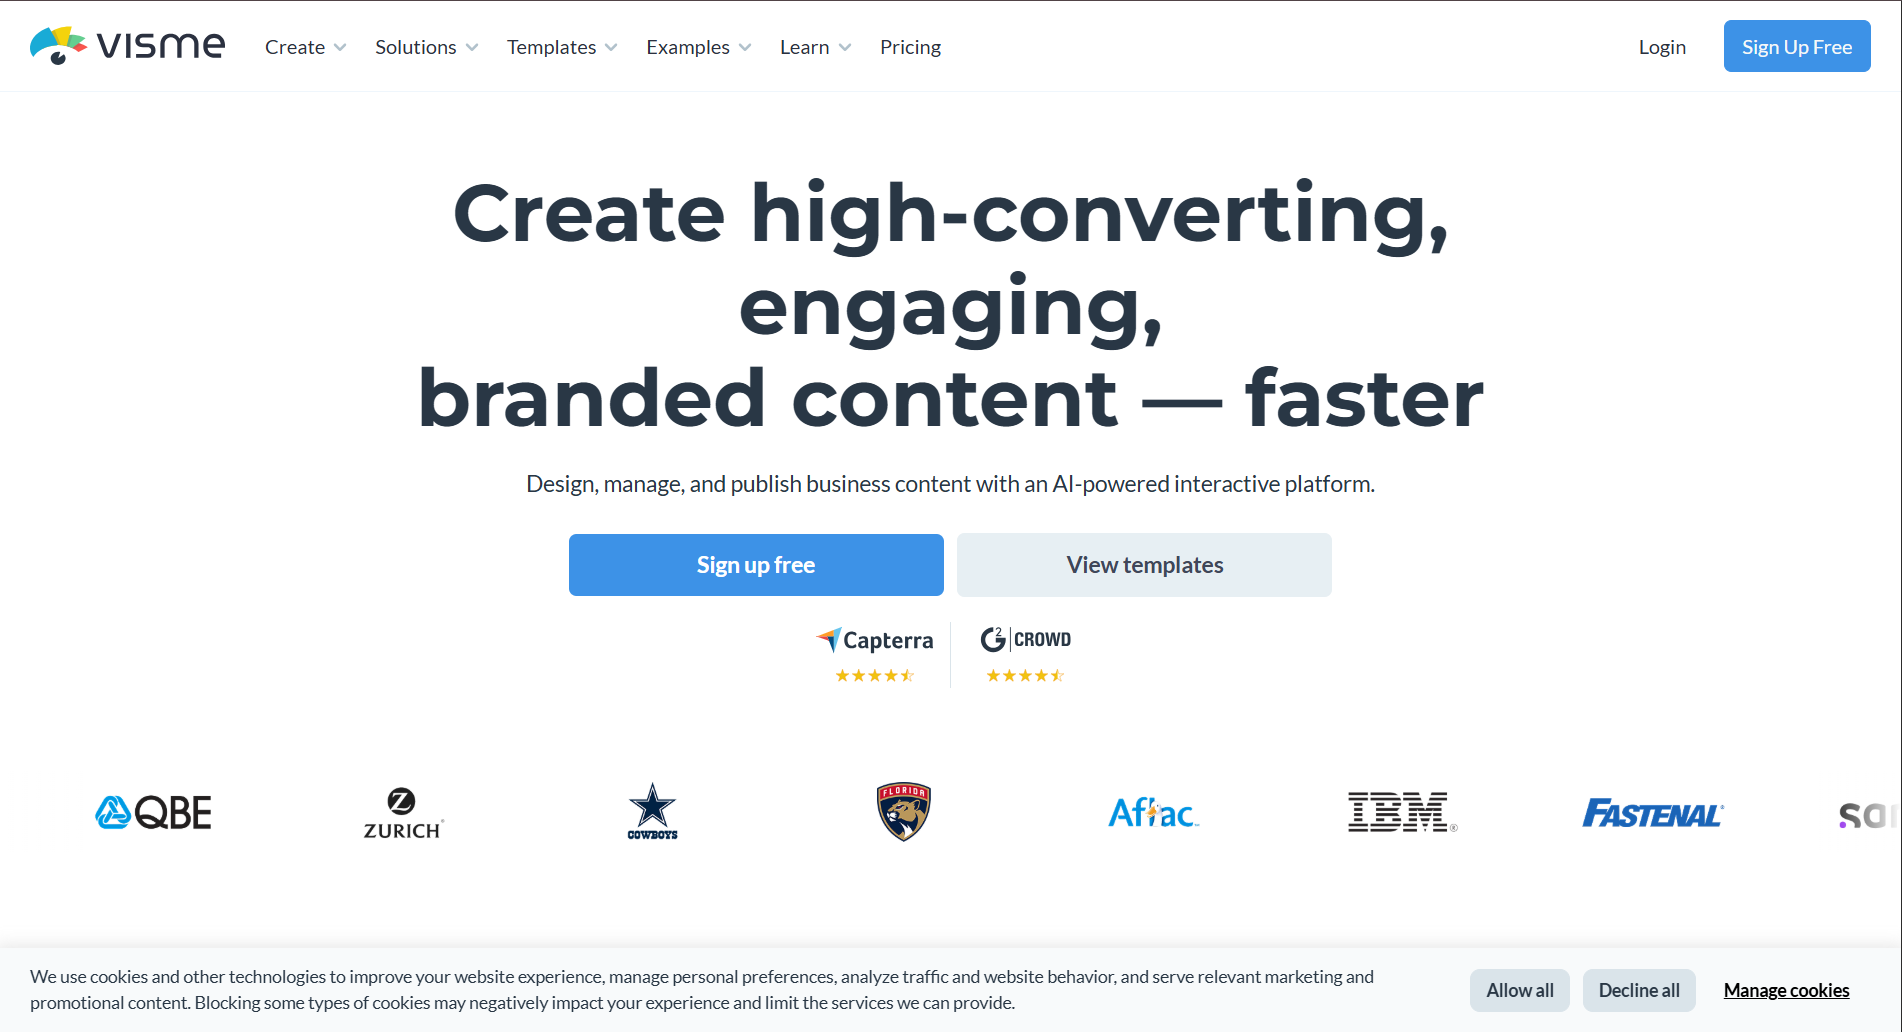
Visme is more than a presentation platform. It’s a complete visual communication tool designed for businesses, marketers, educators, and organizations that regularly create presentations, reports, infographics, proposals, and dashboards.
During my testing, Visme stood out because of its extensive collection of charts, icons, illustrations, and data visualization tools. If your presentations rely heavily on statistics, KPIs, or business reports, it offers more flexibility than many competitors.
While its AI capabilities continue to improve, I found that Visme’s biggest advantage is its ability to turn information-heavy presentations into visually engaging slides.
Key Features
AI-assisted content generation
Professional templates
Interactive charts
Infographics
Brand management
Collaboration
PowerPoint export
Analytics
Pros
✅ Excellent data visualization
✅ Large library of business assets
✅ Strong branding options
✅ Interactive content
✅ Professional templates
Cons
❌ AI generation isn’t as advanced as dedicated AI-first platforms
❌ Beginners may need time to explore all features
❌ Premium assets require a subscription
Pricing
Limited free plan
Paid plans for advanced features
My Experience
For business reports and marketing presentations, Visme consistently produced attractive visuals with relatively little effort. If data storytelling is a major part of your work, it’s a strong choice.
Overall Rating
⭐⭐⭐⭐☆ 4.5/5
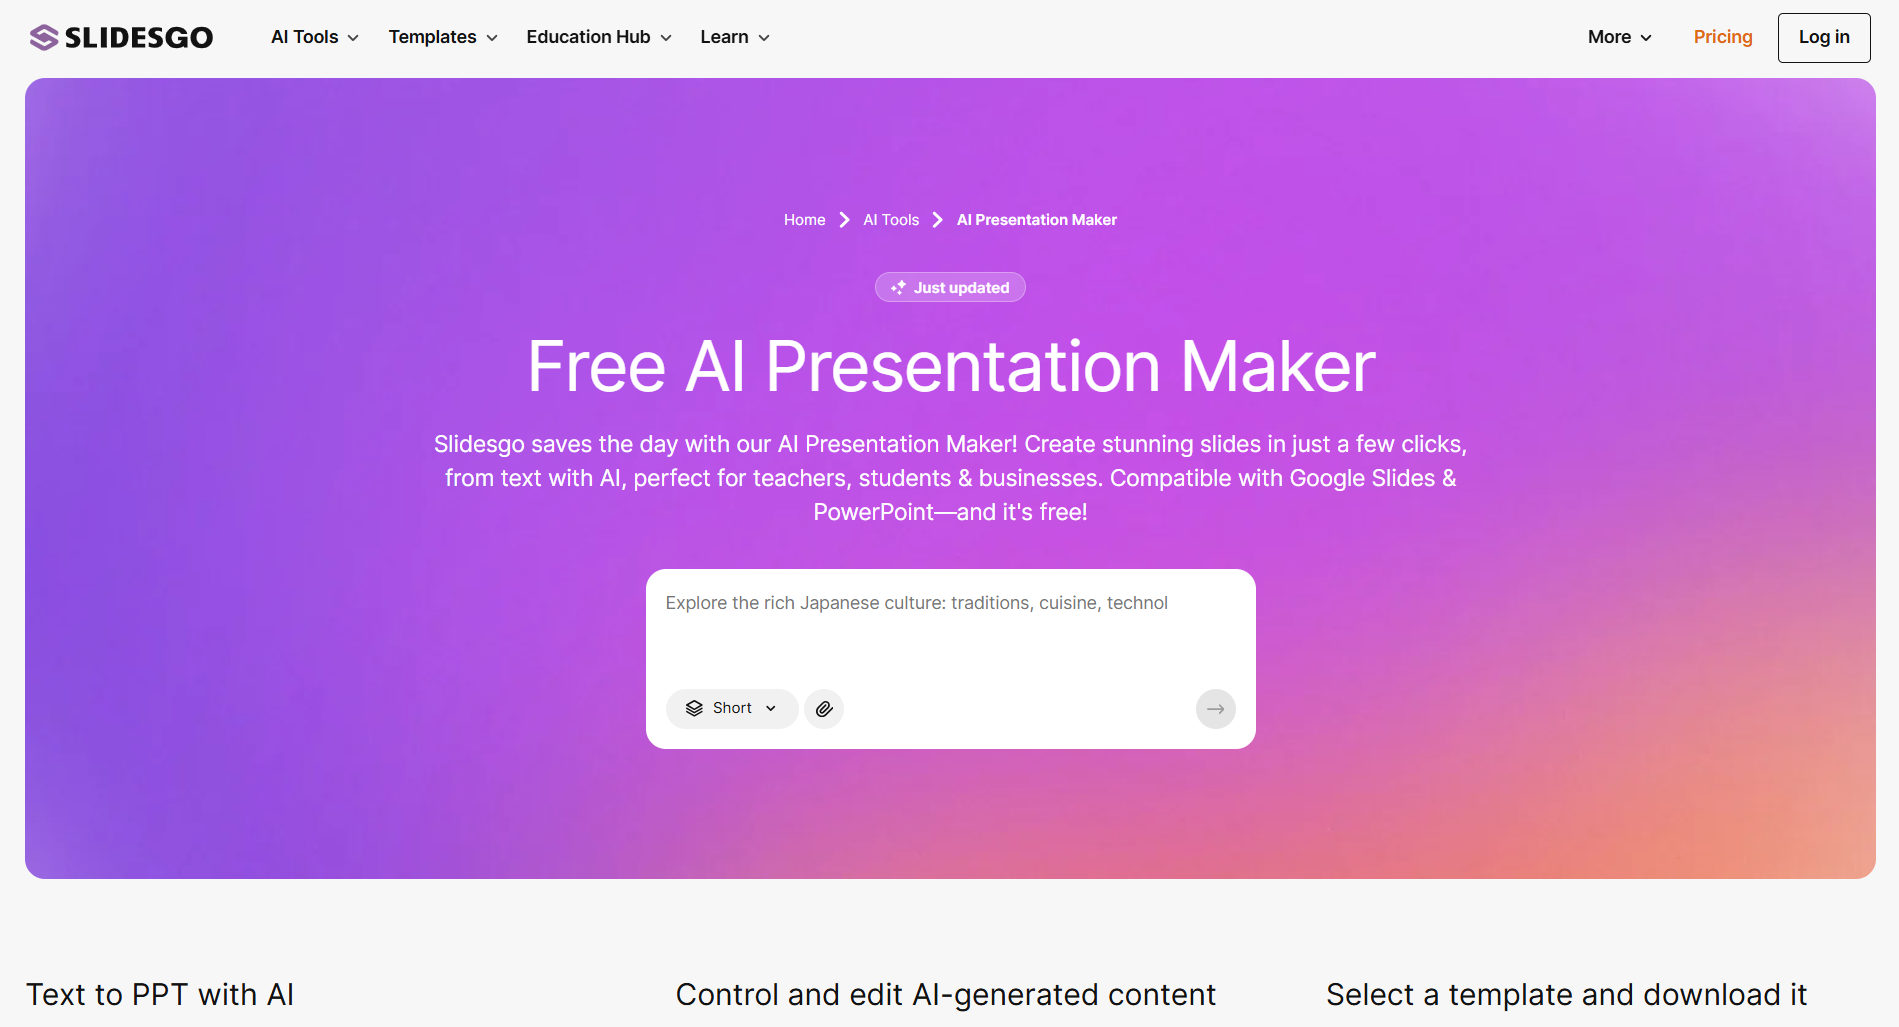
9. Slidesgo AI
Best for: Ready-made templates with AI assistance
Slidesgo has long been known for its extensive collection of presentation templates, and its AI features make creating presentations even faster.
Rather than starting from scratch, users can generate presentation drafts and combine them with Slidesgo’s professionally designed templates. This is particularly helpful for students, teachers, freelancers, and professionals who need visually appealing presentations without investing hours in design.
During testing, I found the platform easy to use and appreciated the variety of layouts available for different industries and presentation styles.
Key Features
AI-generated presentations
Large template library
Google Slides compatibility
PowerPoint compatibility
Educational templates
Business templates
Editable graphics
Pros
✅ Huge template collection
✅ Beginner-friendly
✅ Fast presentation creation
✅ Great for education
✅ Easy customization
Cons
❌ AI writing is more basic than some competitors
❌ Limited advanced collaboration
❌ Premium templates require a subscription
Pricing
Free plan
Premium subscription
My Experience
Slidesgo AI is ideal if you value professionally designed templates and want AI to speed up the initial draft. It’s particularly useful for classrooms, workshops, and general business presentations.
Overall Rating
⭐⭐⭐⭐☆ 4.4/5
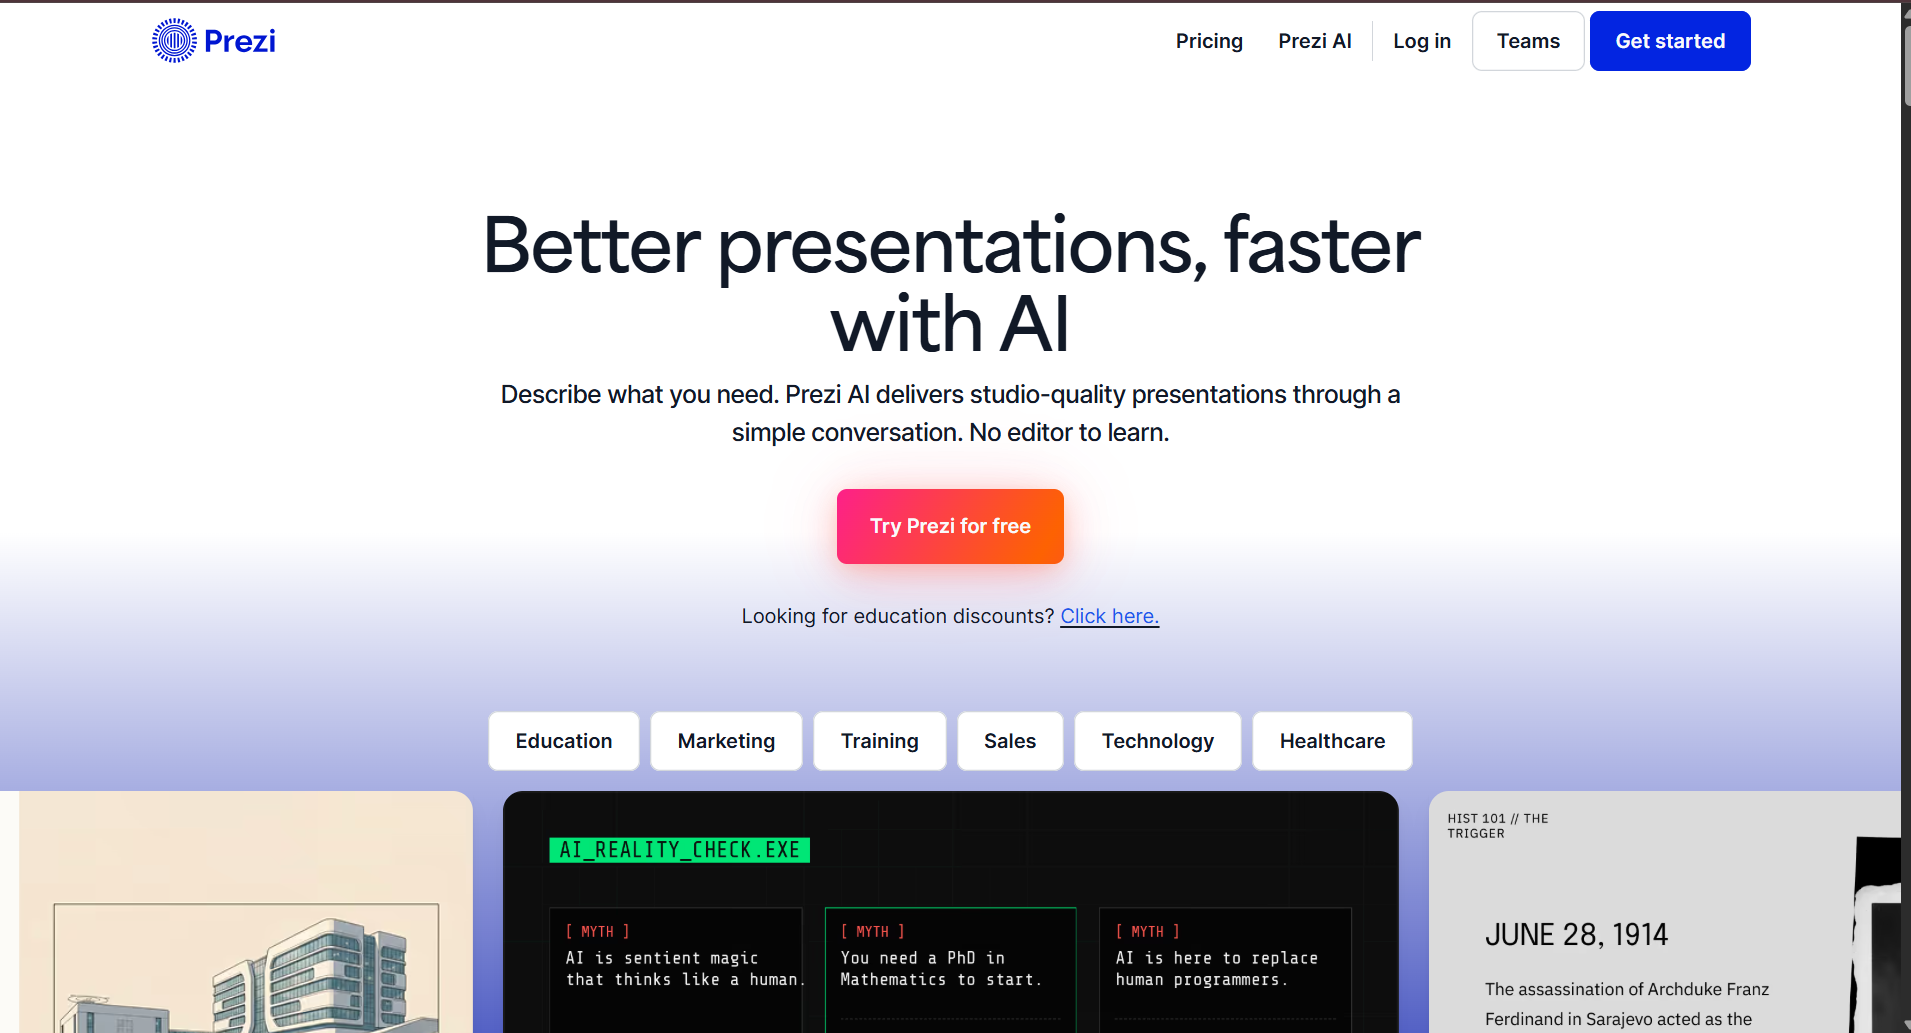
10. Prezi AI
Best for: Dynamic and non-linear presentations
Prezi has always been different from traditional presentation software, and its AI features continue that approach.
Instead of organizing content as a sequence of slides, Prezi allows presenters to zoom in and out of topics, creating a more dynamic storytelling experience.
This style works especially well for keynote presentations, workshops, conferences, and educational sessions where audience engagement is a priority.
During testing, I found that Prezi’s AI helped generate presentation structures quickly, but its unique navigation style requires some practice if you’re accustomed to conventional slide decks.
Key Features
AI-assisted presentation creation
Zoom-based navigation
Dynamic storytelling
Collaboration
Presentation analytics
Cloud sharing
Multimedia support
Pros
✅ Unique presentation style
✅ Highly engaging
✅ Excellent for public speaking
✅ Good storytelling workflow
✅ Strong visual impact
Cons
❌ Learning curve for new users
❌ Not ideal for every business environment
❌ Limited compatibility with traditional slide workflows
Pricing
Free trial
Paid plans
My Experience
Prezi remains one of the most distinctive presentation platforms available. If you regularly speak at conferences or want presentations that stand out visually, it’s worth considering.
Every user has different requirements, so there isn’t a single tool that’s perfect for everyone.
Choose AIPresentations.app if you:
Want to create complete presentations quickly
Need PowerPoint-ready files
Prefer balanced AI content and professional design
Create business, educational, or client presentations regularly
Choose Gamma if you:
Prefer interactive presentations
Deliver online presentations
Want modern layouts
Choose Canva if you:
Care most about visual design
Customize every slide
Create marketing or social-media-focused presentations
Choose Beautiful.ai if you:
Build business presentations frequently
Need polished corporate designs
Want automatic layout optimization
Choose Tome if you:
Focus on storytelling
Create startup pitches
Present ideas instead of detailed reports
Choose Pitch if you:
Collaborate with teams
Need shared workspaces
Want version history and comments
Choose Plus AI if you:
Work primarily in Google Slides
Want AI assistance without leaving your existing workflow
Choose Visme if you:
Build reports and dashboards
Use charts and infographics often
Need strong branding capabilities
Choose Slidesgo AI if you:
Prefer starting from ready-made templates
Create educational presentations
Want a wide variety of design styles
Choose Prezi AI if you:
Deliver keynote presentations
Want dynamic storytelling
Need presentations that stand out visually
Benefits of Using AI Tools for PPT Presentation
Creating presentations is no longer just about arranging text and images on slides. Modern AI-powered tools simplify the entire workflow from brainstorming ideas to designing polished presentations.
Here are some of the biggest advantages I noticed while testing these tools.
1. Save Hours of Manual Work
Building a presentation from scratch often involves researching the topic, writing content, designing layouts, selecting visuals, and formatting slides.
AI significantly reduces this workload by generating a structured draft in minutes. Instead of starting with a blank screen, you begin with a complete presentation that you can refine and customize.
2. Create Better-Structured Presentations
Many AI tools organize content into logical sections with clear titles, supporting points, and smooth transitions.
This helps improve the overall flow of a presentation, especially when you’re explaining complex topics or presenting detailed information.
3. Improve Design Consistency
One of the most common challenges in presentation design is maintaining a consistent look across every slide.
AI tools automatically apply layouts, fonts, colors, spacing, and alignment, resulting in presentations that look polished without requiring professional design skills.
4. Generate Content Faster
Whether you’re preparing a business proposal, project report, classroom lecture, or sales deck, AI can help generate outlines, summaries, headlines, and supporting points much faster than writing everything manually.
5. Increase Productivity
Instead of spending hours formatting slides, you can focus on refining your message, adding personal insights, and preparing for your presentation.
For professionals who create presentations regularly, these time savings can be substantial over the course of a year.
6. Support Different Presentation Types
Most modern AI tools can assist with a variety of presentation formats, including:
Business proposals
Sales presentations
Investor pitches
Educational lectures
Training materials
Marketing reports
Project updates
Research presentations
Product launches
Conference talks
Things to Consider Before Choosing an AI Tool
Not every AI tool is designed for the same type of user. Before selecting one, it’s worth considering a few practical factors.
Your Workflow
If your team already uses PowerPoint or Google Slides, choose a tool that integrates smoothly with your existing workflow rather than requiring you to learn an entirely new platform.
Export Quality
A presentation may look great inside the platform but lose formatting when exported.
Always check whether the tool preserves layouts, fonts, images, and animations when downloading PowerPoint files.
Customization Options
AI-generated presentations are only a starting point.
Choose a tool that allows you to easily edit text, rearrange slides, replace visuals, and apply your own branding.
Collaboration Features
If multiple people work on presentations, look for features like:
Real-time editing
Comments
Version history
Shared workspaces
Access controls
Pricing
Some tools offer generous free plans, while others require a subscription for advanced AI capabilities.
Compare features carefully to ensure the pricing matches your actual needs.
Data Privacy
If you’re working with confidential business information, review how the platform handles uploaded documents and AI-generated content.
Frequently Asked Questions
What are AI tools for PPT presentation?
AI tools for PPT presentation use artificial intelligence to help create presentation outlines, generate slide content, suggest layouts, and simplify the presentation creation process.
Can AI create an entire presentation?
Yes. Many modern tools can generate a complete presentation from a prompt, document, or topic. However, reviewing and customizing the final result is always recommended.
Are free AI presentation tools worth using?
Many free plans provide enough functionality for occasional users, students, and educators. Premium plans generally unlock additional AI usage, templates, collaboration, and branding features.
Which AI tool is best for business presentations?
If your focus is business presentations, look for platforms that offer professional templates, clean PowerPoint exports, branding options, and collaboration features. The right choice depends on your workflow and presentation style.
Can AI tools export PowerPoint files?
Most leading platforms support PowerPoint export, although formatting quality can vary between tools. It’s a good idea to review exported presentations before sharing them.
Do AI tools work with Google Slides?
Some platforms integrate directly with Google Slides, while others allow you to export presentations for further editing.
Are AI-generated presentations editable?
Yes. Nearly all modern AI tools allow you to edit text, replace images, rearrange slides, change themes, and customize the presentation after generation.
Are AI tools suitable for students?
Absolutely. Students can use AI tools to create class presentations, project reports, research summaries, seminar slides, and thesis presentations more efficiently.
Can AI help with presentation design?
Yes. Many platforms automatically suggest layouts, typography, color schemes, icons, and images to create visually appealing presentations.
How do I choose the right AI tool?
The best choice depends on your goals. Consider factors such as presentation quality, editing flexibility, collaboration features, export options, pricing, and how well the tool fits your existing workflow.
Final Verdict
After comparing ten of the most popular AI tools for PPT presentation, one thing became clear: there is no single platform that’s perfect for every user.
Some tools prioritize creative design, while others focus on collaboration, storytelling, or business presentations. The right choice depends on how you work, who your audience is, and how much customization you need after the initial draft.
If your priority is creating professional PowerPoint presentations quickly with a balance of strong AI-generated content, polished designs, and flexible editing, AIPresentations.app is a compelling option to explore.
For users who value design freedom, collaboration, or unique presentation styles, platforms like Canva, Pitch, Gamma, Beautiful.ai, and others each offer strengths that may better suit specific workflows.
Rather than relying on a single feature, evaluate each tool based on the way you create and deliver presentations. The right tool should help you spend less time building slides and more time communicating your ideas effectively.
आज के समय में Presentation बनाना पहले से कहीं ज्यादा आसान हो गया है। अगर पहले आपको एक PowerPoint Presentation तैयार करने में कई घंटे लगते थे, तो अब Artificial Intelligence (AI) की मदद से वही काम कुछ ही मिनटों में किया जा सकता है।
चाहे आपको स्कूल प्रोजेक्ट बनाना हो, कॉलेज सेमिनार की तैयारी करनी हो, ऑफिस में क्लाइंट प्रेजेंटेशन देनी हो या बिजनेस पिच तैयार करनी हो, AI आपकी पूरी Presentation बनाने की प्रक्रिया को तेज और आसान बना सकता है।
अब आपको हर स्लाइड का कंटेंट खुद लिखने, डिजाइन चुनने या लेआउट तैयार करने की जरूरत नहीं होती। आप सिर्फ अपना Topic, PDF, Word Document, YouTube Video या Website URL देते हैं और AI उसके आधार पर एक पूरी Presentation तैयार कर देता है। इसके बाद आप जरूरत के अनुसार स्लाइड्स को एडिट करके उन्हें PowerPoint या Google Slides में इस्तेमाल कर सकते हैं।
इस गाइड में हम विस्तार से सीखेंगे
AI से PPT कैसे बनाएं?
AI से Presentation कैसे बनाएं?
AI से PowerPoint कैसे बनाएं?
बेहतर रिजल्ट के लिए Prompt कैसे लिखें?
AI से बनी Presentation को Professional कैसे बनाएं?
किन गलतियों से बचना चाहिए?
अगर आप पहली बार AI की मदद से Presentation बनाना चाहते हैं, तो यह गाइड आपके लिए है।
AI से PPT कैसे बनाएं? (Quick Answer)
अगर आपके पास समय कम है, तो इन आसान स्टेप्स को फॉलो करें—
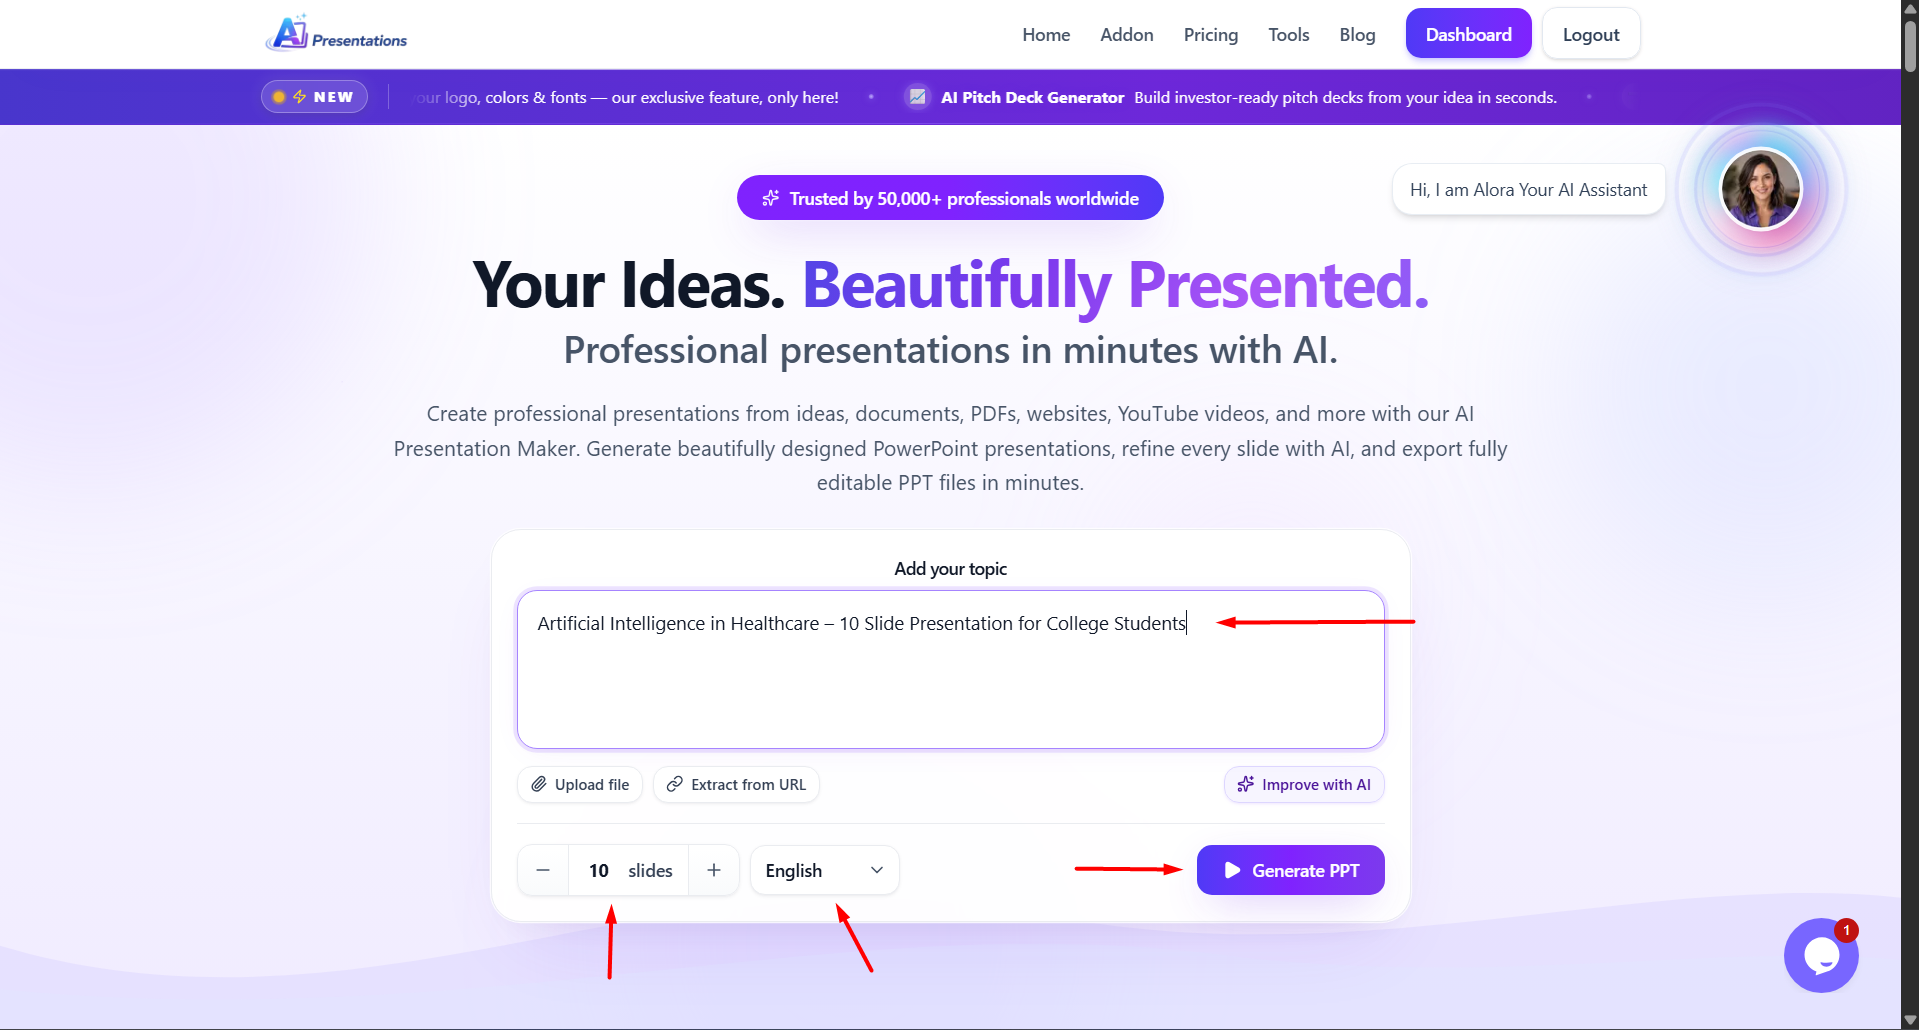
अपना Topic लिखें या PDF, Word File, YouTube Video या Website URL अपलोड करें।
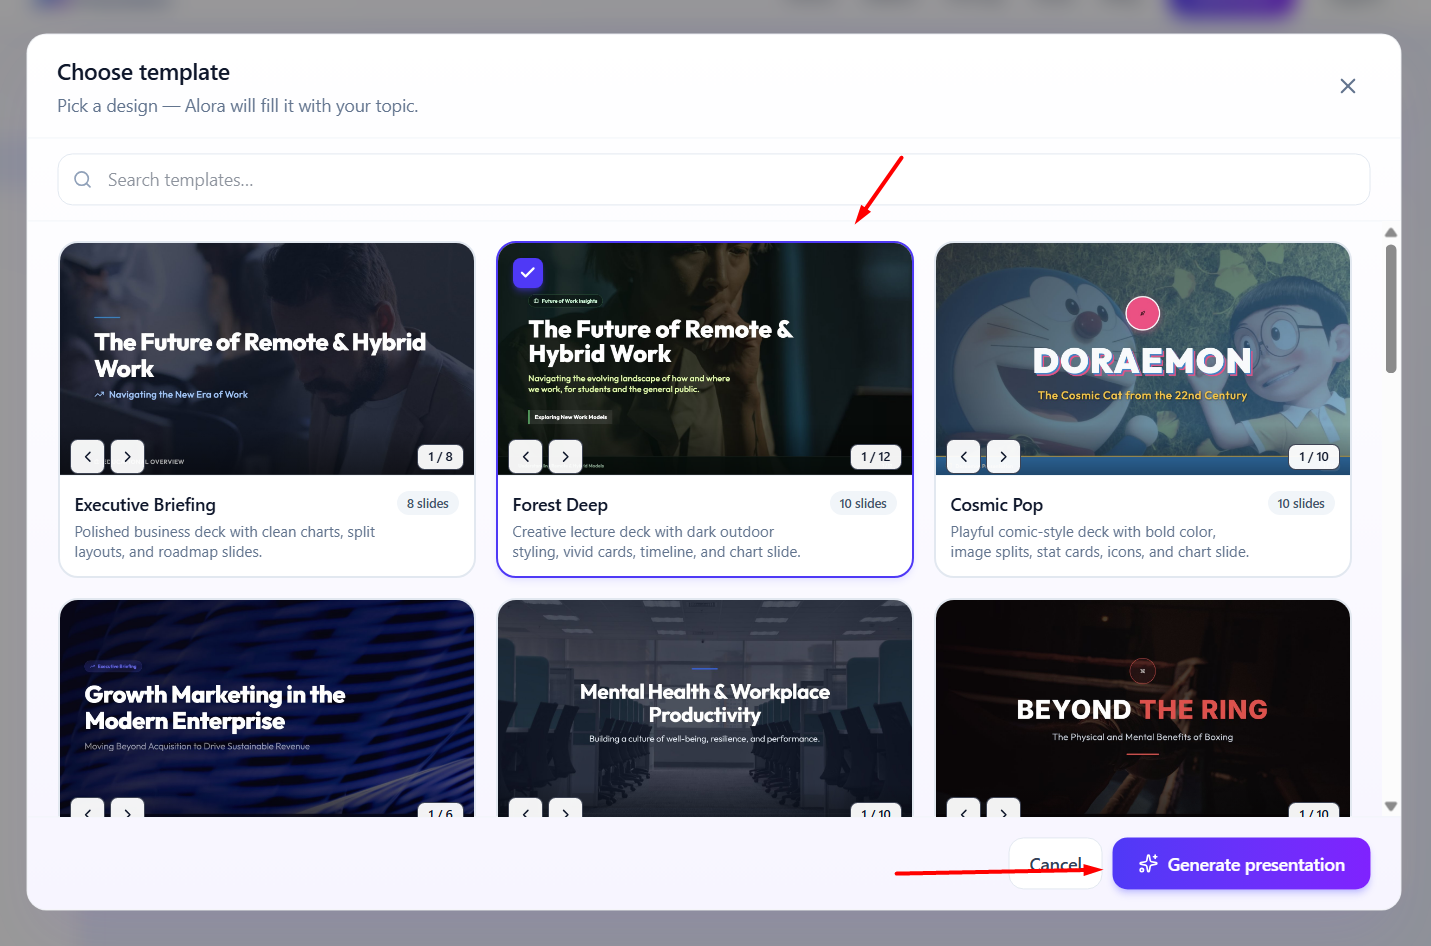
Presentation की भाषा और Theme चुनें।
Generate Presentation पर क्लिक करें।
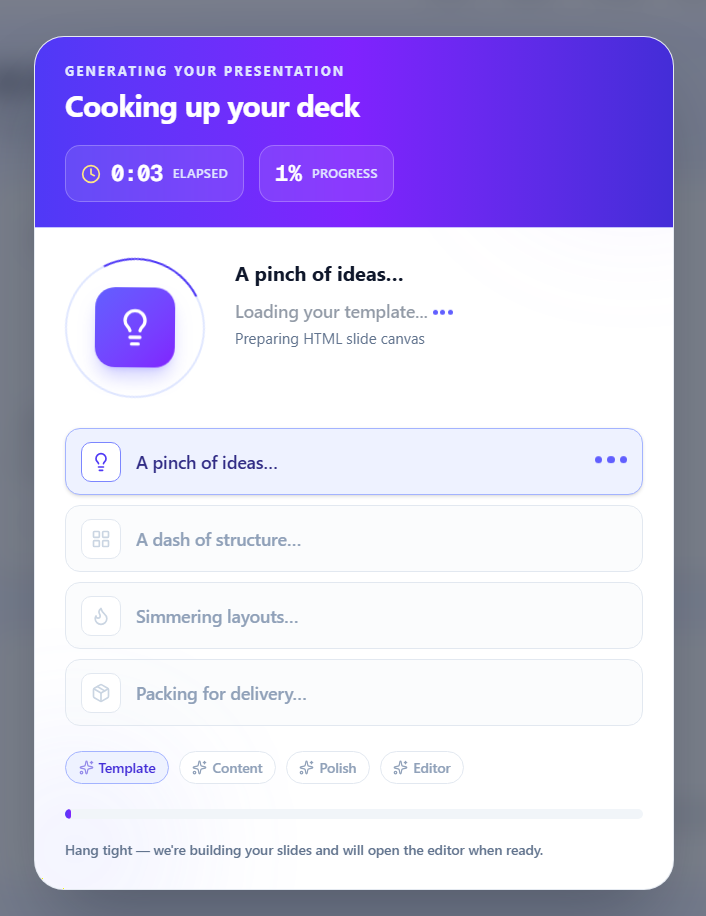
AI कुछ ही सेकंड में पूरी Presentation तैयार कर देगा।
जरूरत के अनुसार Slides Edit करें।
Presentation को PowerPoint (PPTX) या Google Slides में Export करें।
अगर आपके पास केवल एक आइडिया है, तब भी AI कुछ ही मिनटों में एक अच्छी Presentation तैयार कर सकता है।
AI की मदद से Presentation कैसे बनती है?
Artificial Intelligence ऐसे Algorithms का उपयोग करता है जो आपके दिए गए विषय को समझकर उसके आधार पर Presentation तैयार करते हैं।
जब आप कोई Topic या Document देते हैं, तो AI सबसे पहले यह समझने की कोशिश करता है कि उस विषय में कौन-कौन से मुख्य बिंदु शामिल होने चाहिए। इसके बाद वह एक Logical Outline तैयार करता है और उसी के अनुसार हर Slide का Content लिखता है।
आधुनिक AI Presentation Tools केवल टेक्स्ट लिखने तक सीमित नहीं हैं। वे Presentation के लिए उपयुक्त Layout, Design, Colors, Icons और Visual Elements भी चुन सकते हैं, जिससे आपकी Slides अधिक आकर्षक और Professional दिखाई देती हैं।
यही कारण है कि आज AI का उपयोग केवल Students ही नहीं बल्कि Companies, Marketing Teams, Trainers और Business Professionals भी कर रहे हैं।
AI से Presentation बनाने के फायदे
AI का सबसे बड़ा फायदा यह है कि यह Presentation बनाने में लगने वाला समय काफी कम कर देता है। लेकिन इसके अलावा भी इसके कई लाभ हैं।
1. मिनटों में Presentation तैयार करें
जहां पहले Presentation तैयार करने में कई घंटे लग जाते थे, वहीं AI कुछ ही मिनटों में एक Draft तैयार कर देता है।
2. Research का समय बचता है
AI आपके Topic को समझकर एक Organized Structure तैयार करता है। इससे शुरुआत करने में आसानी होती है और आपको हर Slide की Planning अलग से नहीं करनी पड़ती।
3. Professional Structure मिलता है
एक अच्छी Presentation में केवल जानकारी होना ही काफी नहीं है। उसका Flow भी सही होना चाहिए।
AI आमतौर पर Presentation को इस क्रम में तैयार करता है—
Introduction
Main Points
Examples
Summary
Conclusion
जिससे आपकी Presentation अधिक प्रभावशाली बनती है।
4. Design चुनने की परेशानी कम होती है
Presentation बनाते समय सही Color Scheme, Fonts और Layout चुनना कई लोगों के लिए मुश्किल होता है।
AI इस काम को आसान बना देता है और शुरुआत के लिए एक Professional Design तैयार कर देता है।
5. Beginners भी अच्छी Presentation बना सकते हैं
अगर आपको PowerPoint का ज्यादा अनुभव नहीं है, तब भी AI आपकी मदद कर सकता है।
यह खासकर Students, Teachers और Professionals के लिए उपयोगी है जिन्हें कम समय में Presentation तैयार करनी होती है।
AI से PPT बनाने से पहले किन बातों का ध्यान रखें?
बेहतर Presentation पाने के लिए कुछ छोटी-छोटी बातों का ध्यान रखना जरूरी है।
अपना Topic स्पष्ट रखें
गलत उदाहरण:
AI
बेहतर उदाहरण:
Artificial Intelligence in Healthcare – 10 Slide Presentation for College Students
जितनी स्पष्ट जानकारी होगी, उतना बेहतर Result मिलेगा।
मेरी सलाह: मैंने अलग-अलग AI Presentation Tools को इस्तेमाल करने के बाद पाया कि सबसे अच्छे परिणाम तब मिलते हैं जब आप स्पष्ट Topic, Target Audience और Slides की संख्या पहले से तय करते हैं। इससे AI अधिक व्यवस्थित Presentation तैयार करता है।
अगर आपके पास Content पहले से तैयार है, तो आपको उसे दोबारा लिखने की जरूरत नहीं होती।
Step 2: अपना Topic या Content जोड़ें
अब अपना Topic लिखें या उपलब्ध Content अपलोड करें।
उदाहरण
Artificial Intelligence in Healthcare – 10 Slide Presentation for College Students
Digital Marketing Strategy
Climate Change
Machine Learning
Startup Business Plan
Solar Energy
Financial Planning
अगर आपके पास पहले से PDF या Word Document है, तो उसे भी इस्तेमाल किया जा सकता है।
Step 3: Presentation की भाषा चुनें
अब अपनी पसंद की भाषा चुनें।
आप Presentation हिंदी, अंग्रेज़ी और कई अन्य भाषाओं में तैयार कर सकते हैं।
अगर आपकी Audience भारत में है, तो हिंदी या Hinglish Presentation बेहतर विकल्प हो सकती है।
Step 4: Theme और Style चुनें
अब Presentation का Design चुनें।
उदाहरण
Professional
Business
Education
Startup
Minimal
Modern
सही Theme चुनने से Presentation अधिक आकर्षक दिखाई देती है।
Step 5: Presentation Generate करें
अब Generate पर क्लिक करें।
कुछ ही सेकंड में AI
Outline तैयार करेगा।
Slide Titles बनाएगा।
Content लिखेगा।
Layout तैयार करेगा।
Presentation Generate करेगा।
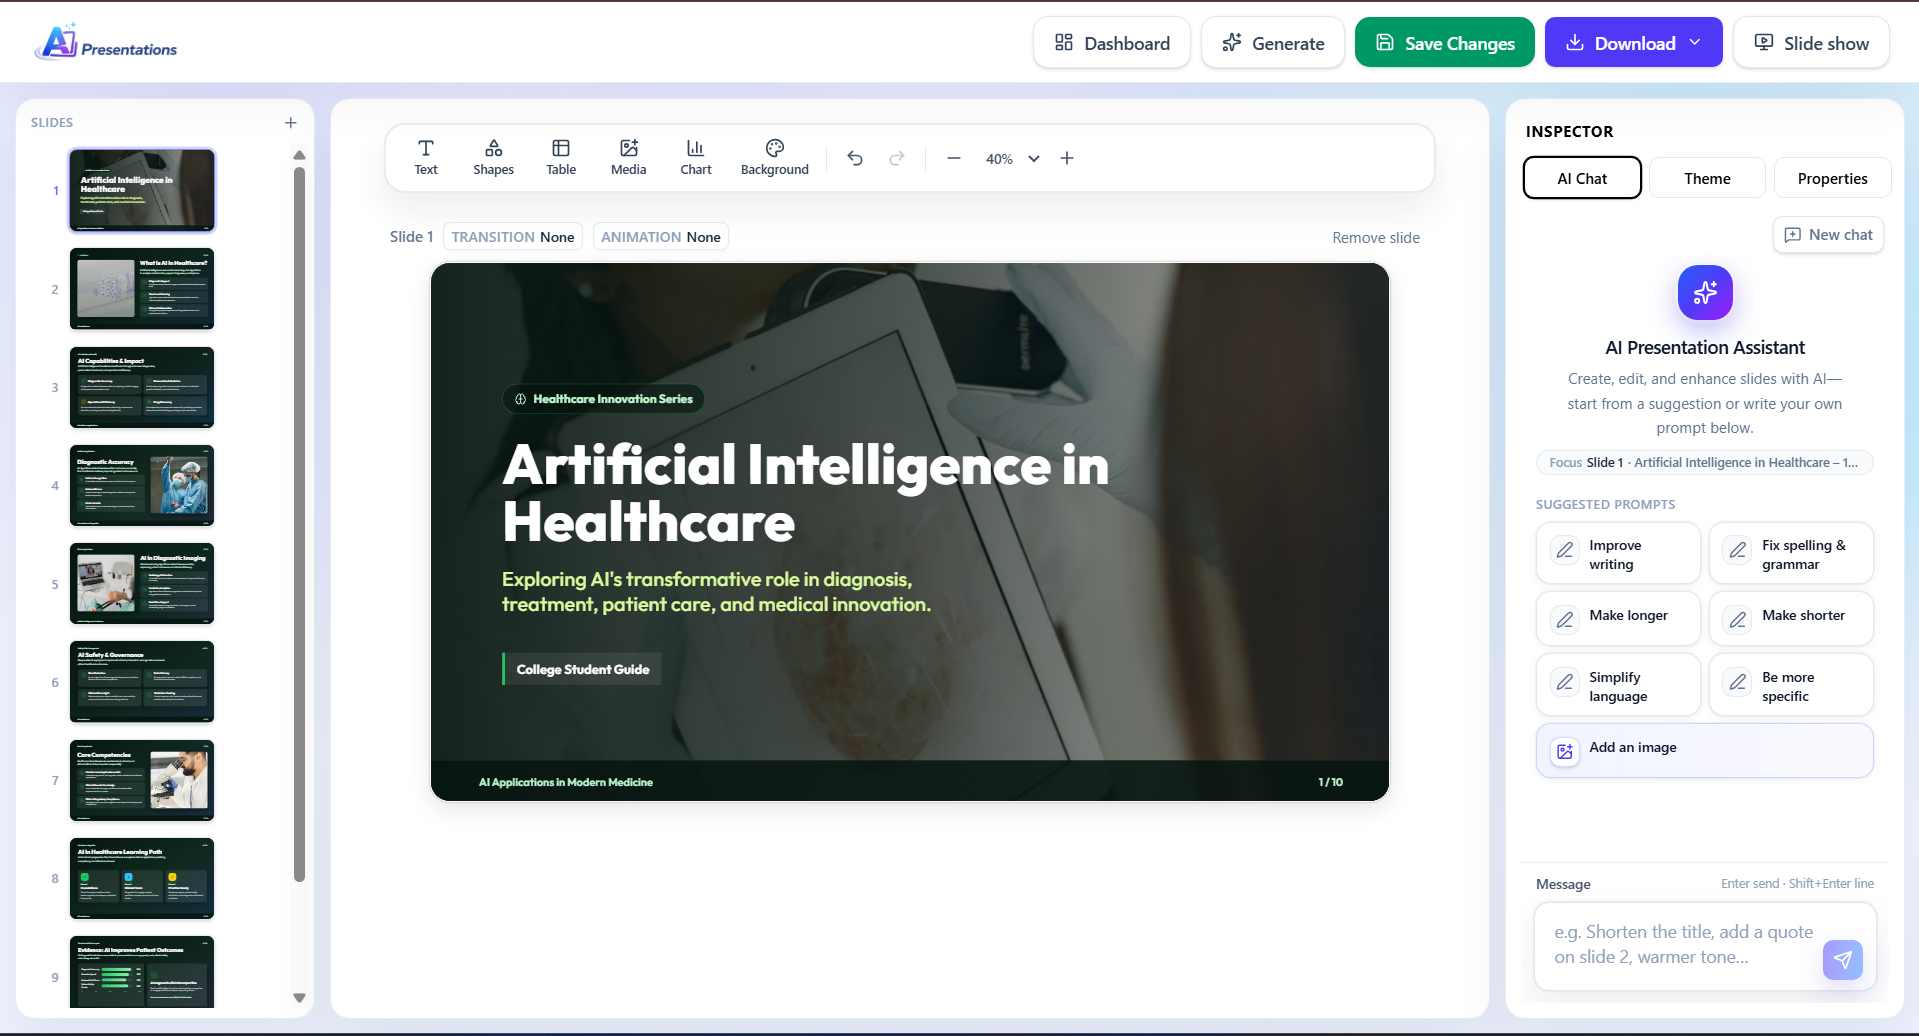
अब आपके पास एक Editable Presentation तैयार होगी।
Step 6: Presentation को Customize करें
AI द्वारा तैयार की गई Presentation को अंतिम रूप देने से पहले उसे जरूर Review करें।
आप
Content बदल सकते हैं।
Images जोड़ सकते हैं।
Slides हट या जोड़ सकते हैं।
Company Branding जोड़ सकते हैं।
Charts और Icons शामिल कर सकते हैं।
इससे आपकी Presentation और अधिक Professional दिखाई देगी।
Step 7: Presentation Export करें
जब Presentation तैयार हो जाए, तब उसे Export करें।
आप Presentation को
PowerPoint (.pptx)
Google Slides
PDF
में उपयोग कर सकते हैं।
AI Presentations की मदद से Presentation बनाना क्यों आसान है?
अगर आपके पास केवल एक Topic नहीं बल्कि अलग-अलग प्रकार का Content है, तो AI Presentations App आपकी पूरी Workflow को आसान बना सकता है।
उदाहरण के लिए, अगर आपके पास
Research PDF
Word Report
YouTube Lecture
Blog Article
Website URL
पहले से मौजूद है, तो आप उसी Content के आधार पर Presentation तैयार कर सकते हैं। इससे दोबारा Content लिखने की जरूरत नहीं पड़ती और आपका काफी समय बच जाता है।
इसके अलावा तैयार Presentation को अपनी जरूरत के अनुसार Edit किया जा सकता है, जिससे Final Output आपकी Audience और उद्देश्य के अनुसार बेहतर बनती है।
इस Tool की कुछ मुख्य विशेषताएं हैं:
One-click presentation generation
Automatic content creation
Smart slide design
Beginner-friendly interface
Fast processing
इसके अलावा यह सिर्फ PPT बनाने तक सीमित नहीं है, बल्कि यह आपकी overall productivity को भी improve करता है।
AI Presentations App क्यों choose करें?
आज के समय में users simplicity और speed चाहते हैं। AI Presentations App इसी जरूरत को ध्यान में रखकर बनाया गया है। यह tool खासतौर पर उन लोगों के लिए useful है जो बार-बार presentations बनाते हैं और हर बार नया design और content बनाने में समय नहीं लगाना चाहते।
यह tool आपको एक streamlined workflow देता है जिसमें आप एक ही जगह पर idea से लेकर final presentation तक का पूरा काम कर सकते हैं। इससे आपका time भी बचता है और effort भी कम होता है।
AI Tools किन लोगों के लिए सबसे useful है?
AI PPT tools लगभग हर category के users के लिए उपयोगी हैं। अगर आप student हैं, तो आप अपने assignments और projects जल्दी तैयार कर सकते हैं। अगर आप professional हैं, तो आप client presentations और reports आसानी से बना सकते हैं।
Teachers के लिए यह lecture slides बनाने में बहुत मददगार है और freelancers के लिए यह fast delivery में मदद करता है। कुल मिलाकर, यह tool हर उस व्यक्ति के लिए उपयोगी है जिसे नियमित रूप से presentations बनानी पड़ती हैं।
Common Mistakes (इनसे बचें)
AI का उपयोग करते समय कई लोग कुछ सामान्य गलतियां करते हैं जो उनकी presentation की quality को कम कर देती हैं।
इनमें शामिल हैं:
AI output को बिना edit किए use करना
Slides में बहुत ज्यादा text भर देना
Design consistency maintain न करना
Visual elements का उपयोग न करना
इन गलतियों से बचकर आप अपनी presentation को काफी बेहतर बना सकते हैं।
AI ने प्रेजेंटेशन बनाने की प्रक्रिया को पूरी तरह बदल दिया है। अब एक प्रभावशाली PPT तैयार करने के लिए आपको डिज़ाइन एक्सपर्ट या PowerPoint विशेषज्ञ होने की आवश्यकता नहीं है। सही AI Presentation Tool और स्पष्ट Prompt की मदद से कोई भी व्यक्ति कुछ ही मिनटों में एक व्यवस्थित और प्रोफेशनल प्रेजेंटेशन तैयार कर सकता है।
हालांकि AI को केवल एक शुरुआती सहायक के रूप में देखना चाहिए, अंतिम परिणाम की गुणवत्ता अभी भी आपकी समीक्षा, कस्टमाइज़ेशन और विषय की समझ पर निर्भर करती है। इसलिए हमेशा AI द्वारा तैयार किए गए कंटेंट को जांचें, आवश्यक बदलाव करें और अपनी ऑडियंस के अनुसार प्रेजेंटेशन को बेहतर बनाएं।
यदि आप नियमित रूप से प्रेजेंटेशन बनाते हैं, तो AI Tools आपके समय की बचत कर सकते हैं, उत्पादकता बढ़ा सकते हैं और बेहतर परिणाम प्राप्त करने में मदद कर सकते हैं। सही तरीके से उपयोग किए जाने पर AI केवल PPT बनाने का टूल नहीं बल्कि एक शक्तिशाली प्रोडक्टिविटी पार्टनर बन सकता है।
अब आप इस गाइड में बताए गए स्टेप्स को फॉलो करके अपनी अगली प्रेजेंटेशन कुछ ही मिनटों में तैयार कर सकते हैं।
FAQ – अक्सर पूछे जाने वाले सवाल
Q1. क्या AI से PPT फ्री में बना सकते हैं?
हाँ, कई AI tools free plan देते हैं जिनसे आप basic presentations बना सकते हैं।
Q2. क्या AI PPT को edit किया जा सकता है?
हाँ, आप पूरी तरह customize कर सकते हैं।
Q3. क्या बिना design skill के PPT बना सकते हैं?
हाँ, AI खुद design संभाल लेता है।
Q4. सबसे अच्छा AI PPT tool कौन सा है?
Beginners के लिए AI Presentations एक बहुत अच्छा विकल्प है।
Q5. क्या ChatGPT PPT बना सकता है?
ChatGPT content generate कर सकता है, लेकिन slides बनाने के लिए आपको अलग tool की जरूरत होती है।
Adding audio to a presentation can make your slides more engaging, interactive, and memorable. Whether you’re creating a classroom lesson, business presentation, sales pitch, training module, or portfolio, audio helps explain ideas more effectively than text alone.
Google Slides includes a built-in audio feature that lets you insert music, voice recordings, podcasts, or sound effects directly into individual slides. Once added, you can configure the audio to play automatically, loop continuously, or start only when clicked.
This guide walks you through everything you need to know about adding audio to Google Slides, including supported formats, playback settings, troubleshooting tips, and best practices.
Can You Add Audio to Google Slides?
Yes.
Google Slides allows you to insert audio files directly into your presentation, provided the files are stored in Google Drive.
Common use cases include:
Voice narration
Background music
Sound effects
Language pronunciation
Educational explanations
Meeting recordings
Product demonstrations
Podcast clips
Unlike embedding audio from external websites, Google Slides stores the audio reference through Google Drive, ensuring reliable playback when shared with others who have the appropriate permissions.
Supported Audio Formats
Google Slides supports several common audio formats, including:
MP3 (recommended)
WAV
OGG
For the best compatibility across browsers and devices, MP3 is generally the safest choice because it offers excellent quality with smaller file sizes.
Before inserting audio, upload the file to Google Drive and ensure anyone viewing the presentation has permission to access it if required.
How to Add Audio to Google Slides?
Follow these simple steps.
Step 1: Upload the Audio File
Open Google Drive and upload your audio file.
Supported examples include:
Voice recordings
MP3 music
Narration
Podcast excerpts
Sound effects
Wait until the upload completes.
Step 2: Open Your Presentation
Open Google Slides.
Navigate to the presentation where you want to include the audio.
Select the slide that should contain the audio.
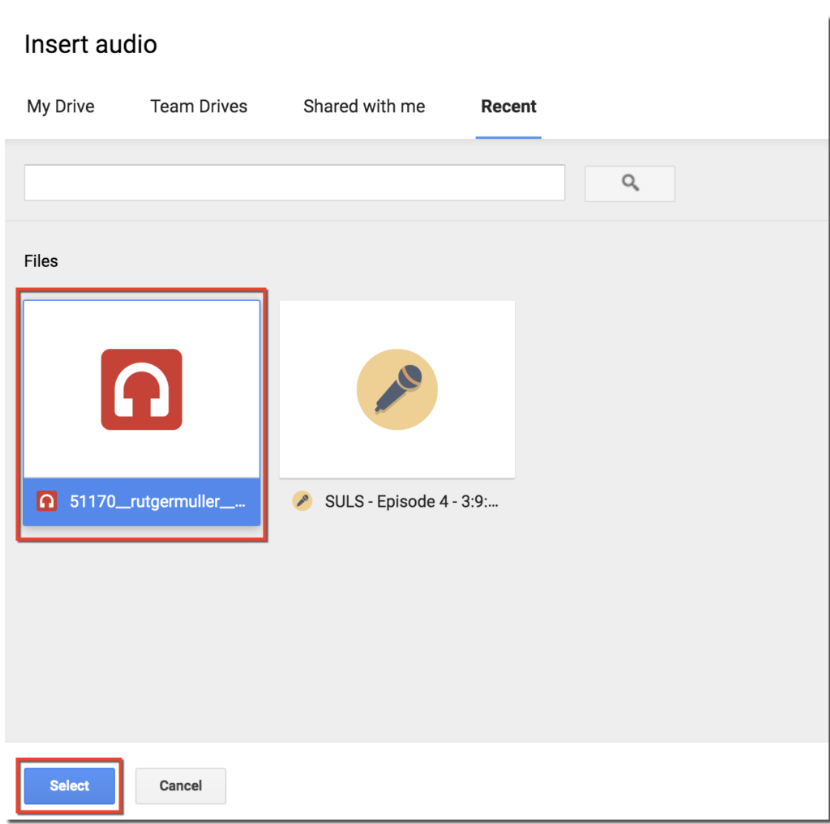
Step 3: Insert Audio
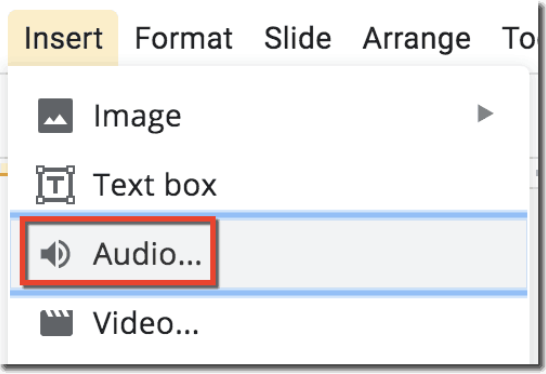
Click:
Insert → Audio
A window will display audio files available in your Google Drive.
Choose the desired file.
Click Select.
Google Slides places a speaker icon on the slide, representing the inserted audio.
Step 4: Position the Audio Icon
You can move the speaker icon anywhere on the slide.
Many presenters place it:
In a corner
Behind an image
Outside the visible slide area (if appropriate)
Near instructions for learners
The icon’s location does not affect playback.
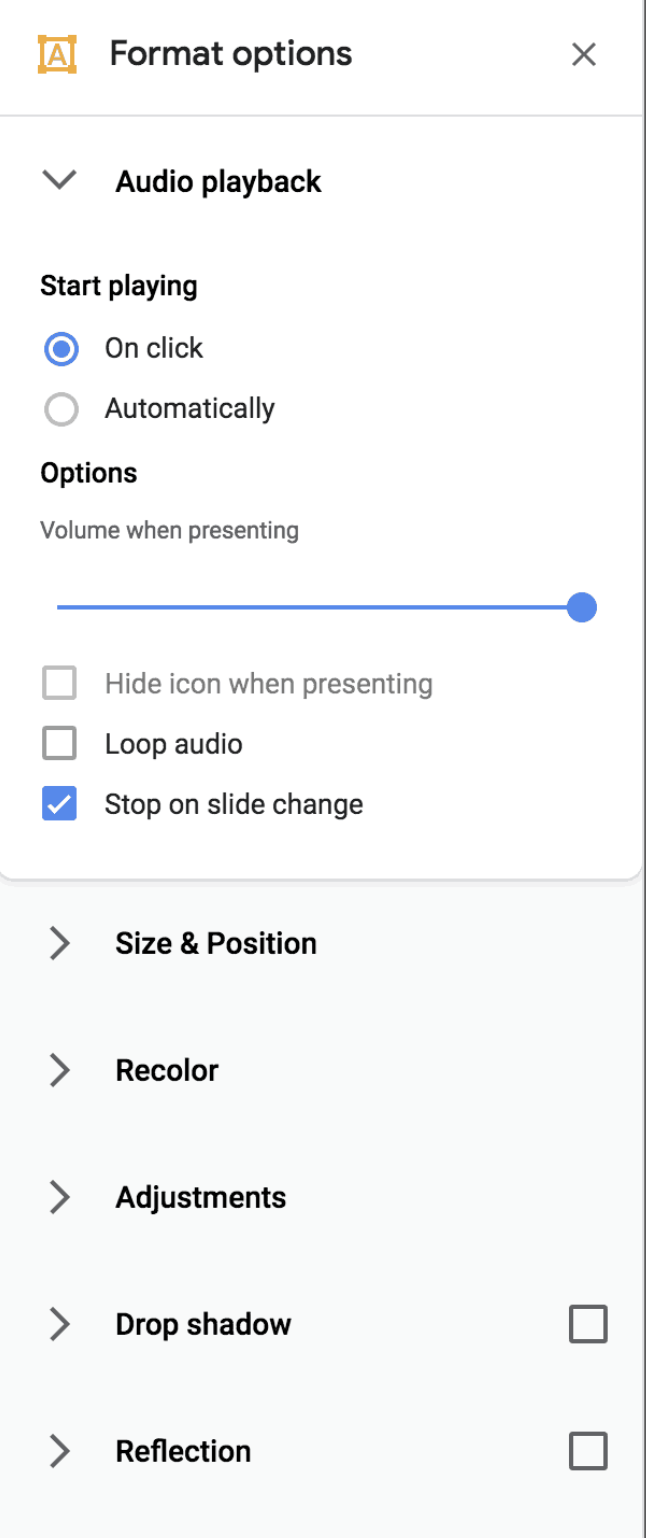
Step 5: Configure Playback Settings
Click the audio icon.
Open Format Options.
You’ll see playback controls such as:
Play on click
Play automatically
Hide icon during presentation
Loop audio
Stop on slide change
Volume adjustment
These settings let you tailor the listening experience for your audience.
How to Make Audio Play Automatically?
Automatic playback is useful when creating:
Online lessons
Self-paced courses
Business demos
Digital kiosks
Product walkthroughs
To enable autoplay:
Select the audio icon.
Open Format Options.
Under Audio Playback, choose Automatically.
Now the audio starts as soon as the slide appears during the presentation.
How to Loop Audio in Google Slides?
Looping repeats the audio until the presentation moves to another slide or the presentation ends.
To loop audio:
Select the speaker icon.
Open Format Options.
Enable Loop Audio.
This works well for:
Background music
Ambient sounds
Exhibition displays
Waiting screens
Trade show presentations
How to Hide the Audio Icon?
If you don’t want your audience to see the speaker icon:
Click the inserted audio.
Open Format Options.
Enable Hide icon when presenting.
The audio will still play according to your selected playback settings, but the icon won’t appear during slideshow mode.
Can You Add Voice Narration?
Absolutely.
Many educators, trainers, and professionals record their own voice and upload it as an MP3 file to Google Drive before inserting it into Google Slides.
Voice narration is especially useful for:
Online learning
Employee onboarding
Product training
Client presentations
Sales demonstrations
Investor pitches
You can record narration using any audio recording software, export it as an MP3, upload it to Google Drive, and insert it using the same steps described above.
Tips for Better Audio Quality
To create a professional presentation:
Record in a quiet environment.
Use a dedicated microphone when possible.
Remove background noise before uploading.
Keep narration concise.
Normalize audio volume so each recording sounds consistent.
Test playback on multiple devices.
Use high-quality MP3 files for better compatibility.
Clear audio significantly improves the viewer’s experience and helps maintain engagement throughout your presentation.
Create Professional Presentations Faster with AI
Once you’ve added audio to your Google Slides presentation, you may also want to improve the overall design, structure, and visual appeal of your slides.
Instead of manually designing every slide, consider using AI Presentations App to generate professional presentations in minutes. You can create complete slide decks from a topic, text, PDF, Word document, YouTube video, images, or other content sources. The generated presentations are fully editable, making it easy to refine your slides before adding narration or background audio in Google Slides.
This workflow combines AI-powered content creation with Google Slides’ collaboration and audio features, helping students, educators, marketers, and business professionals create polished presentations much faster.
Why Is Audio Not Playing in Google Slides?
Sometimes your audio may not play as expected. The issue is usually related to file permissions, browser settings, or unsupported formats rather than Google Slides itself.
Here are the most common problems and their solutions.
1. Google Drive Permissions
Google Slides references audio files stored in Google Drive. If viewers don’t have permission to access the file, the audio won’t play.
Solution:
Open Google Drive.
Right-click the audio file.
Select Share.
Grant appropriate viewing permissions or adjust the sharing settings if the presentation is intended for a wider audience.
2. Unsupported Audio Format
Google Slides works best with:
MP3
WAV
OGG
If your audio uses another format, convert it to MP3 before uploading.
3. Browser Issues
Older browsers or disabled media permissions may prevent playback.
Try the following:
Refresh the presentation.
Update your browser.
Clear your browser cache.
Test the presentation in another browser.
4. Audio File Was Deleted
If the original file is removed from Google Drive, Google Slides can no longer access it.
Solution:
Restore the deleted file or upload it again and reinsert the audio.
5. Internet Connection
Google Slides relies on cloud-based files. A poor internet connection may delay or interrupt playback.
If you’re presenting in an environment with unreliable internet, test everything beforehand or consider downloading the presentation if your workflow supports offline access.
Best Practices for Adding Audio in Google Slides
Adding audio can enhance your presentation, but it should support your message rather than distract from it.
Follow these best practices:
Keep narration concise and focused.
Use background music sparingly.
Maintain a consistent audio volume throughout the presentation.
Avoid overlapping multiple audio tracks.
Test playback on desktop and mobile devices.
Use autoplay only when it improves the viewer’s experience.
Ensure audio aligns naturally with the slide content.
Optimize audio files to reduce loading time.
Always preview the entire presentation before sharing.
Well-planned audio can improve engagement, especially in educational lessons, product demos, webinars, and self-guided presentations.
Common Mistakes to Avoid
Many users encounter avoidable issues when working with audio in Google Slides.
Avoid these common mistakes:
Uploading unsupported audio formats.
Forgetting to upload files to Google Drive.
Restricting access to the audio file.
Using poor-quality recordings with background noise.
Playing loud background music over narration.
Leaving autoplay enabled where manual playback is more appropriate.
Not testing the presentation before a live audience.
Taking a few extra minutes to review your presentation can help prevent technical issues during delivery.
Final Thoughts
Adding audio to Google Slides is an excellent way to create more engaging, informative, and memorable presentations. Whether you’re using voice narration, background music, or instructional sound effects, the built-in audio feature makes it easy to enhance your slides without requiring advanced technical skills.
Following the steps in this guide, you can confidently insert audio, configure playback settings, troubleshoot common issues, and deliver presentations that capture your audience’s attention.
If you’re looking to save even more time, consider creating your presentation with AI Presentation Tool mentioned above before importing it into Google Slides. AI-generated content, professionally designed layouts, and fully editable slides can dramatically reduce presentation creation time while helping you produce polished, presentation-ready results.
Whether you’re a student, educator, business professional, or content creator, combining AI-powered presentation generation with Google Slides’ audio capabilities is an effective way to create presentations that are both visually impressive and highly engaging.
Frequently Asked Questions
Can I add audio directly from my computer?
Not directly. First upload the audio file to Google Drive, then insert it into Google Slides using Insert → Audio.
What audio formats does Google Slides support?
Google Slides supports MP3, WAV, and OGG audio files. MP3 is generally recommended for the best compatibility.
Can I make audio play automatically?
Yes. Select the audio icon, open Format Options, and choose Play Automatically.
Can I loop background music?
Yes. Enable the Loop Audio option in the playback settings.
Can I hide the speaker icon?
Yes. Use Hide icon when presenting under the audio playback settings.
Can I record audio inside Google Slides?
No. Google Slides does not include a built-in audio recorder. Record your narration with another application, save it as an MP3, upload it to Google Drive, and then insert it into your presentation.
Why can’t others hear my audio?
Most playback issues occur because viewers don’t have permission to access the audio file in Google Drive or because the file has been moved or deleted.
Can I use background music across multiple slides?
Google Slides doesn’t support continuous background music across all slides. Audio is attached to individual slides, although looping can keep it playing while that slide remains active.
Does Google Slides support voice narration?
Yes. You can record your narration separately, upload it to Google Drive, and insert it into any slide.
Is adding audio to Google Slides free?
Yes. Anyone with a Google account can use the built-in audio feature at no additional cost.
If you’re creating an academic paper, bibliography, or reference page, you may need to use a hanging indent. Many students and professionals use Canva to design documents and presentations but often struggle to find the hanging indent option.
In this guide, you’ll learn how to do a hanging indent on Canva, how to create hanging indents in Canva Docs, and alternative methods if the feature isn’t available.
What Is a Hanging Indent in Canva?
A hanging indent is a paragraph formatting style where:
The first line starts at the left margin.
Every line after the first is indented to the right.
Example:
Smith, J. The Future of AI.
New York Press, 2026.
Johnson, M. Digital Marketing Basics.
ABC Publishing, 2025.
Hanging indents are commonly used for:
APA reference pages
MLA Works Cited pages
Chicago citations
Bibliographies
Professional reports
Can You Do a Hanging Indent in Canva?
Yes. Canva supports hanging indents in certain editors, including Canva Docs and some text editing environments. However, the process isn’t as obvious as it is in traditional word processors like Microsoft Word or Google Docs.
How to Create a Hanging Indent in Canva?
Follow these steps:
Step 1: Open Your Canva Document
Open your Canva design or Canva Docs document.
Step 2: Select the Text
Highlight the paragraph or citation that needs a hanging indent.
Step 3: Enable the Ruler
Navigate to:
File → View Settings → Show Rulers and Guides
Step 4: Adjust the Indent Markers
You’ll see two markers on the ruler:
Top marker = First-line indent
Bottom marker = Left indent
To create a hanging indent:
Leave the top marker at the margin.
Drag the bottom marker slightly to the right.
Your paragraph will now use a hanging indent.
How to Make a Hanging Indent on Canva Without the Ruler?
If the ruler option isn’t available:
Method 1: Use the Tab Key
Press Enter and then Tab before the second line.
Method 2: Add Spaces Manually
Insert spaces before each subsequent line.
This method works but may become misaligned if you edit the text later.
How to Do a Hanging Indent on Canva for APA Style?
APA formatting requires hanging indents in the reference section.
Example:
Brown, T. (2026). Artificial Intelligence and Education.
Academic Press.
Canva’s ruler tool makes formatting APA citations significantly easier.
How to Create a Hanging Indent for MLA Works Cited?
MLA formatting also requires a hanging indent:
Brown, Thomas. Artificial Intelligence and Education.
Academic Press, 2026.
When creating research papers or presentations with references, using hanging indents improves readability and ensures your citations follow academic standards.
Common Problems and Fixes
My Hanging Indent Isn’t Working
Make sure the text is highlighted.
Enable rulers and guides.
Try using Canva Docs instead of a standard design page.
I Can’t Find the Ruler
The ruler feature may not be available in every Canva design type. Switching to Canva Docs often resolves the issue.
The Indent Keeps Moving
Avoid using multiple spaces. Use the ruler or tab method instead.
Why Use Canva for Academic Documents?
Canva is excellent for:
Reports
Infographics
Presentations
Research posters
Educational materials
However, when you need to create presentations from documents, research papers, or outlines, manually designing slides can be time-consuming.
Turn Your Canva Documents Into Presentations With AI
Canva is great for creating documents, reports, and citation pages. But once your paper, assignment, or report is finished, you may also need to create a presentation to share your work.
Instead of building slides manually, you can use an AI presentation maker to instantly transform your content into a professional presentation.
Generate presentations from text, documents, PDFs, and topics.
Create professional PowerPoint presentations in minutes.
Automatically organize content into well-structured slides.
Save hours of manual formatting and slide design.
Export and edit presentations for school, work, or business meetings.
For example, if you’ve created a research paper or bibliography in Canva and need to present your findings, you can simply copy your content into an AI presentation generator and instantly get a polished presentation ready for editing and presenting.
This is especially useful for:
Students creating class presentations
Teachers preparing lesson slides
Professionals building reports and proposals
Researchers turning papers into presentations
Businesses creating pitch decks and presentations quickly
By combining Canva’s document design capabilities with an AI presentation generator like AI Presentations App, you can go from a written document to a complete presentation in just a few minutes.
Final Thoughts
Learning how to do a hanging indent on Canva is essential for creating properly formatted citations, bibliographies, and reference pages. Whether you’re preparing an APA paper, MLA Works Cited page, or professional report, Canva provides several ways to create hanging indents.
And once your document is ready, you can save hours of manual work by using an AI presentation maker like AI Presentations App to instantly transform your content into beautiful presentations.
Frequently Asked Questions
Q1. What is a hanging indent in Canva?
A hanging indent is a formatting style where the first line stays at the margin and all following lines are indented.
Q2. Can you create a hanging indent in Canva Docs?
Yes. Canva Docs supports hanging indents through its ruler feature.
Q3. How do I indent the second line in Canva?
Use the ruler, tab key, or manually insert spaces.
Q4. Why do APA and MLA formats use hanging indents?
Hanging indents make citations easier to scan and improve the readability of reference lists.
Q5. Is Canva good for academic papers?
Canva works well for visually appealing documents, reports, and presentations, although advanced formatting features may be more limited than dedicated word processors.
If you’ve ever received a PowerPoint presentation but needed to collaborate using Google Workspace, you’ve probably wondered how to transfer PowerPoint to Google Slides without breaking the formatting.
I’ve worked with both Microsoft PowerPoint and Google Slides for years, and one of the most common tasks I perform is converting presentations between the two platforms. While the process is simple, I’ve learned that there are a few important details that can save you from formatting headaches later.
In this guide, I’ll show you exactly how to convert PowerPoint to Google Slides, explain what happens during the conversion process, share common issues I’ve encountered, and provide practical tips to preserve your presentation’s design.
By the end, you’ll know how to upload PowerPoint to Google Slides, edit PPTX files online, and avoid the most common conversion mistakes.
Quick Answer: How to Convert PowerPoint to Google Slides
If you’re looking for the fastest method:
Open Google Drive.
Upload your PowerPoint (.PPT or .PPTX) file.
Right-click the file.
Select Open With → Google Slides.
Click File → Save as Google Slides.
Google Slides will automatically convert the PowerPoint presentation into an editable Google Slides file.
Can Google Slides Open PowerPoint Files?
Yes.
Google Slides supports both:
PPT files
PPTX files
This means you can upload PowerPoint presentations directly into Google Drive and open them in Google Slides without installing additional software.
In my experience, standard presentations containing text, images, charts, and tables usually transfer very well. However, presentations with advanced animations, custom fonts, or complex SmartArt graphics may require minor adjustments after conversion.
Why Transfer PowerPoint to Google Slides?
Many users move from PowerPoint to Google Slides because of the collaboration benefits.
Some advantages include:
Real-Time Collaboration: Multiple team members can edit slides simultaneously.
Cloud Accessibility: Access presentations from any device with an internet connection.
Automatic Saving: Google Slides automatically saves changes.
Easy Sharing: Instead of emailing large presentation files, you can simply share a link.
For teams already using Google Workspace, converting PowerPoint files to Google Slides often creates a more efficient workflow.
Step-by-Step Guide: Upload PowerPoint to Google Slides
Open Google Drive. Click the New button.
Select File Upload.
Choose your PowerPoint presentation. Wait for the upload to complete.
Locate the uploaded file. Right-click it.
Select:
Open With → Google Slides
Google Slides will begin converting the presentation automatically.
Once the file opens:
Click File
Select Save as Google Slides
This creates a native Google Slides version while preserving the original PowerPoint file.
I always recommend saving a separate Google Slides copy rather than overwriting the original presentation. This gives you a backup if anything doesn’t convert perfectly.
What Happens During PowerPoint Conversion?
Many people assume Google Slides simply copies the presentation.
That’s not exactly what happens.
Google Slides translates PowerPoint-specific elements into its own format.
Most content transfers successfully, but compatibility varies by feature.
Presentation Element
Conversion Success
Text
Excellent
Images
Excellent
Tables
Excellent
Charts
Good
Videos
Usually Good
Speaker Notes
Usually Preserved
Hyperlinks
Excellent
SmartArt
Sometimes Modified
Custom Fonts
May Change
Advanced Animations
Often Lost
This compatibility gap is one reason I always review every slide after converting a PPTX file to Google Slides.
Common PowerPoint to Google Slides Formatting Issues
After converting hundreds of presentations, I’ve noticed several recurring problems.
1. Missing Fonts
This is by far the issue I encounter most often.
If PowerPoint uses a font unavailable in Google Slides, Google automatically replaces it.
Solution
Use widely supported fonts such as:
Arial
Calibri
Roboto
Open Sans
before converting.
2. Broken Layouts
Complex slide layouts sometimes shift during conversion.
Text boxes may move slightly, and image placement can change.
Solution
Review:
Title alignment
Image positioning
Spacing
Slide dimensions
after importing.
3. Animation Problems
PowerPoint supports more advanced animations than Google Slides.
In my testing, advanced motion effects often disappear entirely during conversion.
Solution
Rebuild important animations using Google Slides’ built-in animation tools.
4. SmartArt Conversion Issues
SmartArt frequently converts poorly.
I’ve found that converting SmartArt to grouped shapes before importing significantly improves results.
My Personal Checklist After Every Conversion
Whenever I transfer a PowerPoint presentation to Google Slides, I spend five minutes checking:
✓ Fonts
✓ Charts
✓ Images
✓ Speaker notes
✓ Animations
✓ Embedded videos
✓ Hyperlinks
✓ Slide layouts
This quick review helps catch issues before presenting to clients, colleagues, or stakeholders.
PowerPoint vs Google Slides: Which Is Better?
The answer depends on your needs.
Feature
PowerPoint
Google Slides
Offline Editing
Excellent
Limited
Collaboration
Good
Excellent
Cloud Sharing
Good
Excellent
Design Flexibility
Excellent
Good
Advanced Animations
Excellent
Limited
Team Workflows
Good
Excellent
Accessibility
Good
Excellent
I generally recommend Google Slides for collaboration-heavy projects and PowerPoint for highly designed presentations requiring advanced visual effects.
A Faster Way to Create Presentations with AI
One thing I’ve noticed over the years is that presentation conversion isn’t usually the biggest challenge.
Creating the presentation itself often takes far longer.
That’s why many professionals are now using AI-powered presentation generators.
For example, AI Presentations App allows users to generate presentations from several formats. It allows you to convert:
Instead of spending hours building slides manually and then converting them between platforms, you can generate a complete presentation, edit it using AI, and export it as a PowerPoint file that works with both Microsoft PowerPoint and Google Slides.
For teams that regularly create presentations, this can dramatically reduce preparation time.
Best Practices for Importing PowerPoint Into Google Slides
To achieve the best results:
Use Standard Fonts: Avoid obscure or proprietary fonts whenever possible.
Keep Layouts Simple: Complex designs are more likely to break during conversion.
Compress Large Images: Large media files can slow uploads and affect performance.
Test Before Presenting: Always review your converted presentation before sharing it.
Keep the Original File: Never delete the original PowerPoint presentation until you’ve confirmed the Google Slides version is accurate.
Final Thoughts
Transferring PowerPoint to Google Slides is usually a straightforward process. Simply upload the PPT or PPTX file to Google Drive, open it with Google Slides, and save it as a native Google Slides presentation.
In my experience, most presentations convert successfully with minimal issues. The biggest challenges typically involve custom fonts, SmartArt graphics, and advanced animations. By reviewing your slides after conversion and following the best practices outlined above, you can avoid most compatibility problems.
If you frequently create presentations from scratch, consider using AI-powered tools like AI Presentations to streamline the entire workflow. Rather than manually building slides and then converting them between formats, you can generate, edit, and export presentation-ready files that work seamlessly across both PowerPoint and Google Slides.
Frequently Asked Questions
Q1. Can Google Slides Open PowerPoint Files?
Yes. Google Slides supports both PPT and PPTX files.
Q2. How Do I Convert PPTX to Google Slides Online?
Upload the PPTX file to Google Drive, open it with Google Slides, and save it as a Google Slides presentation.
Q3. Can I Edit PowerPoint in Google Slides?
Yes. Once imported, you can fully edit the presentation.
Q4. Why Does My PowerPoint Look Different in Google Slides?
Differences usually occur because of unsupported fonts, SmartArt elements, or advanced animations.
Q5. Is Google Slides Free?
Yes. Google Slides is available free with a Google account.
Q6. Can I Convert Google Slides Back to PowerPoint?
Yes. Go to:
File → Download → Microsoft PowerPoint (.pptx)
to export the presentation.
Q7. Does Google Slides Support PowerPoint Animations?
Basic animations may transfer successfully, but advanced PowerPoint animations often require manual recreation.
Pecha Kucha presentation topics work well when they are visual, creative, personal, and easy to explain in the fast-paced 20×20 presentation format. Some popular Pecha Kucha presentation topics include storytelling, technology, student life, motivation, travel, and social media trends. These can also overlap with technology presentation topics and even creative health presentation topics when presented visually.
People like Pecha Kucha presentations because they make presentations more fun and less boring. Instead of long lectures filled with text-heavy slides, this format uses 20 slides shown for 20 seconds each, creating a presentation that lasts only 6 minutes and 40 seconds.
The timing is very strict, so choosing the Pecha Kucha presentation topics is really important. The best Pecha Kucha presentation topics are simple, look good and are easy to turn into a story. Whether you are a student, a teacher or a professional, picking Pecha Kucha presentation topics that are engaging can help you connect with the people listening and make your Pecha Kucha presentation memorable.
In this guide, you will find Pecha Kucha presentation topics, funny Pecha Kucha presentation ideas, examples that students will like and tips to create a Pecha Kucha presentation that will have an impact.
What Is a Pecha Kucha Presentation?
A Pecha Kucha presentation is a fast-paced presentation format where speakers show 20 slides for 20 seconds each, creating a presentation that lasts 6 minutes and 40 seconds. The format focuses on visual storytelling, concise communication, and audience engagement.
Unlike traditional presentations with text-heavy slides, Pecha Kucha presentations rely on images, minimal text, and natural speaking. Since slides automatically change every 20 seconds, presenters must explain ideas clearly and stay on track.
Today, Pecha Kucha presentation topics are widely used in schools, colleges, workplaces, and public speaking events because the format makes presentations more engaging, creative, and easier for audiences to follow. Many students also use this style for seminar topics for students because it keeps audiences focused.
How to Choose the Best Pecha Kucha Presentation Topics
Choosing the right Pecha Kucha presentation topics is important because the 20×20 format moves quickly. A good topic should be simple, visual, and easy to explain within a few minutes.
Start by choosing something you already know or genuinely enjoy. Personal experiences, hobbies, technology trends, travel stories, and motivational lessons often make the best Pecha Kucha topics because they feel natural to present.
It is also important to pick visual presentation ideas. Since Pecha Kucha presentations rely heavily on images, topics related to photography, social media, lifestyle, fashion, or storytelling usually work well. Avoid overly broad or technical subjects that are difficult to explain quickly.
Another helpful tip is to keep your presentation focused on one main idea. Instead of discussing a huge topic like artificial intelligence, narrow it down to something specific like “How AI Changed Student Productivity” or “The Future of AI in Education.” which can also work as strong ai presentation topics.
The best Pecha Kucha presentation ideas combine storytelling, audience engagement, and clear communication. When your topic feels relatable and visually engaging, your presentation becomes far more memorable.
Best Pecha Kucha Presentation Topics for Students
Finding engaging Pecha Kucha presentation topics for students can feel difficult, especially when you need ideas that are creative, simple, and easy to present within the 20×20 format. The best student presentation topics are usually relatable, visual, and connected to everyday experiences. Many of these also fit into easy presentation topics 100 ideas collections shared by teachers and educators online.
Educational Presentation Topics
How online learning changed education
The psychology of procrastination
Study habits that actually work
Mental health awareness in schools
Why creativity matters in classrooms
Technology Presentation Ideas
AI tools students use daily
The impact of social media addiction
Cybersecurity basics for beginners
How smartphones affect attention spans
The future of virtual classrooms
Motivational Pecha Kucha Topics
Lessons learned from failure
Building self-confidence as a student
Why discipline matters more than motivation
Small habits that improve productivity
My journey overcoming stage fear
Fun and Creative Presentation Topics
The evolution of meme culture
Why introverts make great leaders
My most embarrassing school moment
The hidden psychology of colors
A day without the internet
These Pecha Kucha presentation ideas help students improve public speaking skills and keep audiences engaged through storytelling and visual communication.
Creative Pecha Kucha Presentation Topics
Creative Pecha Kucha presentation topics are often the most memorable because they combine storytelling, visuals, and personal experiences. These topics allow speakers to connect emotionally with the audience while making the presentation feel natural and engaging.
Some of the best creative Pecha Kucha topics include:
A place that changed my life
The power of nostalgia
Life lessons from travel
Why do people romanticize rain
My relationship with photography
The psychology behind music and mood
The evolution of fashion trends
Things I learned from failure
The hidden beauty of old buildings
How social media changed communication
You can also explore storytelling presentation ideas based on hobbies, childhood memories, cultural experiences, or daily routines. Topics that include strong visuals and emotional connection usually work best in the 20×20 presentation format.
The key to choosing creative presentation topics is keeping them personal, simple, and visually engaging. When audiences feel connected to your story, your presentation becomes far more impactful.
Funny Pecha Kucha Presentation Topics
Funny Pecha Kucha presentation topics work extremely well because the fast-paced 20×20 format naturally keeps audiences entertained. Humorous topics also make presentations feel more relaxed and relatable.
Here are some funny Pecha Kucha topics that can easily grab attention:
Why group projects never work
My toxic relationship with alarms
How Netflix destroys productivity
The emotional stages of online shopping
Why autocorrect ruins lives
Surviving family WhatsApp groups
Things students pretend to understand
The science of procrastination
Why everyone thinks they are a life coach online
Weird food combinations that actually taste good
The best funny presentation ideas are based on everyday situations that people can relate to. Adding humour, storytelling, and expressive visuals helps make your Pecha Kucha presentation more memorable and engaging.
When using humour, keep your presentation light, simple, and audience-friendly. The goal is to entertain while maintaining a clear, organised presentation.
Turn Your Pecha Kucha Presentation Topics into Ready-to-Present Slides
Once you finalise your Pecha Kucha presentation topics, the next challenge is creating visually engaging slides that match the fast-paced 20×20 presentation format. Designing 20 different slides manually can take a lot of time, especially when you also need strong visuals, smooth storytelling, and proper timing.
This is where an AI Presentation Maker can simplify the entire process. Instead of starting from scratch, you can instantly turn your topic into a structured presentation with ready-to-edit slides, visual layouts, and presentation flow suggestions.
Whether you are creating a classroom assignment, business presentation, seminar deck, or creative storytelling presentation, AI-powered presentation tools help save time while maintaining a professional and engaging design.
Quick Steps to Create Your Pecha Kucha Presentation
Step 1. Start with an AI PPT Maker or Topic-to-Slides tool directly from your browser.
Step 2. Add your selected Pecha Kucha presentation topic, such as:
The Psychology of Social Media
Lessons Learned from Failure
AI in Student Life
The Evolution of Meme Culture
Step 3. Choose the number of slides, presentation theme, and visual style based on your audience and topic.
Step 4. The AI tool automatically creates a presentation outline with slide content, headings, and design structure optimised for visual storytelling.
Step 5. Edit text, add images, change themes, rearrange slides, or include your personal storytelling elements.
Step 6. Preview the final presentation.
Step 7. Lastly, export it in formats like PPT or PDF for school, college, meetings, or events.
Using AI for presentation creation makes it much easier to focus on storytelling, audience engagement, and delivery instead of spending hours on slide formatting and design.
Conclusion
Pecha Kucha presentations are really good at making things more interesting and fun to listen to. They do this with a format that is very fast-paced, it is called the 20×20 format. To make a Pecha Kucha presentation really good, you need to pick Pecha Kucha presentation topics that are easy to understand, have a lot of pictures, and are about things that people can relate to.
It does not matter what your Pecha Kucha presentation topic is about, whether it is funny, meant to motivate people, teach them something or is, for a job. What is important is that you tell a story and use strong pictures to help people remember what you are saying. You can use tools to help you make your Pecha Kucha presentation slides look nice and be ready to show people quickly and easily. Pecha Kucha presentations are great because they help people pay attention and remember what you are saying.
The best math presentation topics make mathematics easy to understand, useful and fun for the audience. Topics like probability, geometry, statistics, cryptography and math in AI are popular because they combine applications with cool concepts.
Picking the right math presentation topic can really make a difference in how your audience reacts. A good topic helps you explain ideas clearly, keeps listeners interested, and makes your presentation more memorable.
Today, students are encouraged to explore math presentation topics that go beyond just formulas and connect math to daily life, technology, sports, finance, and science. Whether you need math presentation topics for school or advanced math seminar ideas for college, choosing a topic with real-life examples and visuals always works better. Many students also search for unique college presentation topics that combine mathematics with modern industries and innovation.
In this guide, you will find beginner-friendly, advanced, and real-life math presentation topics along with helpful tips to make your presentation more engaging and interactive with probability, geometry, statistics, cryptography, and math in AI.
How to Choose the Best Math Presentation Topics
Picking the right math presentation topics is really important because it makes your presentation easy to understand and fun to listen to. You should think about who’s going to be listening to you and pick topics that are not too hard or too easy for them.
For example, kids in school might like simple math presentation topics, such as how to figure out percentages or what symmetries are. On the other hand, college kids can learn about harder topics like cryptography or graph theory. Some teachers also prefer kid friendly presentation topics that make mathematics simple and interactive for younger students.
You should also try to pick math presentation topics that people can relate to in their lives. It is an idea to use pictures and graphs to help explain these topics. Math presentation topics, with graphs, charts, or diagrams, are really helpful. The important thing is to pick a topic that you know Well so you can explain it to your audience in a way that keeps them interested and listening to what you have to say about math presentation topics.
Beginner Math Presentation Topics
Topic
Best For
Prime Numbers and Their Importance
Beginners
Fractions in Daily Life
School Students
Understanding Percentages
Beginners
Importance of Zero in Mathematics
School Seminars
Roman Numerals Explained
Beginners
Time and Calendar Mathematics
School Projects
Simple Interest vs Compound Interest
Commerce Students
Odd and Even Numbers
Primary & Middle School
Basic Probability with Coins and Dice
Interactive Classroom Activities
Mathematical Patterns
School Students
These are also useful for students looking for 5 minute presentation topics that are easy to explain in classrooms.
Creative Math Presentation Topics
Topic
Best For
Fibonacci Sequence in Nature
Creative Presentations
Math Behind Sudoku
Fun Math Seminar Topics
The Golden Ratio in Art and Architecture
Visual Learners
Fractals and Infinite Patterns
Advanced School Students
Mathematics in Music
Creative Mathematics Presentation Topics
Rubik’s Cube Mathematics
Interactive Presentations
Mathematics Behind Video Games
Teen Students
Magic Squares Explained
Fun Classroom Activities
Infinity in Mathematics
College Students
Mathematics in Escape Rooms
Interactive Learning
Algebra and Calculus Presentation Topics
Topic
Best For
Linear Equations in Real Life
Algebra Presentation Ideas
Quadratic Equations Explained
High School Students
Polynomial Functions
Algebra Seminars
Logarithms and Their Applications
College Mathematics
Sequences and Series
Advanced Students
Derivatives in Daily Life
Calculus Presentation Topics
Optimization Problems in Mathematics
College Seminars
Limits and Continuity
Advanced Mathematics Presentation Topics
Exponential Growth and Decay
Science & Math Projects
Functions and Graphs
School & College Students
Geometry and Trigonometry Presentation Topics
Topic
Best For
Coordinate Geometry Basics
Geometry Presentation Topics
Pythagorean Theorem Applications
School Students
Geometry in Architecture
Real-Life Applications of Mathematics
Symmetry in Nature and Art
Visual Presentations
Trigonometry in Navigation
Trigonometry Presentation Topics
Waves and Sound Mathematics
Science & Math Combined Topics
Circles and Their Properties
School Mathematics
Surface Area and Volume
Practical Geometry Learning
Tessellations in Art
Creative Geometry Topics
Geometry Behind Bridges and Buildings
Engineering Awareness
Statistics and Probability Presentation Topics
Topic
Best For
Statistics in Sports Analytics
Statistics Presentation Ideas
Probability in Casino Games
Interactive Math Presentations
The Birthday Paradox
Fun Probability Topics
Survey Data Analysis
School & College Projects
Mathematics in Weather Forecasting
Real-Life Math Presentation Topics
Conditional Probability
Advanced Students
Risk Analysis in Banking
Commerce Students
Statistics in Medical Research
College Seminars
Data Collection Methods
Beginners
Probability in Daily Life
Classroom Presentations
Advanced Mathematics Presentation Topics
Topic
Best For
Cryptography and Internet Security
College Seminar Topics
Graph Theory Applications
Advanced Mathematics Topics
Chaos Theory Explained
University Students
Machine Learning Mathematics
Technology & AI Seminars
Mathematics in Space Exploration
STEM Presentations
Game Theory in Business Decisions
Applied Mathematics Topics
Differential Equations
Advanced College Students
Matrix Algebra Applications
Engineering Students
Neural Networks Mathematics
AI & Data Science Learners
Number Theory Concepts
Mathematics Research Presentations
Real-Life Applications of Mathematics Topics
Topic
Best For
Mathematics in Artificial Intelligence
Technology Seminars
Mathematics Behind Social Media Algorithms
Modern Mathematics Presentation Ideas
Financial Mathematics in Banking
Commerce & Finance Students
Mathematics in Medicine and Healthcare
Research Presentations
Data Science and Predictive Analytics
College & University Seminars
Mathematics in Sports Performance
Sports Analytics Discussions
GPS Navigation Mathematics
Practical Learning
Mathematics in Shopping Discounts
School Students
Math in Architecture and Design
Creative Learners
Mathematics in Business Decisions
Applied Mathematics Presentations
Use AI to Create Presentations for Math Presentation Topics
Once you have selected your math presentation topics, the next step is creating well-structured and visually engaging slides. Instead of spending hours designing presentations manually, many students now use AI presentation tools to generate complete presentations within minutes.
An AI presentation maker is very useful for mathematics presentation topics because it can automatically organise concepts, create clean slide structures, and suggest visuals like graphs, charts, and diagrams. This makes it much easier to explain complex mathematical concepts clearly.
Quick Steps to Create Your Math Presentation Using AI
Step 1. Visit an AI presentation tool in your browser and choose the Topic to PPT Generator feature.
Step 2. Enter Your Math Presentation Topic, such as:
Probability in Daily Life
Mathematics in Artificial Intelligence
Geometry in Architecture
Statistics in Sports Analytics
Step 3. Choose how many slides of the presentation you want based on your assignment or seminar requirements.
Step 4. The AI tool will automatically create:
A structured outline
Topic-wise slides
Key points and explanations
Visual suggestions for graphs and diagrams
5. Review the presentation and make changes based on your style, audience, or academic requirements by clicking on edit outline option.
6. Export the presentation in your preferred format, such as PPT or PDF, and use it directly for your classroom or seminar presentation.
Using AI tools can save time while helping students create more professional and visually appealing math presentation topics presentations with less effort. Students searching for easy presentation topics 100 ideas often use AI tools to quickly generate and customise presentation outlines.
Tips to Make Math Presentation Topics More Engaging
The best math presentation topics become more engaging when explained in simple language, with visuals and real-life examples. Use graphs, charts, animations, and diagrams to make mathematical concepts easier to understand.
Avoid adding too many formulas on one slide. Instead, explain one concept at a time and connect it to daily life, such as using sports statistics, shopping discounts, or AI technology as examples.
You can also make mathematics presentation topics more interactive by asking questions, adding quizzes, or using short demonstrations. Simple and visually clear slides help audiences stay focused and understand concepts more easily.
Common Mistakes to Avoid in Math Presentations
When students choose math presentation topics, they often do a good job, but they lose the audience because they present poorly. A big mistake students make is choosing topics that are too hard without really understanding what they are about. It is always better to make an idea easy to understand than to make a hard topic confusing.
Another thing students do wrong is putting many math formulas and long paragraphs on their slides. People usually understand math topics better when they are explained one step at a time with pictures and examples.
Math presentation topics are easier to understand when they are explained in a way. Reading from the slides is also a bad idea because it makes the presentation boring. Instead, students should try to explain the math presentation topics in their own words and talk to the audience. Students should also avoid using technical terms when simpler language works, making the math presentation topics easier to understand.
The best math presentation topics are the ones that are easy to understand, use pictures and help people really get what is going on rather than just memorising things. Math presentation topics should be, about understanding, not just memorising.
Conclusion
Choosing the right math presentation topics can make mathematics more engaging, practical, and easier to understand for any audience. Whether you select beginner-friendly topics like percentages and symmetry or advanced mathematics presentation topics like cryptography and machine learning, the key is to explain concepts clearly using real-life examples and visuals.
The best mathematics presentation topics are the ones that combine creativity, simplicity, and practical applications. By selecting a topic you understand well and presenting it in an interactive way, you can make your presentation more memorable, informative, and impactful for your audience.
200+ Presentation Topics That Are Easy, Unique & Guaranteed to Impress
Standing in front of an audience is already challenging but choosing the right topic can make or break your presentation.
Whether you’re a student, professional, or beginner, picking an engaging and easy presentation topic is the first step toward delivering a confident and impactful talk.
In this guide, you’ll discover 200+ easy presentation topics that actually impress, along with tips to choose the best one and turn it into a powerful presentation.
What Makes a Presentation Topic Easy?
An easy presentation topic is simple to understand. It does not require so much of research.
Here are the main features of topics that are easy.
Let us look into it now:
It is easy to explain in very simple words
It requires research that are very minimal
It is interesting
It is relatable
200+ Easy Presentation Topics That Actually Impress (2026 Guide)
9. Simple Presentation Topics Related to Fun & Creativity
What if humans could fly?
Life without smartphones
If animals could talk
A day without the internet
What if time travel existed?
My life as a billionaire
The funniest thing that happened to me
If I ruled the world
A world without exams
If robots took over
The weirdest invention ever
My dream vacation
If I had a superpower
A day in the future
The best invention ever made
What makes people laugh?
The importance of humor
Why memes are powerful
The science of fun
The role of creativity in life
10. Easy Beginner-Friendly Presentation Topics
My favorite hobby
My favorite book
My role model
My favorite place
My daily routine
My favorite teacher
My favorite subject
My dream job
My favorite movie
My favorite food
A memorable day in my life
My best friend
My favorite festival
My school experience
My favorite sport
My biggest achievement
My future goals
My favorite holiday
My favorite activity
My favorite childhood memory
BONUS – 5 Extra Easy Presentations Topics
How to prepare a presentation fast
Common presentation mistakes
How to overcome stage fear
How to make slides engaging
Tips to deliver confident presentations
Create PPT from Easy Presentation Topics Instantly Using AI
Even with easy presentation topics, creating slides can take a lot of time for you. Doing everything manually can be really stressful. So you have options to use platforms like Canva, PowerPoint, Google Slides, etc. Even with these platforms you need to spend hours of manual work to come up with a desired presentation.
If you want to speed up the entire process and remove the human efforts then you can use AI. Yes using AI tools you can create any PPT using any topics above in just 60 seconds.
This is where AI PPT Maker like AI Presentations App can help you. This tool allows you to create complete presentations in just a few minutes. You do not need any design skills.
Key Featured of AI Presentations That Gives It an Edge Over Others
It offers several smart AI tools designed for different presentation needs and use cases
Supports multiple input formats, making presentation creation flexible and fast
Eliminates manual effort by automating content creation, structuring, and design
Helps users go from idea to presentation in seconds without any design skills
Instead of building slides manually, you can generate them automatically if you use AI. I always prefer tools over manual approach as it save time and efforts.
Steps to Create a Presentation Using AI Presentations
Follow these simple steps now:
Open the AI PresentationsApp website in your browser.
Enter your presentation topic. I am choosing this topic from the above list of easy presenation topics: “Poverty and education connection”
Choose the number of slides, & choose the desired template. Now, click on the continue to generate the outline.
Review the AI-generated structure before creating your full presentation. If you want to edit any slide content you can edit accordingly.
Now click on Create presentation & open editor.
Then the AI creates your slides automatically. Review the content. Make small edits if it is needed. Use the AI Chat feature to make the changes using AI.
Download the presentation in PowerPoint format or PDF format.
You can also present directly.
Common Mistakes When Choosing Presentation Topics
Many people make simple mistakes while selecting the topics.
Some common mistakes may include:
Choosing topics that are very difficult
Picking something that you do not understand
Selecting topics that are boring
When you do not consider the audience
When you do not have clear examples
Tips to Make Your Presentation Better
Once you choose an easy topic, you can improve your presentation. This can be by following these tips that are given below:
keep your slides simple
Keep your slides very clear
Use bullet points that are short
Practice your presentation
Maintain eye contact with your audience
Be confident
These small improvements can make a very big difference.
Conclusion
Choosing easy presentation topics is important for you. This is important for creating a successful presentation. Simple topics can help you prepare quickly. It can help you present confidently.
Instead of spending too much time on creating your slides, you can use AI Presentations. This is to generate complete presentations that are very fast. This saves you time. It makes sure you deliver professional results.
FAQs
Q1. What are easy presentation topics?
Easy presentation topics are simple subjects that are easy to understand and explain.
Q2. How can I create a presentation quickly?
You can use AI tools like AI Presentations to generate slides automatically.
Q3. Are AI presentation tools beginner-friendly?
Yes. Most AI tools are designed for beginners and require no technical skills.
Q4. Can I edit AI-generated presentations?
Yes. You can easily customize the slides after they are generated.
Q5. How do I choose a good presentation topic?
Choose a topic that is simple, familiar, and interesting for your audience.